
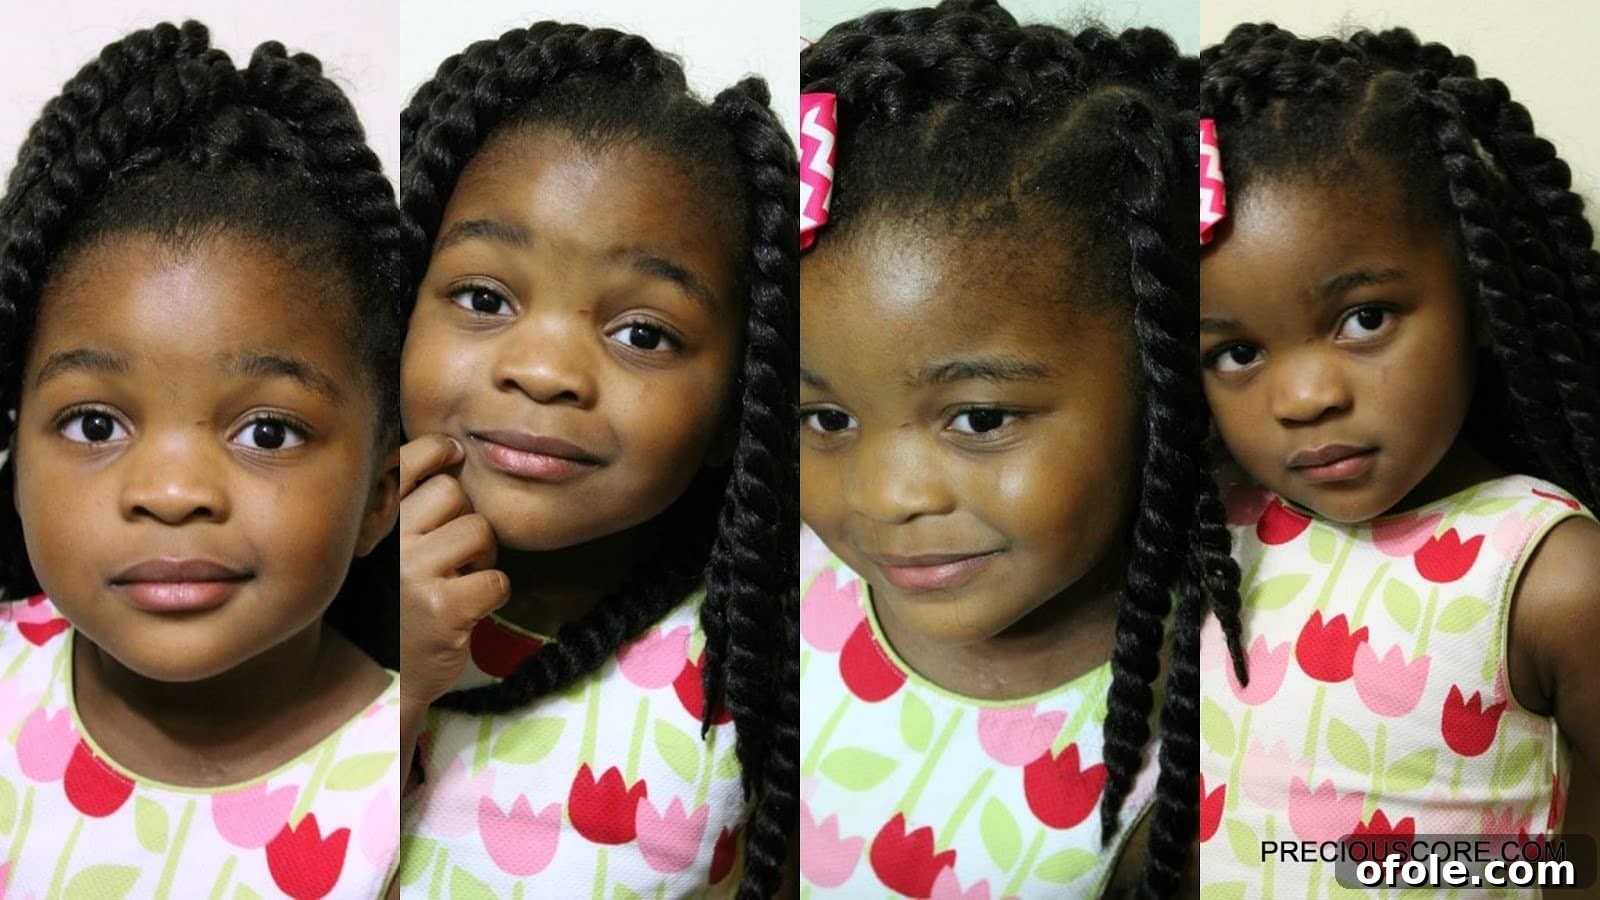
Easy Crochet Braids for Kids: A Beginner’s Step-by-Step Guide to Beautiful Protective Styles
It all began with an utterly charming, yet surprisingly insightful, suggestion from my five-year-old just the other day. With a sparkle in her eye, she declared: “Mummy, I have an idea for you! How about you make a video of you doing our hair? Your website is full of only cooking!” Her keen observation truly caught me off guard! It just goes to show you, kids truly notice absolutely everything, right down to the specific content focus of a blog. This sweet demand quickly escalated into a serious urging for both hair tutorials and even a “day in the life” video. While a full-fledged video might still be in the pipeline, I am absolutely thrilled to take a crucial first step by sharing a comprehensive hair pictorial on a style that has become an absolute game-changer for our busy family: the wonderfully versatile and easy-to-install crochet braids.
Navigating the exciting, yet often time-consuming, world of children’s hairstyles is a familiar challenge for many parents. The quest for a style that is not only beautiful and manageable but also gentle and protective for their delicate hair is paramount. This is precisely where crochet braids step in as a true lifesaver. I had been seeing a surge of stunning crochet braid styles online and was particularly drawn to their apparent ease and incredible versatility. Deciding to give this immensely popular protective style a try for my own daughters was one of the best decisions I’ve made for their hair care routine – and I was certainly not disappointed. The process proved to be surprisingly straightforward, and the results have been consistently beautiful, making it a firm favorite in our household.
This method has completely revolutionized how I approach styling my older girls’ hair. As a busy parent, the daunting thought of spending countless hours on a single head of hair used to be a source of genuine dread, often leading to what I affectionately refer to as “#Mommydaughtertroubles.” But with the ingenious method of crochet braids, that lengthy ordeal is now a thing of the past. The efficiency and stunning outcome have truly transformed our hair styling sessions. If a self-proclaimed hair novice like myself can successfully achieve such beautiful and professional-looking results with remarkable ease and efficiency, then I wholeheartedly believe that you, my friend, can absolutely do it too. Prepare yourself to embark on a journey that will not only simplify your hair styling routine but also empower you to create gorgeous, protective styles, bringing undeniable smiles and confidence to your little ones’ faces.
What Are Crochet Braids? Unraveling the Mystery of This Popular Protective Style
Before we dive into the nitty-gritty of the installation process, let’s take a moment to clearly define what crochet braids actually are. At their most fundamental, crochet braids represent a highly adaptable type of hair extension that is skillfully crocheted into your natural hair. This is accomplished using a specialized tool known as a latch hook, which is often simply referred to as a crochet hook due to its design. The entire process begins by preparing your natural hair, which is meticulously braided into flat, secure cornrows. These cornrows serve as a sturdy and invisible foundation. Subsequently, pre-braided, pre-twisted, or even pre-curled hair extensions are carefully looped through these foundational cornrows using the crochet hook, and then firmly secured with a knot. This innovative method offers unparalleled versatility, allowing for an incredibly wide array of textures, lengths, and styles, ranging from bouncy, vivacious curls and sophisticated waves to elegant twists and trendy protective faux locs, all while keeping your natural hair protected underneath.
Why Choose Crochet Braids? The Myriad Advantages for Kids and Busy Parents
Crochet braids are far more than just a fleeting trend; they offer a wealth of practical and significant benefits, especially when it comes to styling children’s hair. Understanding these numerous advantages will undoubtedly further inspire you to embrace and master this wonderful, protective hair styling technique:
- An Unparalleled Time-Saving Marvel: This particular advantage is arguably the biggest and most celebrated win for busy parents everywhere. Unlike traditional individual braids or twists, which can demand a laborious 7 hours or even more of your precious time, installing crochet braids can often be completed in a mere fraction of that time – typically ranging from 2 to 4 hours, depending on your individual skill level, the child’s hair type, and the desired density of the final style. This remarkable efficiency translates directly into significantly less time spent in the styling chair and, more importantly, much more time available for fun, play, and other essential family activities!
- Exceptionally Gentle on Delicate Hair: Crochet braids stand out as a truly fantastic protective hairstyle. Their core design minimizes the need for excessive manipulation of your child’s delicate natural hair, which in turn significantly reduces breakage and actively promotes healthy hair growth and length retention. Because the extensions are delicately looped into cornrows rather than being tightly braided with the natural hair from root to tip, there is substantially less tension placed directly on the scalp. This reduced tension is absolutely crucial for sensitive scalps and helps to safeguard fragile hair follicles from unnecessary stress or damage.
- Incredible Styling Versatility: The styling possibilities and creative expressions with crochet braids are virtually boundless. You have the freedom to choose from an astonishing variety of hair types – whether you prefer classic Senegalese twists, trendy Havana twists, neat box braids, fashionable faux locs, voluminous deep wave curls, playful kinky curly textures, or even sleek straight hair. This vast selection allows for endless creative experimentation and offers the fantastic ability to frequently switch up your child’s look without the long-term commitment of a permanent style.
- Remarkably Low Maintenance: Once meticulously installed, crochet braids are wonderfully easy to maintain. They demand minimal daily styling effort, which dramatically contributes to less hectic and more relaxed mornings. A simple routine of wearing a satin bonnet or a soft silk scarf at night is typically all that is required to perfectly preserve the style and ensure it continues to look fresh, neat, and vibrant for an extended period.
- Highly Cost-Effective Solution: While the initial upfront cost of purchasing the hair extensions can certainly vary, opting for crochet braids can prove to be a much more budget-friendly choice in the long run, especially when compared to the recurring expenses of regular salon visits for more complex and labor-intensive braided styles. By learning and performing the installation yourself at home, you can save a significant amount on labor costs, making it an economically smart choice for families.
- A Long-Lasting and Durable Style: With diligent and proper care, crochet braids possess the impressive ability to last anywhere from 4 to 8 weeks. This provides a beautiful, consistent, and long-lasting protective style for your child, minimizing the frequency of salon visits or at-home styling sessions. This durability means fewer styling interventions and more time simply enjoying the gorgeous look.
- Effortless and Damage-Free Removal: Unlike individual extensions that often require painstaking and time-consuming unbraiding, crochet braids are generally much easier and quicker to remove. This streamlined removal process further reduces the potential for any unwanted damage or stress to the natural hair underneath, making the entire experience smoother and more pleasant.
Pre-Installation Preparation: Setting the Foundation for Crochet Braids Success
Before you even consider reaching for your crochet hook, it is absolutely paramount to dedicate sufficient time to proper hair preparation. A well-prepared canvas is not just beneficial; it’s essential for ensuring a smoother installation process, guaranteeing a more comfortable experience for your child, and laying the groundwork for a longer-lasting, healthier style. Under no circumstances should you skip these crucial foundational steps:
- Thorough Cleansing: Always begin with hair that has been freshly and thoroughly washed. Utilize a gentle, moisturizing shampoo specifically formulated for children’s hair to effectively remove any accumulated dirt, excess oil, or product buildup. A clean scalp is a healthy scalp.
- Condition and Deep Condition: Immediately follow the shampooing with a high-quality conditioner. For an added boost of moisture and health, ideally incorporate a deep conditioning treatment. This vital step infuses moisture, enhances strength, and improves elasticity, rendering the hair far more pliable, manageable, and significantly less prone to breakage throughout the subsequent braiding process.
- Meticulous Detangling: This is arguably the most critical step in the entire preparation phase. After conditioning, while your child’s hair is still damp, generously apply your DIY hair detangler or a trusted store-bought alternative. Systematically detangle the hair using a wide-tooth comb, always starting from the very ends of the hair and diligently working your way upwards towards the roots. It is imperative to ensure that there are absolutely no knots, snags, or tangles remaining before proceeding.
- Gentle Stretch or Blow Dry (Optional but Recommended): For certain hair types, gently stretching the hair using a tension method (like banding) or carefully using a cool-setting blow dryer can significantly facilitate the cornrowing process, resulting in neater, more uniform braids. However, if you choose to blow dry, always ensure you use a low heat setting and maintain a safe distance to prevent any potential heat damage to the delicate hair strands.
What You’ll Need: Gathering Your Essential Crochet Braids Toolkit
Having all your necessary supplies neatly organized and within arm’s reach before you begin will make the entire installation process considerably smoother and more enjoyable. Here’s a detailed breakdown of each item you’ll need for your crochet braids project:
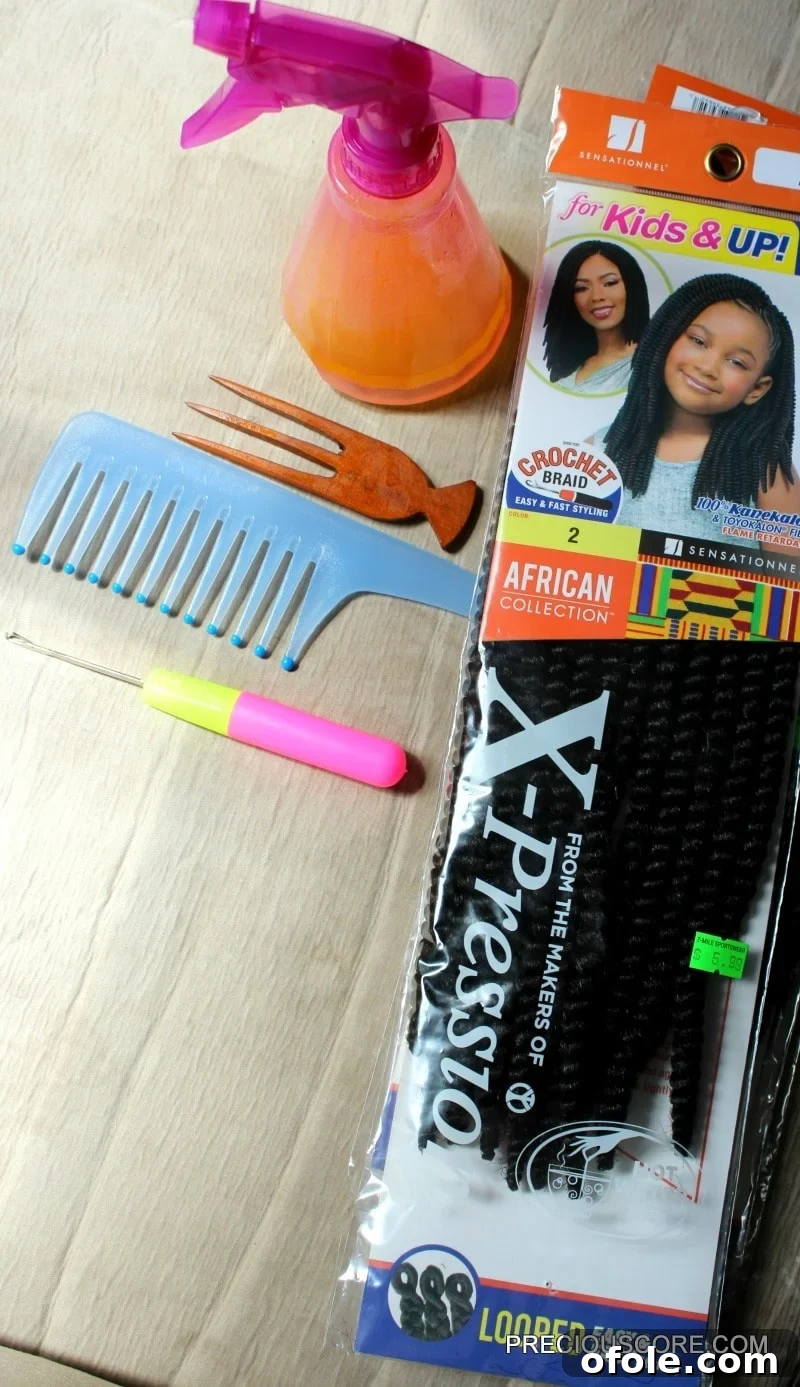
- Crochet Braids Hair Extensions (3-5 packs):
- My personal experience found that 3 packs of 12-inch Senegalese twists worked perfectly for my children, providing a beautiful, natural, and easily manageable volume that wasn’t overly heavy.
- Understanding Hair Types: The sheer beauty and versatility of crochet braids lie in the vast array of hair types available! You have the fantastic option to choose from pre-braided styles (such as classic box braids, elegant Senegalese twists, or voluminous Havana twists), pre-curled textures (like deep wave, water wave, or kinky curly), or even sleek straight hair. When selecting for children, lighter options like Senegalese or Havana twists are often highly preferred due to their reduced weight and manageable nature, which enhances comfort.
- Considering Length and Volume: The 12-inch length is typically considered ideal for younger children, offering sufficient length for various styling options without becoming cumbersome or getting in the way during active play. Regarding the quantity of hair, while 3 packs proved perfectly sufficient for a natural-looking style on my kids, some individuals might opt for up to five packs to achieve a much fuller, denser, and more dramatic look. For children, I strongly recommend starting with 3-4 packs to avoid making the hairstyle overly bulky or heavy, which could potentially cause discomfort or unnecessary tension.
- Prioritizing Quality: It’s always a wise investment to choose good quality synthetic hair. Look for extensions that are known for not tangling easily, possess a natural-looking sheen, and have a soft texture, ensuring both comfort and durability.
- Crochet Hook (Latch Hook Tool): This indispensable tool is your primary instrument for installation. It is characterized by its thin design, a small hook at one end, and a secure latch that closes over the hook. This design is specifically engineered to efficiently pull hair extensions through your cornrows. Ensure you select a hook that is ergonomically comfortable to hold during extended periods of use and features a robust, reliable latch that won’t easily break or come undone.
- My DIY Hair Detangler or Your Favorite Leave-In Conditioner/Detangling Spray: An absolute essential for smoothing, softening, and thoroughly preparing the natural hair before you even begin the cornrow braiding process. A well-detangled base prevents pain and breakage.
- Combs: You will need at least two distinct types of combs for optimal results. A wide-tooth comb is perfect for gentle detangling, especially after applying conditioner. A rat-tail comb, with its thin, pointed handle, is indispensable for creating precise, neat sections and parting the hair when forming your cornrows.
- Hair Clips: Several sturdy hair clips are incredibly useful for holding sections of hair neatly out of the way while you concentrate on braiding specific areas. This keeps your workspace clean and organized.
- Scissors: A sharp pair of scissors will be handy for snipping any loose ends on the extensions or for cleanly opening the hair packaging.
- Edge Control Gel (Optional but Recommended): For those who desire a flawlessly polished and neat finish, especially around the delicate hairline, a good quality edge control gel is a fantastic addition. It helps to smooth down baby hairs for a sleek look.
- Hair Mousse or Setting Lotion (Optional): These products can be used later to refresh the braids, add a lovely sheen, or help define the texture of specific crochet hair types.
Here is How to Install Crochet Braids: A Comprehensive Step-by-Step Tutorial
Now that you have meticulously gathered all your supplies and perfectly prepped your child’s hair, let’s dive into the most exciting part: the actual installation of those beautiful crochet braids! Following these detailed steps carefully will ensure a flawless, secure, and stunning finish.
Step 1: Prepare the Foundation – Crafting Perfect Cornrows
The cornrow foundation is the absolute bedrock for a successful, comfortable, and long-lasting crochet braid style. It is crucial to invest sufficient time and care in this step to ensure your cornrows are neat, consistently firm, and gentle on your child’s scalp.
- Thorough Detangling and Hydration: Begin by spraying your child’s hair generously with your chosen detangling spray or leave-in conditioner. Systematically comb through the hair thoroughly with a wide-tooth comb, ensuring every single strand is free from snags, knots, and tangles. This meticulous detangling process makes the subsequent braiding much easier and significantly prevents any discomfort for your child.
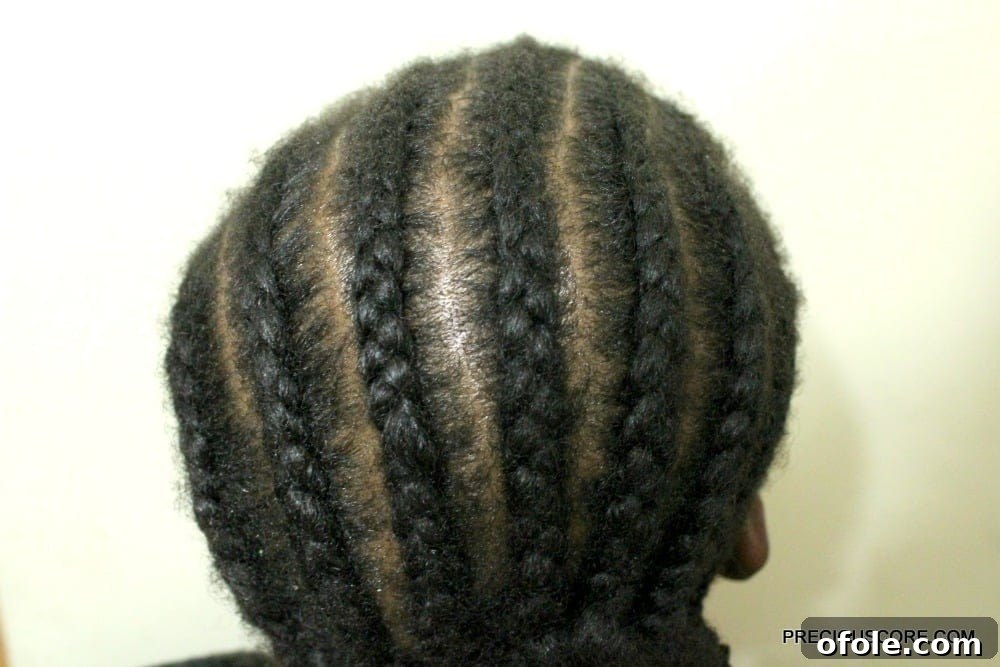
- Creating the Cornrows: Now, it’s time to expertly braid the hair into cornrows that extend all the way to the back of the head. In Cameroon, these braids are affectionately known as “bakala.” For those who are new to this technique, straight-back cornrows are generally the easiest and most commonly used pattern, as they provide a consistently flat and even base across the entire scalp.

The entire head typically requires anywhere from 8 to 12 cornrows, a number that can vary slightly depending on the child’s specific head size and the natural density of their hair. It is absolutely vital to ensure that the cornrows are braided firmly enough to securely hold the extensions but never so tight that they cause discomfort, excessive tension, or potential damage to the delicate hairline and scalp. They should feel snug, not painful.
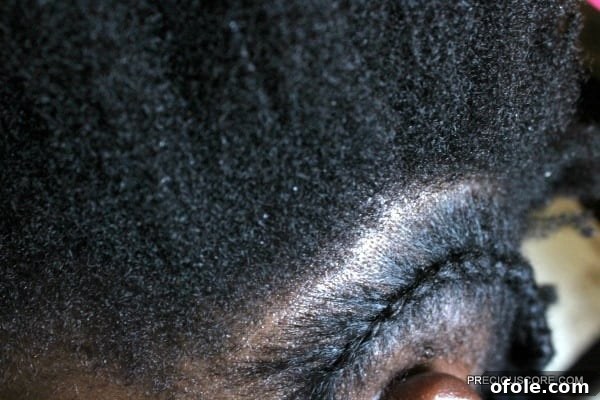
- Mastering the Cornrow Connection for a Seamless Finish: A truly essential technique for achieving a flawlessly seamless and polished finish involves expertly connecting the cornrows at the nape of the neck. I found it most effective to connect the ends of the individual cornrows into one large, cohesive cornrow that runs horizontally across the very bottom of the hairline. This single, unifying horizontal cornrow is then carefully tucked into an adjacent cornrow, effectively hiding all the loose ends of the natural hair. This advanced technique creates an incredibly clean, virtually invisible finish, preventing your child’s natural hair from inadvertently peeking through the installed extensions and ensuring a professional look. (I understand this part might sound a bit complex when described purely in text! A demonstration video would undeniably clarify this intricate step – perhaps very soon!)
Step 2: The Magic Begins – Expertly Installing the Crochet Braids
This is truly where the exciting transformation commences, as you watch the style magically come to life before your eyes. The latch hook technique is surprisingly simple once you get the hang of it!
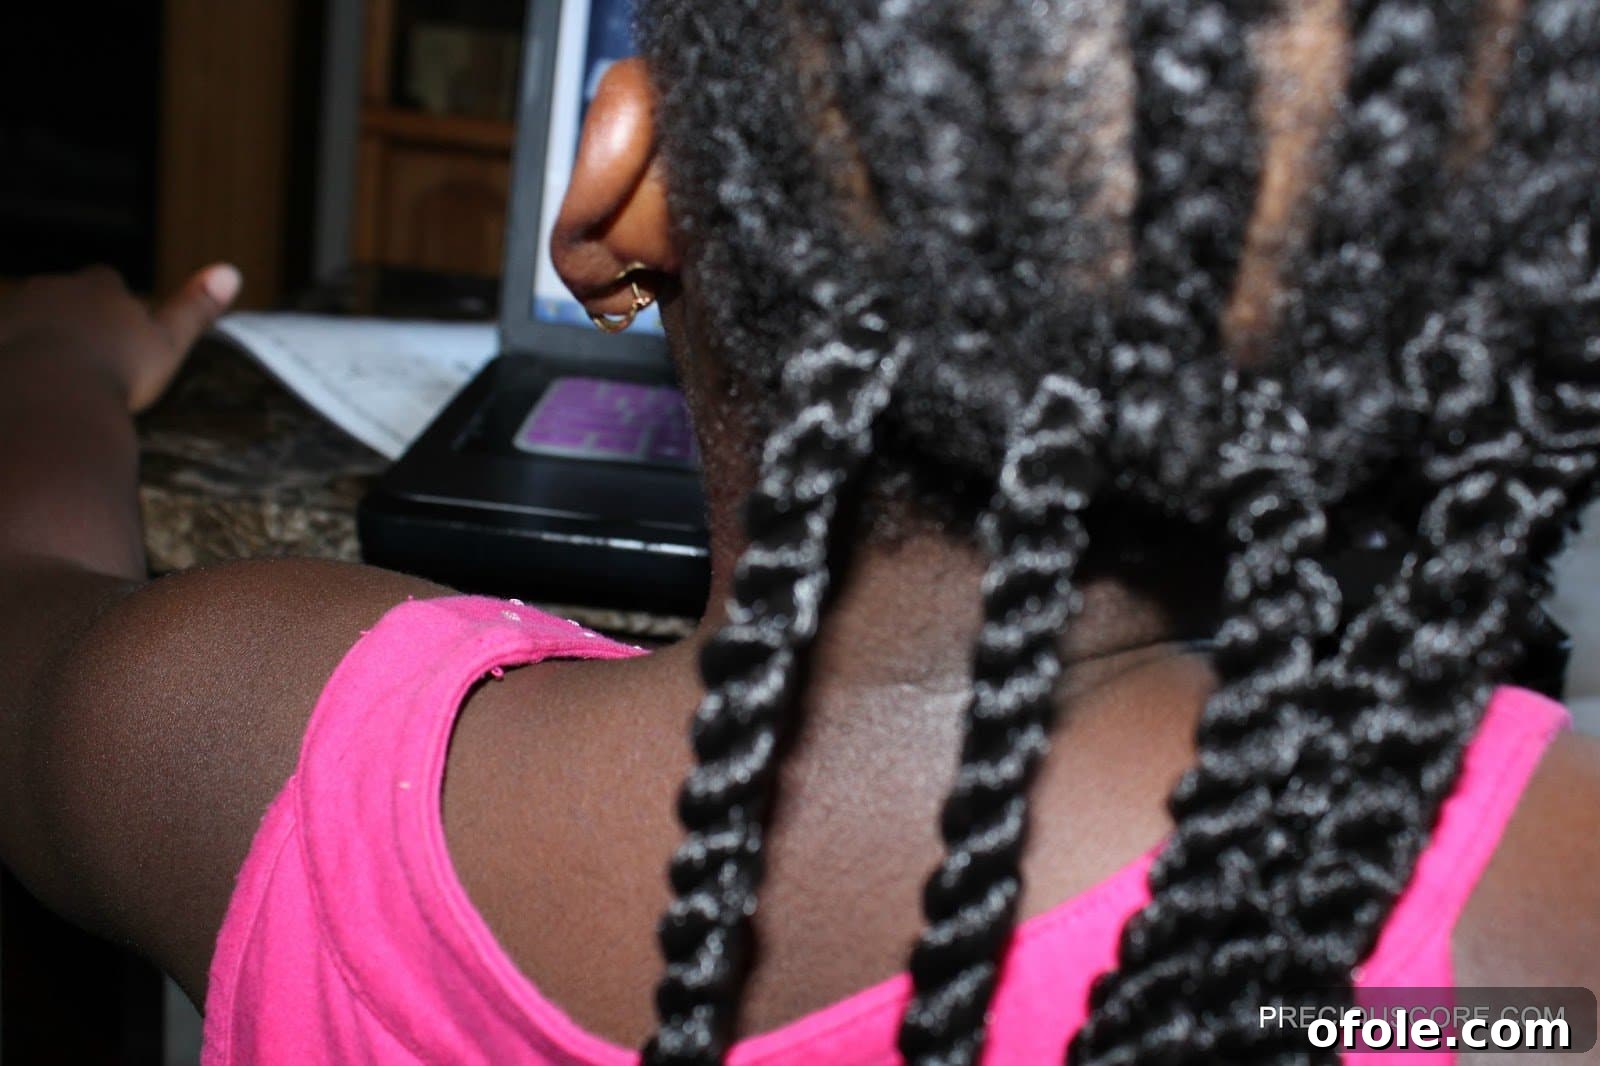
- Precisely Insert the Crochet Hook: Begin by taking a single strand of your chosen crochet braid extension. Hold this extension securely in one hand. With your other hand, carefully open the tiny latch of your crochet hook. Now, gently insert the hook through a cornrow, specifically sliding it underneath one of its loops. The critical point here is to ensure you slide the hook directly through the base of the cornrow, rather than just through a single, isolated strand of your child’s natural hair. This ensures a robust and incredibly secure anchor point for the extension.
- Expertly Loop the Hair onto the Hook: Once the hook has been successfully inserted through the cornrow, ensure its latch is open. Take the crochet braid extension and carefully fold it in half, creating a neat loop at its midpoint. Position this created loop directly onto the open latch of the crochet hook. Now, firmly close the latch securely over the hair, double-checking to make certain that the hair is tightly caught and will not inadvertently slip off the hook during the next step.
Step 3: Smoothly Pulling the Hair Through
This step is where you bring the extension halfway through the cornrow, preparing it for the final knot.
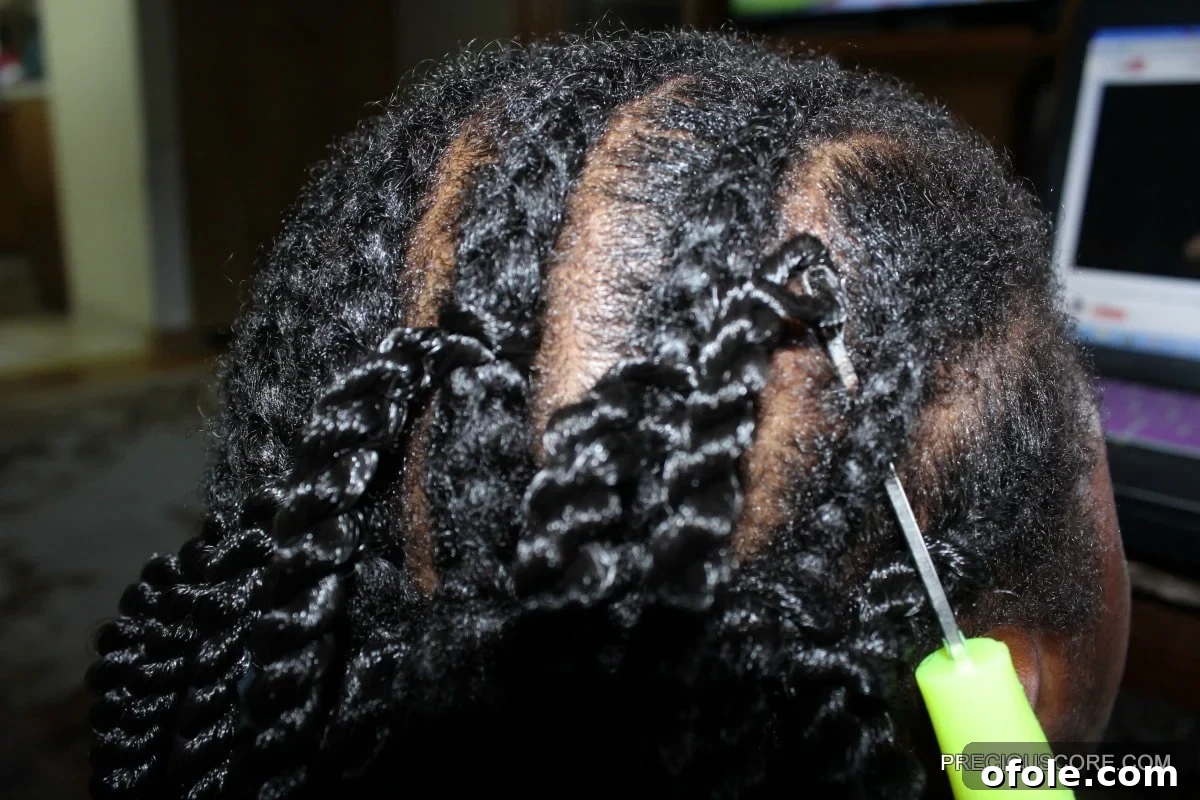
- Gently Slide Hooked Hair Back: With utmost care and gentleness, smoothly slide the crochet hook, with the hair extension still attached, back through the cornrow. The primary objective here is to pull the looped portion of the extension completely through the cornrow, ensuring that the two loose tails of the extension remain on the opposite side of the cornrow.
- Carefully Remove the Crochet Hook: Once the loop of the extension is fully visible and completely through the cornrow, gently open the latch of the hook and carefully remove the crochet hook. At this point, you should see a distinct loop of the extension protruding from the cornrow, with the two loose, free-hanging tails positioned on the other side, ready for securing.
Step 4: Securing the Knot – The Final Attachment
This crucial final step is what firmly attaches the crochet braid extension to the cornrow, ensuring it stays in place.
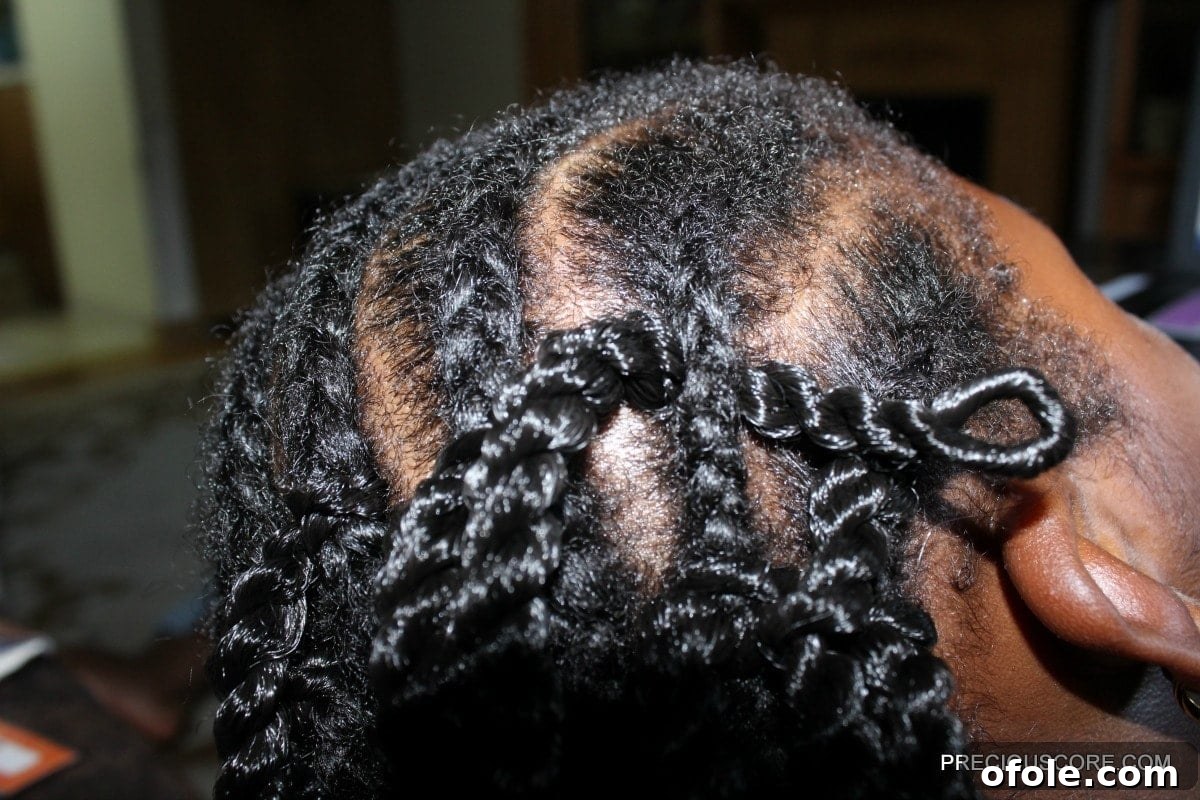
- Feed Hair Through the Opening: Take both of the two loose tails of the crochet braid extension. Carefully feed these tails directly through the pre-looped opening that is now conspicuously coming out of the cornrow.
- Pull to Secure Tightly (But Gently): Gently but firmly pull the tails through the loop. As you draw the tails, a neat and secure knot will naturally form, anchoring the crochet braid firmly to the underlying cornrow. For enhanced security, particularly for very active children, it is highly recommended to repeat this step, creating a second, reinforcing knot. Always ensure that the knot is sufficiently tight to be secure and prevent slippage, but never so tight that it causes undue tension on the cornrow itself or, more importantly, on the child’s scalp. The ultimate goal is a firm, neat, and comfortable attachment.
Repeat and Refine: Building Your Beautiful Style
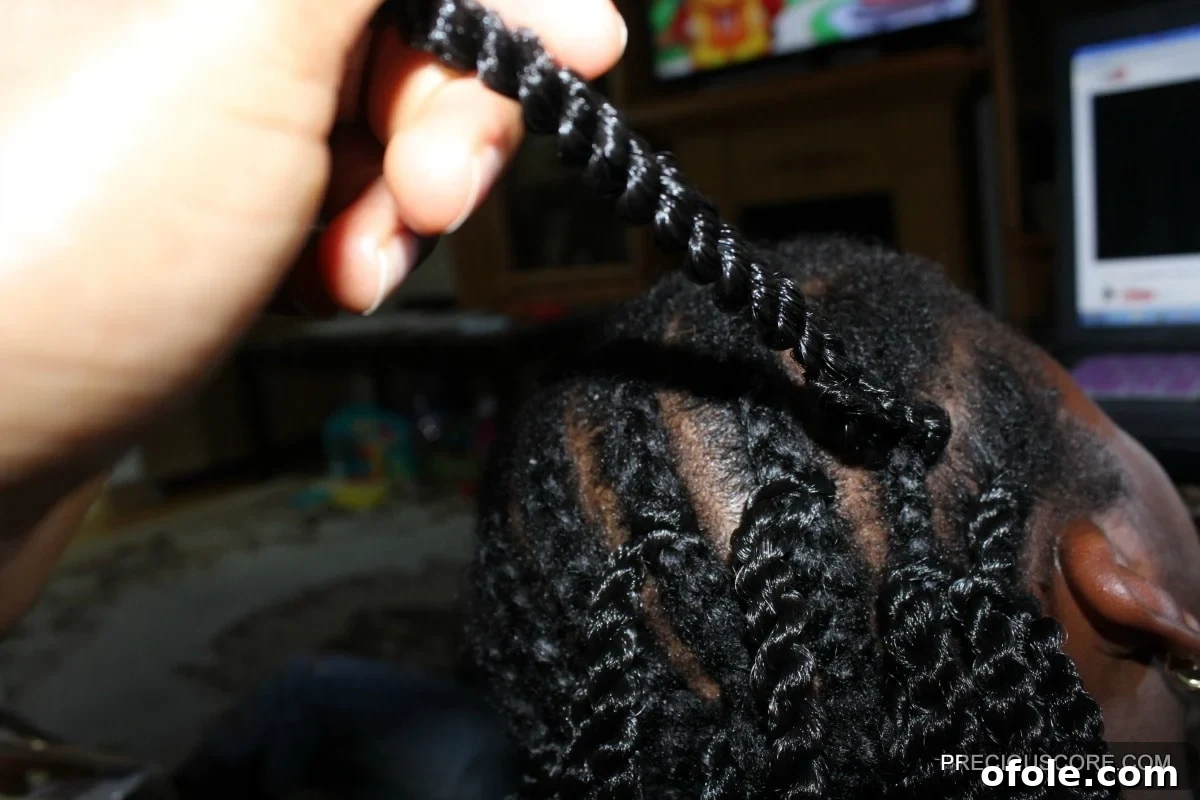
Continue this precise process of inserting, looping, pulling, and knotting, spacing out the braids as desired across the entire head. The optimal spacing largely depends on your personal preference for fullness and the specific type of hair extension you are incorporating. For a more lush and voluminous appearance, install the extensions closer together. Conversely, for a more natural, lighter, and airy look, space them a bit wider apart. It is essential to maintain consistent and even spacing across the entire head to ensure a balanced, harmonious, and aesthetically pleasing final appearance. Keep diligently going until the entire cornrowed hair foundation is completely covered with crochet braids.
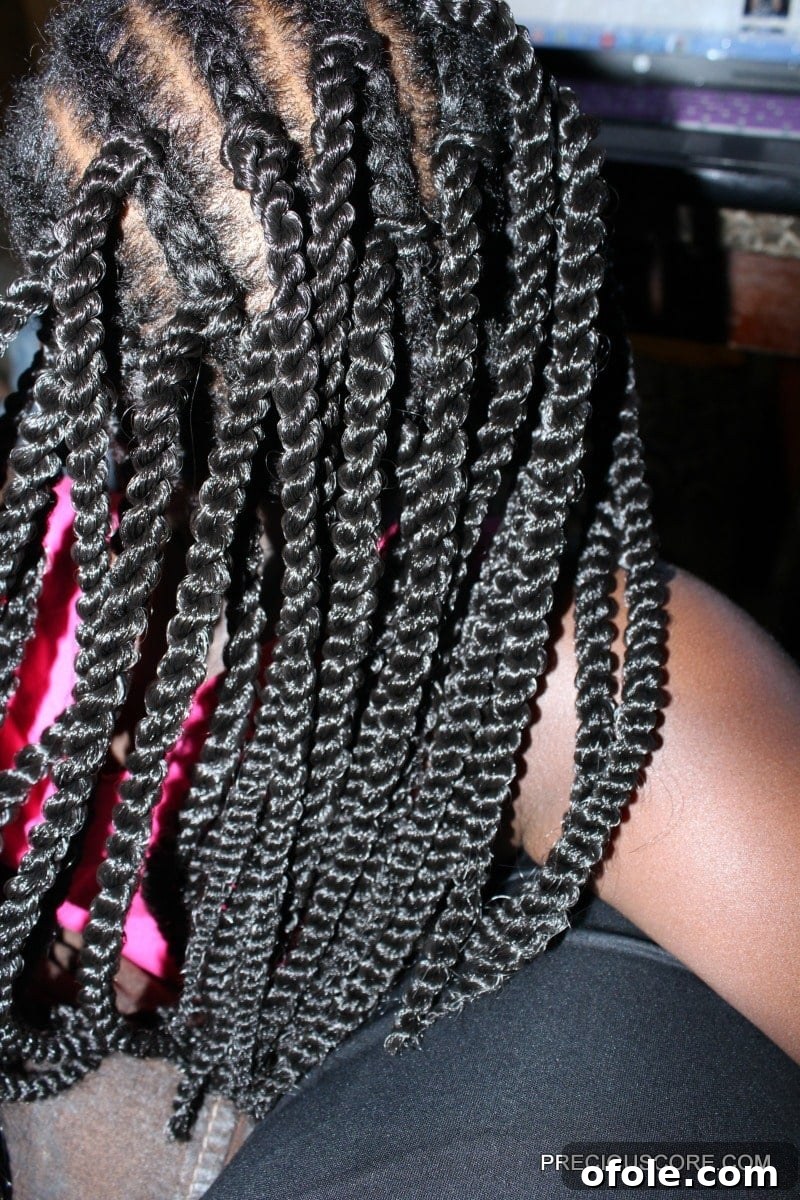
This entire installation process typically took me approximately 3 hours from the very beginning to the finished style for one child’s head, which I consider incredibly efficient and a true time-saver compared to the arduous 7 hours I would usually spend installing traditional individual braids. The specific style beautifully pictured at the very top of this post, featuring elegant 12-inch Havana Twists, was remarkably completed in just two hours – a powerful testament to the truly transformative and time-saving power of crochet braids!
Styling & Maintenance Tips for Long-Lasting Crochet Braids
Once your child’s beautiful crochet braids are meticulously installed, the fun certainly doesn’t stop there! Here’s a comprehensive guide on how to style them creatively and maintain their fresh, neat, and vibrant appearance for weeks on end.
Unraveling for Enhanced Volume and Texture (If Applicable)
For certain types of crochet hair extensions, particularly pre-twisted or pre-braided styles such as Senegalese or Havana twists, you have the wonderful option to gently unravel the ends. This technique is fantastic for creating a significantly fuller, more natural, and voluminous look. Unraveling reveals a beautiful underlying curly or wavy texture, adding an exquisite dimension and unique personality to the overall style.
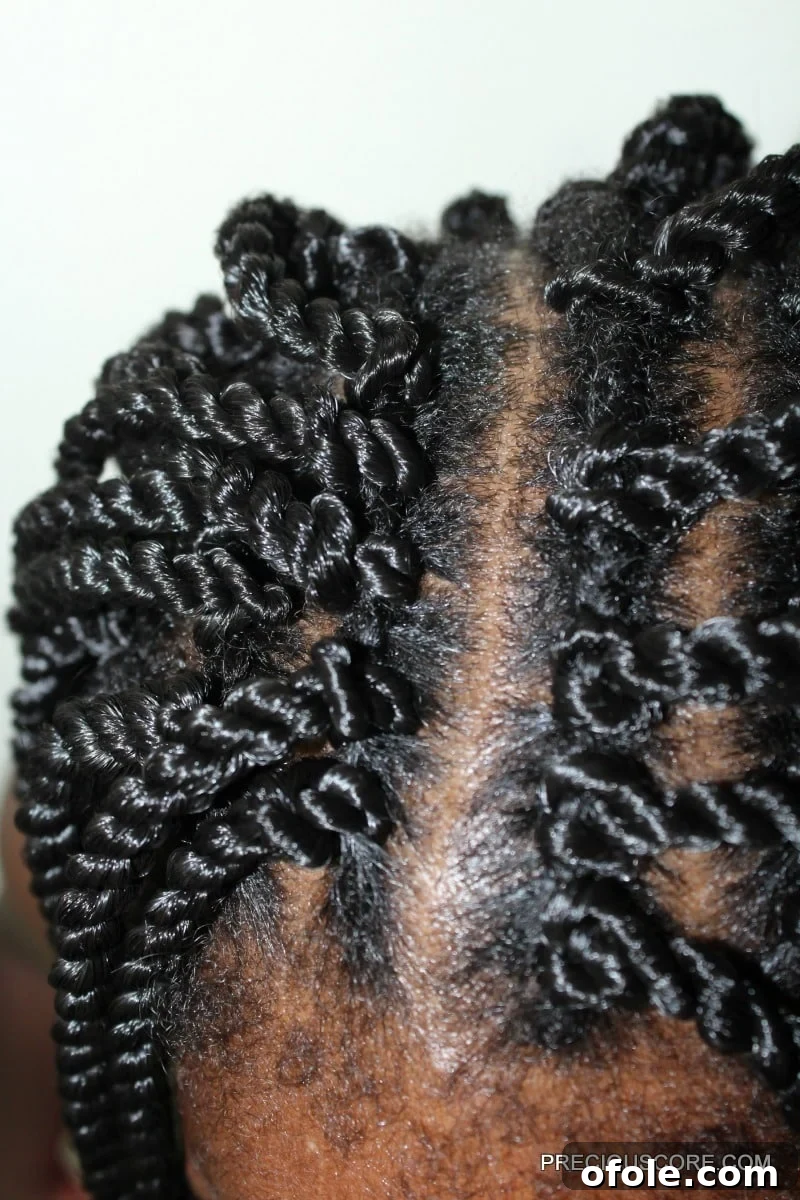
To execute this technique, simply and gently pull apart the ends of the twists or braids. Exercise caution not to unravel too high up the shaft of the extension, as this could compromise the integrity of the base. This method works exceptionally well to customize the look, offering extra bounce, movement, and a personalized touch to the style.
Mastering Those Edges for a Polished Finish
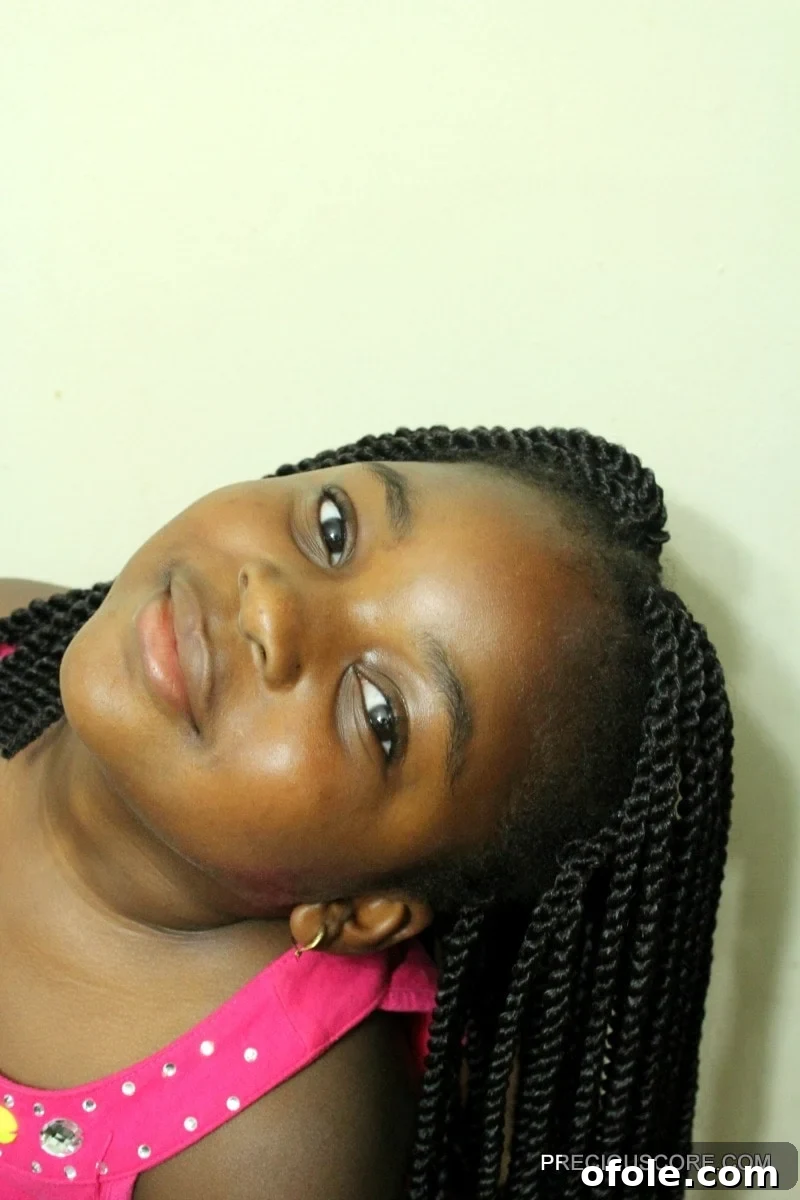
For a truly polished, neat, and professional finish, especially around the delicate hairline, you might want to consider expertly laying your child’s edges. Apply a very small amount of a high-quality edge control gel to a soft-bristled brush (like a toothbrush dedicated to hair) or your fingertip. Then, gently and carefully smooth down the tiny baby hairs around the entire perimeter of the hairline. This creates a remarkably sharp, clean, and defined look that beautifully frames the face and provides a perfect finishing touch to the overall hairstyle.
General Maintenance Tips for Longevity and Hair Health:
- Effective Nighttime Routine: To proactively prevent unsightly frizz, unwanted tangling, and general wear and tear, always ensure your child sleeps with a satin bonnet or a soft silk scarf. This protective covering significantly reduces friction against pillows, helping to preserve the integrity of the style and keep it looking fresh and neat for longer.
- Consistent Scalp Moisturizing: Even when wearing protective styles, maintaining optimal scalp health is absolutely crucial. Gently apply a light, non-comedogenic hair oil or a specialized scalp moisturizer directly to the scalp, carefully working it in between the cornrows every few days. This practice keeps the scalp adequately hydrated, preventing uncomfortable dryness, flakiness, or itching.
- Refreshing the Braids: If, over time, the braids begin to appear a little dull or lose some of their initial luster, you can easily refresh them. Lightly mist them with a conditioning spray or apply a small amount of hair mousse. Gently separate any braids that may have inadvertently clumped together to restore their definition and bounce.
- Strategic Washing: While traditional shampooing and conditioning can be challenging when crochet braids are installed, maintaining cleanliness is still possible. You can “wash” your child’s scalp using a diluted astringent or witch hazel applied with a cotton ball to cleanse and refresh. For the extensions themselves, a very light co-wash or careful rinse with diluted shampoo can be performed, but it is absolutely imperative to ensure thorough drying to prevent any moisture buildup or potential mildew.
- Optimal Duration of Wear: Crochet braids can typically be worn comfortably and beautifully for a duration ranging from 4 to 8 weeks. Beyond this period, the natural hair at the roots will grow out significantly, and the style may begin to look unkempt. More importantly, keeping any protective style in for an excessively long time can lead to matting, tangling, and potential damage to your natural hair upon removal.
Gentle Removal for Healthy Hair: Protecting Your Child’s Natural Tresses
When the time inevitably comes to take out the crochet braids, patience and a gentle approach are paramount to prevent any damage to your child’s precious natural hair. Begin by carefully cutting the small knots where the extensions are meticulously attached to the underlying cornrows. Once the extensions are loose, gently and slowly unravel the cornrows themselves. It is immensely helpful to apply a generous amount of conditioner or a detangling spray during the removal process; this will significantly ease the process, minimize friction, and prevent breakage. Always make sure to thoroughly detangle the natural hair, section by section, after all the extensions and cornrows have been removed, and before proceeding with the next wash. This crucial step prevents matting and makes subsequent styling much easier.
Final Thoughts: Empowering Your Child’s Hair Journey
Embracing the world of crochet braids for your children’s hair care routine is an incredibly rewarding experience that offers a perfect and harmonious blend of stunning style, essential protection, and unparalleled convenience. From the initial meticulous detangling and the creation of a sturdy cornrow foundation to the final expert styling touches, every single step in this process is thoughtfully designed to be manageable and achievable, even for complete beginners. The profound joy of seeing your little ones confidently rocking a beautiful, effortlessly low-maintenance style that actively promotes healthy hair growth is truly unparalleled and deeply satisfying.
I sincerely hope that this detailed, step-by-step guide empowers you with the confidence and knowledge needed to expertly create some truly awesome crochet braids for the precious little ladies (or gentlemen!) in your life. Once you’ve mastered the fundamental technique, don’t hesitate to boldly experiment with different hair types, lengths, and even vibrant colors. You’ll be absolutely amazed at the incredible variety of stunning looks you can effortlessly achieve right from the comfort of your own home!
Happy braiding!