
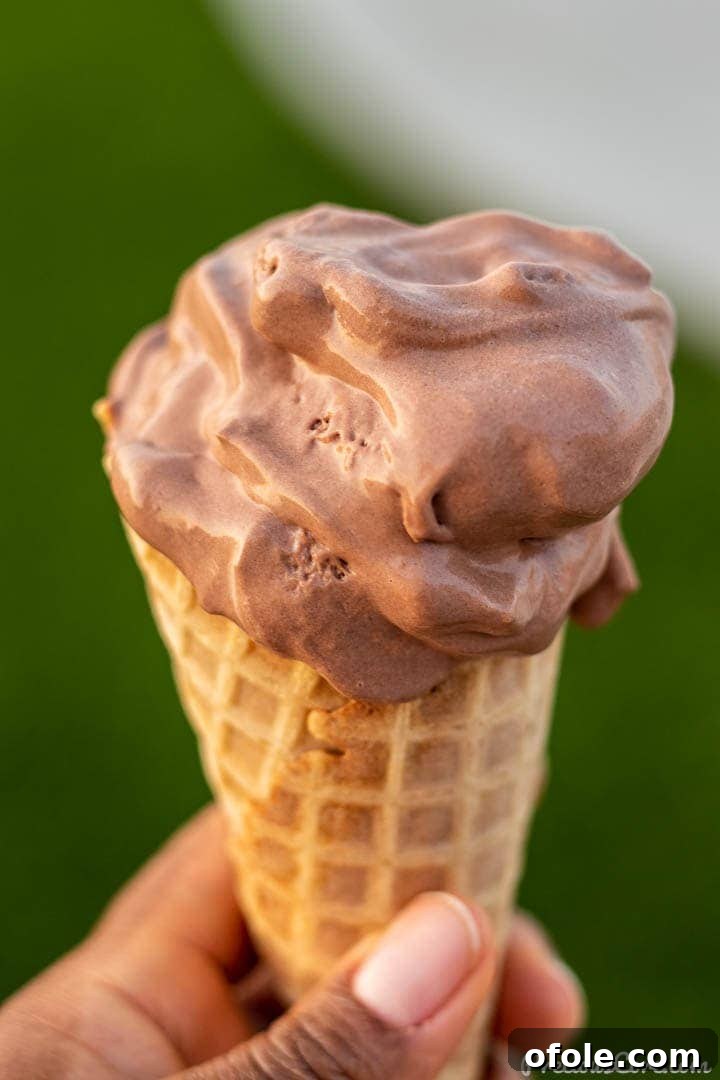
The Easiest 3-Ingredient No-Churn Homemade Chocolate Ice Cream Recipe
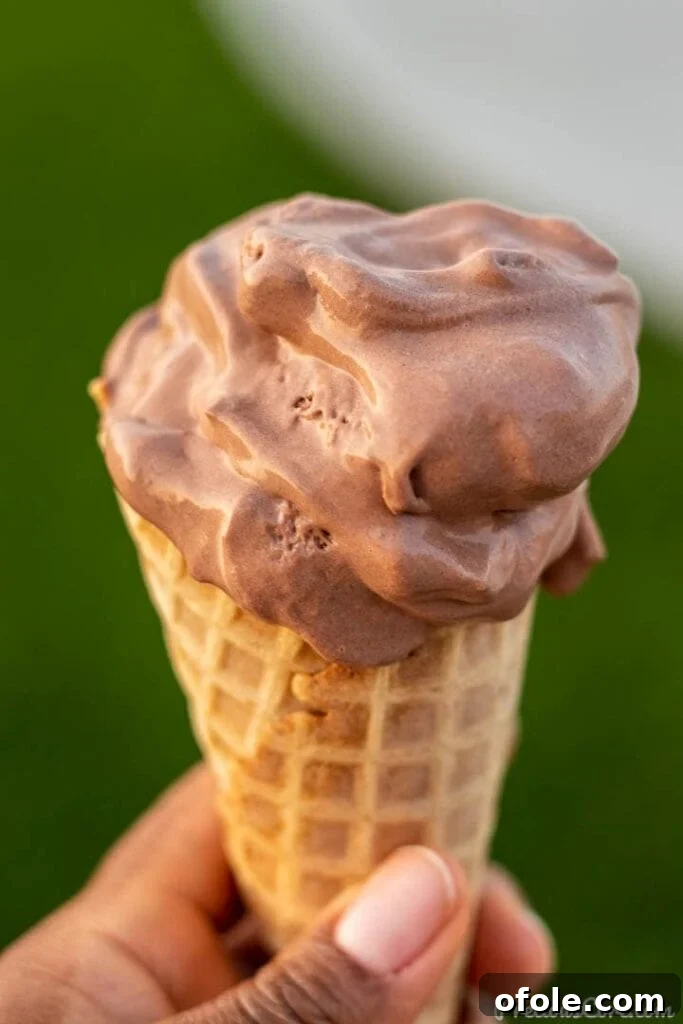
Imagine crafting the ultimate chocolate indulgence right in your own kitchen, with minimal effort and just three simple ingredients. This isn’t a culinary fantasy; it’s the sheer delight of our incredible Homemade Chocolate Ice Cream recipe! Forget about complex custard bases, tempering eggs, or the need for bulky, expensive ice cream makers. We’re about to unveil a perfectly creamy, intensely chocolatey, and wonderfully refreshing frozen treat that comes together with remarkable ease. Whether you’re seeking refuge from a scorching summer day or simply yearning for a comforting, sweet dessert, this no-churn recipe is your passport to frozen bliss.
From the sun-drenched coasts of Southern California, we understand the universal appeal of a cold, sweet treat on a warm day. While store-bought ice cream certainly has its place, nothing compares to the unparalleled depth of flavor and unique satisfaction derived from a batch made right at home. This particular chocolate ice cream recipe stands out for its straightforward approach, delivering a decadent experience that not only rivals but often surpasses traditional, more laborious methods. It’s rich, smooth, and full of genuine chocolate goodness.
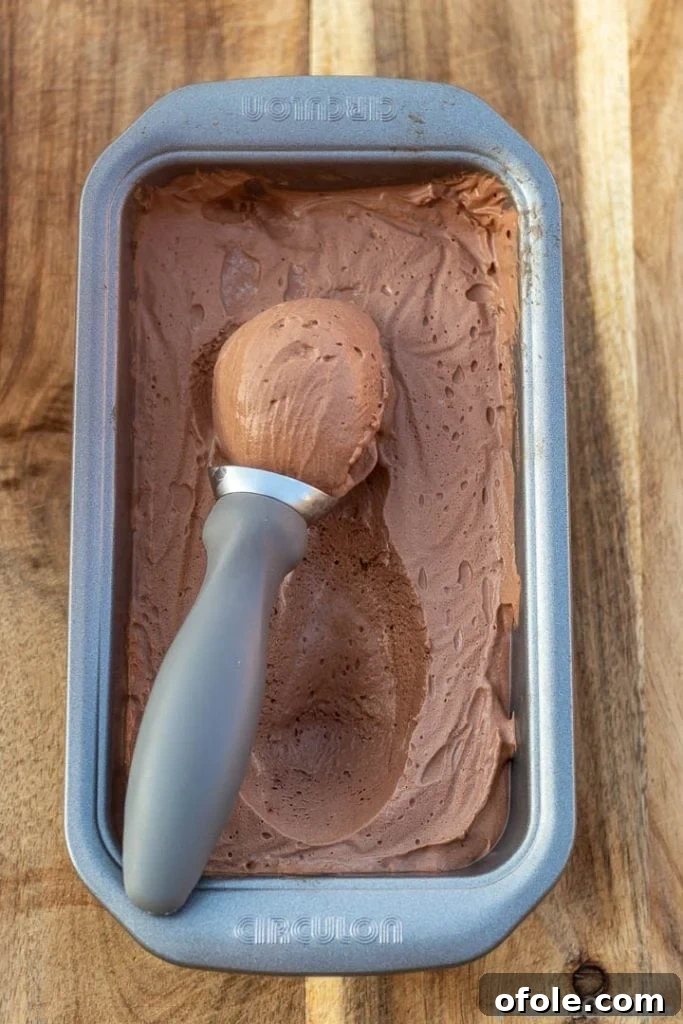
Table of Contents
- The Magic of No-Churn Ice Cream: Simplicity Meets Decadence
- Essential Chocolate Ice Cream Ingredients: Quality Matters
- Step-by-Step Guide: How To Make Chocolate Ice Cream
- Expert Tips For The Best Homemade Chocolate Ice Cream
- Unlocking Flavor: Variations and Mix-ins
- Serving and Storage Suggestions
- Watch the Recipe Video
- Explore More Homemade Ice Cream Recipes You’ll Love!
- Homemade Chocolate Ice Cream Recipe Card
The Magic of No-Churn Ice Cream: Simplicity Meets Decadence
For many home cooks, the thought of making ice cream from scratch might seem daunting, often conjuring images of specialized machinery and intricate techniques involving tempering eggs for a rich custard base. Our revolutionary no-churn method completely eliminates these complexities, making homemade ice cream effortlessly accessible to everyone, regardless of their baking experience or kitchen gadgetry.
The true genius behind this simplicity lies in the brilliant combination of just two core components: heavy whipping cream and sweetened condensed milk. When heavy cream is vigorously whipped, it incorporates a significant amount of air, transforming into a light, airy, and voluminous base. Sweetened condensed milk, with its naturally high sugar content and wonderfully thick, syrupy consistency, acts as a phenomenal natural stabilizer. This crucial role prevents the formation of large, icy crystals that can often plague homemade ice creams, instead fostering a remarkably smooth and velvety texture. The result? A delightfully rich, incredibly smooth, and perfectly scoopable ice cream that is nearly indistinguishable from its more labor-intensive churned counterparts. Introduce high-quality cocoa powder to this wondrous mixture, and you’ve just created a chocolate dream come true, ready to satisfy any sweet craving.
Essential Chocolate Ice Cream Ingredients: Quality Matters
Given that this recipe relies on a mere three ingredients, the quality of each component is paramount and will profoundly influence the ultimate taste, texture, and overall enjoyment of your homemade chocolate ice cream. Always strive to select the finest ingredients you can find to ensure a truly luxurious and memorable frozen treat.
- 1. Heavy Cream or Heavy Whipping Cream: This ingredient forms the very foundation of your ice cream’s characteristic creamy texture and airy volume. Heavy cream, typically containing a minimum of 36% milk fat, is absolutely essential for achieving stiff peaks when whipped. This process of aeration is what imbues no-churn ice cream with its signature light yet satisfyingly dense consistency. For optimal whipping results, ensure your heavy cream is thoroughly chilled, ideally straight from the refrigerator.
- 2. Sweetened Condensed Milk: This versatile ingredient performs several vital functions in our recipe. It provides the ideal level of sweetness, eliminating the need for any additional granulated sugar, and its thick, viscous nature plays a key role in creating a smooth, velvety consistency. By effectively inhibiting the growth of large ice crystals during the freezing process, it ensures a delightful mouthfeel. Always choose a reputable, good quality brand of sweetened condensed milk for the best flavor and texture.
- 3. Cocoa Powder: As the undisputed star of our chocolate masterpiece, cocoa powder is responsible for delivering that irresistible, deep chocolate flavor and a rich, inviting color. For an exceptionally decadent and intensely flavored result, consider using Dutch-processed cocoa powder. This variety is treated to be less acidic, resulting in a smoother, mellower, and often darker chocolate profile that truly elevates the ice cream.
Exploring Flavor Alternatives: While pure cocoa powder provides a classic and robust chocolate experience, this recipe is incredibly adaptable for culinary experimentation. You can easily substitute a portion of the cocoa powder with other delightful chocolate sources. For an even richer, fudgier flavor, try incorporating a good quality chocolate spread. Alternatively, for a unique and nostalgic twist, integrate chocolate-based beverage mixes like Ovaltine or Milo. If you choose to explore these delicious alternatives, it’s important to remember that they often contain additional sugars. Be mindful to adjust the quantity of sweetened condensed milk accordingly to prevent your homemade ice cream from becoming overly sweet and to maintain a perfect flavor balance.
Step-by-Step Guide: How To Make Chocolate Ice Cream
Creating your perfect batch of creamy, homemade chocolate ice cream is incredibly straightforward when you follow these simple instructions:
-
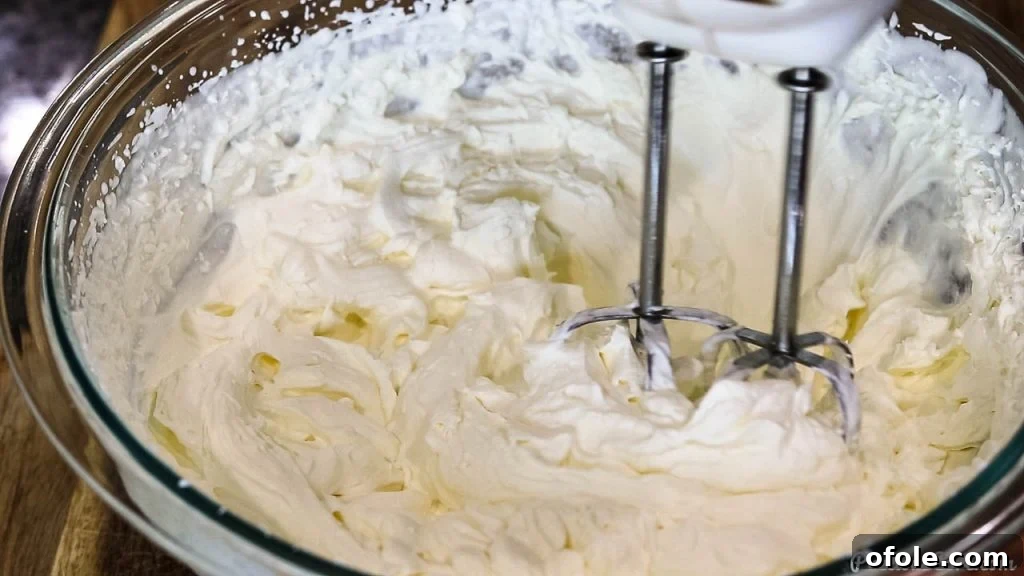
Whip the Cream to Perfection: Begin by pouring your thoroughly chilled heavy whipping cream into a large, clean mixing bowl. Using either an electric hand mixer or a stand mixer fitted with a whisk attachment, beat the cream on medium-high speed. Continue beating until the cream becomes significantly thick and forms stiff peaks. This crucial stage means that when you lift the beaters, the whipped cream will hold its shape firmly without collapsing. This step is vital for incorporating the necessary air, which provides the ice cream with its signature light, yet substantial, texture.

Whipping the heavy cream until it achieves perfect, unyielding stiff peaks. -
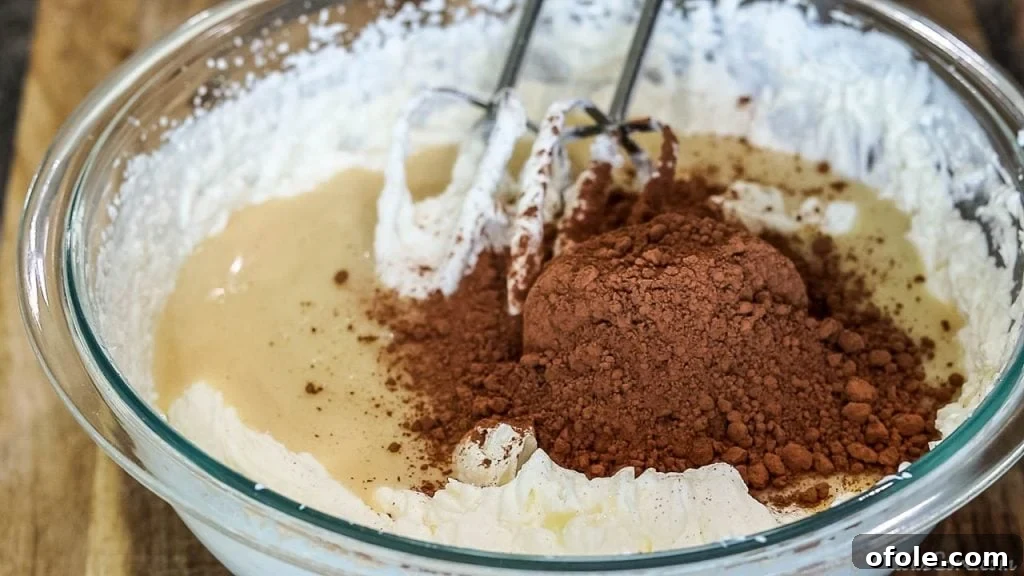
Gently Combine with Chocolate and Sweetness: Once your heavy cream is perfectly whipped, gently add the sweetened condensed milk and the cocoa powder to the bowl. For the smoothest possible mixture, especially if your cocoa powder tends to clump, you may wish to sift it before adding. This helps to prevent any pockets of dry powder in your final ice cream.
Carefully folding in the sweetened condensed milk and sifted cocoa powder. -
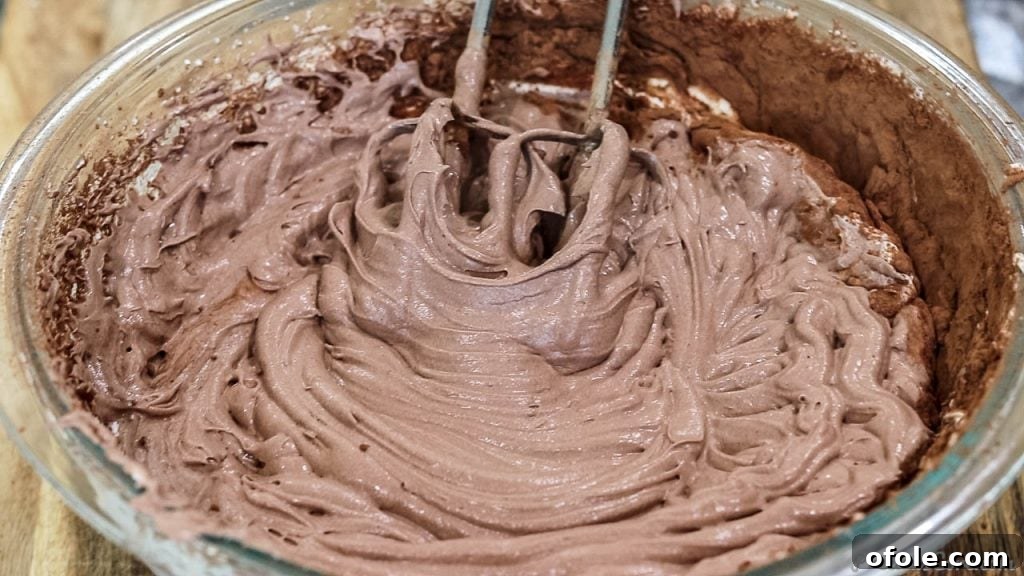
Fold Until Uniform: Continue to gently beat or carefully fold the mixture until all of the ingredients are fully incorporated, and the color is consistently chocolatey throughout. It’s important to be mindful not to overmix at this stage; your goal is to maintain as much of the air that was incorporated into the whipped cream as possible. Overmixing can deflate the cream and lead to a less airy texture in the final product.
The beautifully smooth and rich chocolate ice cream mixture, now ready for freezing. -
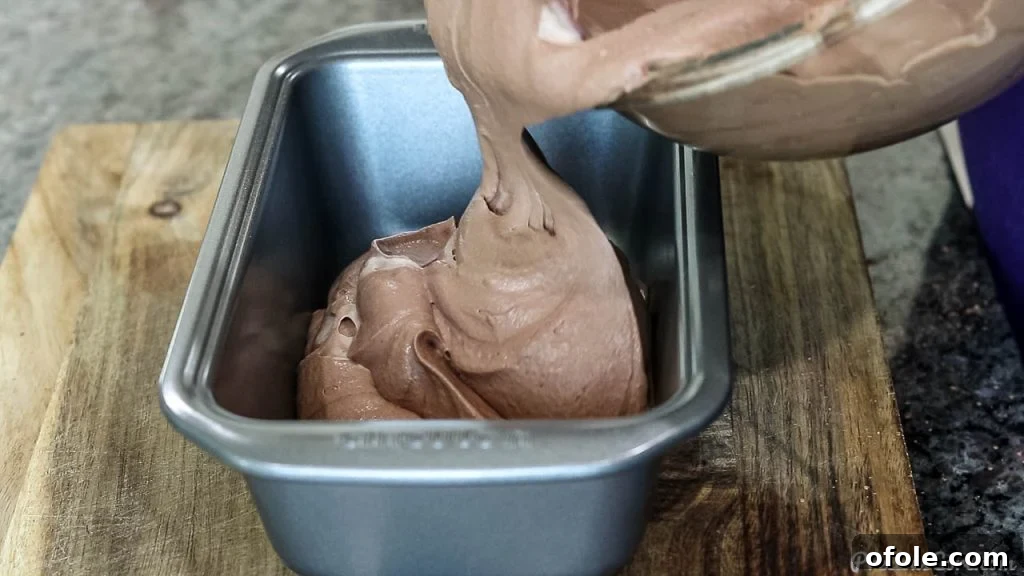
Transfer to Your Freezing Vessel: Carefully pour the luscious, creamy chocolate mixture into a standard loaf pan (typically around 9×5 inches) or any other freezer-safe container of a similar size and shape. A loaf pan is often recommended because its rectangular form provides an ample and even surface area, which greatly facilitates easy scooping once the ice cream is frozen solid.
Transferring the delicious mixture into a loaf pan, preparing it for its frosty journey. -
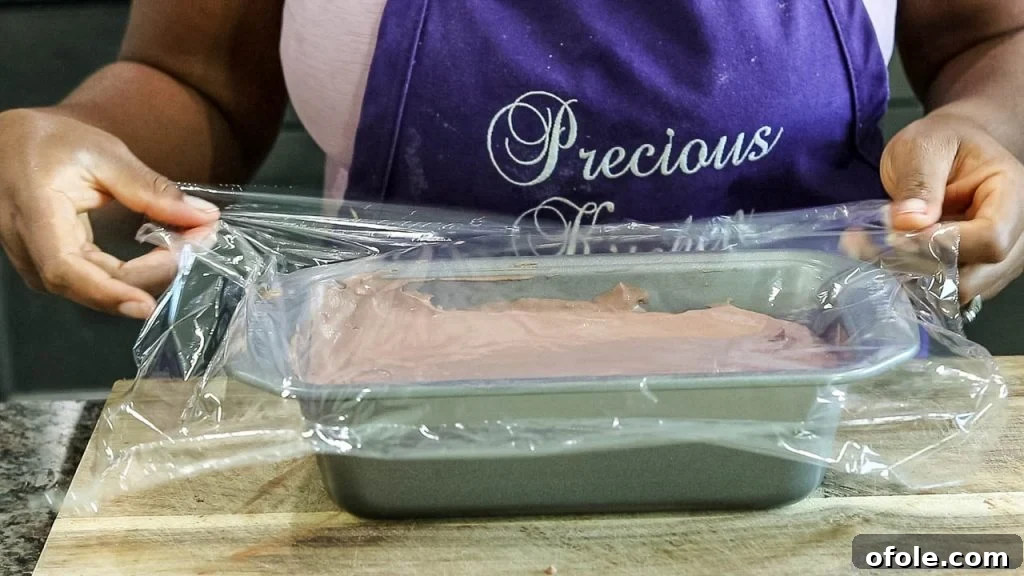
Prepare for Optimal Freezing: Use a spatula or the back of a spoon to gently level the top surface of the ice cream mixture in the pan. Next, cover the loaf pan tightly with plastic wrap. It is absolutely crucial to ensure that the plastic wrap makes direct contact with the entire surface of the mixture. This vital step creates an effective barrier against air and moisture, which are the primary culprits behind the formation of undesirable ice crystals on the surface and the occurrence of freezer burn, both of which can compromise the texture and flavor of your ice cream.
Covering the mixture with plastic wrap, ensuring direct contact to prevent ice crystal formation. -
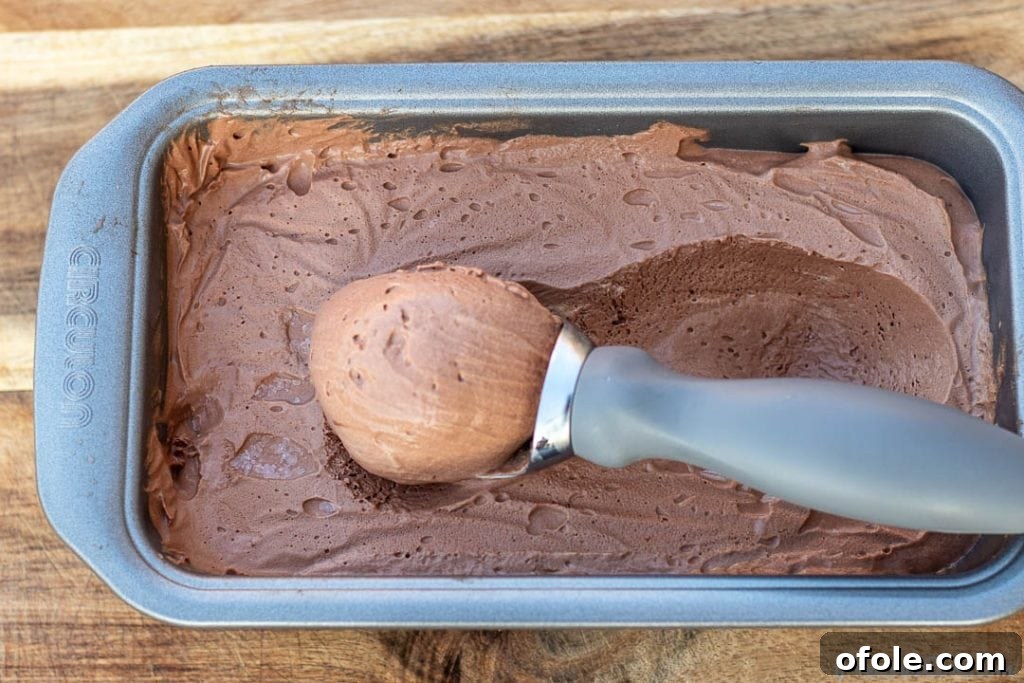
Freeze and Anticipate: Carefully place the covered loaf pan into your freezer. Allow the ice cream to freeze for a minimum of 7 hours, or ideally, leave it overnight, to ensure it firms up completely and achieves the perfect scoopable consistency. Once it is thoroughly frozen and ready, generously scoop and savor your incredibly decadent, homemade chocolate ice cream!
Ready to scoop and savor after perfect freezing, a truly delightful moment.
Expert Tips For The Best Homemade Chocolate Ice Cream
Achieving perfectly creamy, scoopable, and utterly delicious homemade chocolate ice cream is surprisingly simple, especially with these additional expert tips to guide you:
- Ensure Your Cream and Equipment are Super Cold: The colder your heavy whipping cream, the faster and more efficiently it will whip up to glorious stiff peaks. For an extra advantage, consider placing your mixing bowl and the whisk attachments in the freezer for about 15-20 minutes before you begin the whipping process. This pre-chilling step helps to maintain an optimal low temperature, which is especially important in warmer kitchen environments, and ensures maximum volume and stability in your whipped cream. Alternatively, you can place your mixing bowl over a larger bowl filled with ice while you whip the cream. The consistent cold is key for proper aeration.
- Never Over-Whip the Cream: This is a crucial point! Once your heavy whipping cream forms beautiful, firm stiff peaks, stop beating immediately. Continuing to beat past this point will cause the cream to separate, leading to a grainy texture and eventually turning it into butter, which is certainly not the desired outcome for creamy ice cream. If you accidentally over-whip slightly, you might be able to salvage it by gently stirring in a tablespoon or two of cold milk to loosen its texture, but prevention is always the best approach.
- Choose the Right Freezing Container: A standard loaf pan (approximately 9×5 inches) is highly recommended for freezing homemade no-churn ice cream. Its rectangular shape provides a large, even surface area that not only promotes consistent freezing but also makes scooping the finished ice cream considerably easier. While dedicated ice cream containers are available and work wonderfully, a simple loaf pan is a perfectly effective, readily available, and economical alternative. Ensure that whichever container you choose is clearly labeled as freezer-safe and can be tightly sealed.
- Prevent Ice Crystals with Direct Contact Covering: To guarantee a smooth, crystal-free scoop every time, always ensure that the plastic wrap (or the lid of your container) makes direct contact with the entire surface of the ice cream mixture before you place it in the freezer. This creates an essential barrier against air and any moisture from the freezer environment, which are the primary culprits behind the formation of undesirable ice crystals and the dreaded freezer burn. A perfectly smooth, luxurious texture is our goal!
- Patience is Truly a Virtue: While a minimum of 7 hours of freezing time is typically sufficient, allowing your ice cream to freeze overnight will often yield the absolute best results. Overnight freezing ensures the firmest, most perfectly set ice cream with the ideal consistency. Resist the temptation to check it too early – good things come to those who wait!
Unlocking Flavor: Variations and Mix-ins
This foundational 3-ingredient chocolate ice cream recipe is an incredibly versatile canvas, just waiting for your personal touch and creative flourishes. Don’t hesitate to experiment with different additions to customize your frozen treat:
- Double Chocolate Dream: For an ultimate chocolate experience, gently fold in a cup of mini chocolate chips, finely chopped dark chocolate, or even white chocolate chunks before you transfer the mixture to the loaf pan for freezing. This adds an extra layer of chocolatey flavor and delightful textural contrast.
- Mint Chocolate Chip Classic: Infuse a refreshing twist by adding 1/2 to 1 teaspoon of pure mint extract (or peppermint extract for a bolder flavor) along with the cocoa powder. Once mixed, fold in some finely chopped chocolate or classic mini chocolate chips for that timeless combination.
- Nutty Indulgence: Introduce a wonderful crunch and earthy flavor by stirring in a handful of toasted and chopped nuts, such as walnuts, pecans, almonds, or even hazelnuts. Toasting them beforehand enhances their aroma and taste.
- Coffee Kick – Mocha Madness: For those who love the pairing of coffee and chocolate, dissolve 1-2 tablespoons of instant espresso powder or strong instant coffee granules in a tablespoon of hot water. Allow it to cool completely, then add this concentrated coffee mixture to the bowl along with the cocoa powder and sweetened condensed milk for a rich mocha-flavored ice cream.
- Swirls of Decadence: After you’ve poured the chocolate mixture into the loaf pan, create beautiful flavor swirls by drizzling spoonfuls of warm caramel sauce, rich fudge sauce, or even creamy peanut butter over the top. Use a knife or skewer to gently swirl these additions through the ice cream for a stunning marbled effect.
- Spicy Chocolate Adventure: For the more adventurous palate, add a subtle yet intriguing warmth by incorporating a small pinch of cayenne pepper or a touch of chili powder along with the cocoa powder. This creates a delightful ‘Mexican hot chocolate’ inspired flavor profile.
Serving and Storage Suggestions
Once your homemade chocolate ice cream is perfectly frozen and reaches its ideal consistency, the most exciting part begins – it’s time to enjoy!
- Optimizing for Serving: For the easiest and most enjoyable scooping experience, we recommend letting the ice cream sit at room temperature for approximately 5 to 10 minutes before you begin scooping. This brief moment allows it to soften just enough, making it easier to glide your scoop through and enhancing its wonderfully creamy, melt-in-your-mouth texture. Serve it proudly in classic ice cream cones, elegant dessert bowls, or as a decadent accompaniment to your favorite warm treats like fudgy brownies, fruit pies, or delicate tarts. A tiny sprinkle of flaky sea salt over the top can also surprisingly elevate and beautifully enhance the deep chocolate flavor.
- Best Storage Practices: To maintain the peak freshness, flavor, and texture of your precious homemade ice cream, it should always be stored in an airtight, freezer-safe container. The loaf pan, tightly sealed with plastic wrap and an additional lid (if available), serves as an excellent storage solution. Properly stored, your homemade chocolate ice cream will retain its optimal quality for up to 2-3 weeks in the freezer. While it may remain edible beyond this timeframe, the texture and nuanced flavors are best enjoyed within this period. Always ensure it’s securely covered to prevent any exposure to air, which can lead to freezer burn and a decline in quality.
Watch the Recipe Video
Sometimes seeing is believing! Witness firsthand just how incredibly easy it is to create this delectable Homemade Chocolate Ice Cream. Watch me demonstrate the entire fuss-free process in the video below, guiding you through each step to ensure your success. And while you’re there, don’t forget to hit that SUBSCRIBE button on my YouTube Channel so you never miss out on any of my exciting new recipes and helpful cooking tips!
Explore More Homemade Ice Cream Recipes You’ll Love!
Homemade Vanilla Ice Cream (VIDEO)
Watermelon Ice Cream
No Churn Strawberry Ice Cream
Mango Ice Cream
No Churn Coconut Ice Cream
If you make this irresistible homemade chocolate ice cream, please share your experience! We encourage you to leave a star rating below and let us know your thoughts in the comments. Your valuable feedback not only helps others discover and enjoy this incredible recipe but also allows us to connect with our wonderful community. Thank you for your support!
Homemade Chocolate Ice Cream Recipe Card

Homemade Chocolate Ice Cream
Learn how to effortlessly create rich, creamy, and refreshing homemade chocolate ice cream using only 3 simple ingredients. No ice cream machine is needed for this delightful treat!
Freezing time: 7 hrs
Total time: 7 hrs 10 mins
Servings: 6 servings
Ingredients
- 2 cups heavy whipping cream (480 ml), very cold
- 14 oz sweetened condensed milk (397 g)
- 1/2 cup cocoa powder (60g)
Instructions
- Pour cold heavy whipping cream into a large mixing bowl. Beat using an electric beater or an egg whisk until stiff peaks form.
- Add the sweetened condensed milk and cocoa powder to the bowl. For a smoother mixture, sift the cocoa powder to prevent lumps.
- Continue beating gently until all ingredients are fully combined and the mixture has a uniform, rich chocolate color. Avoid overmixing to maintain the cream’s aeration.
- Pour the creamy chocolate mixture into a 9×5 inch loaf pan or another suitable freezer-safe container. Use a spatula to gently level the top surface.
- Cover the loaf pan tightly with plastic wrap, making sure the plastic wrap directly touches the entire surface of the cream mixture. This prevents ice crystals from forming.
- Place the covered pan in a freezer and let it freeze for a minimum of 7 hours, or preferably overnight, until thoroughly solid. Once frozen, scoop generously and enjoy!
Notes
For alternative chocolate flavors, you can replace the cocoa powder with 1 cup of chocolate spread or half a cup of a chocolate beverage mix like Ovaltine or Milo. If you choose to add any of these alternate sources of chocolate, be sure to slightly reduce the quantity of sweetened condensed milk. This adjustment will help balance the sweetness, as these products often contain additional sugar, ensuring your ice cream doesn’t turn out overly sweet.
Nutrition
Additional Info
Cuisine: International
Calories: 366
This post contains affiliate links, which means I may earn a small commission if you make a purchase through these links, at no extra cost to you. These commissions help support my work and enable me to continue providing delicious recipes. Thank you for supporting my content!