
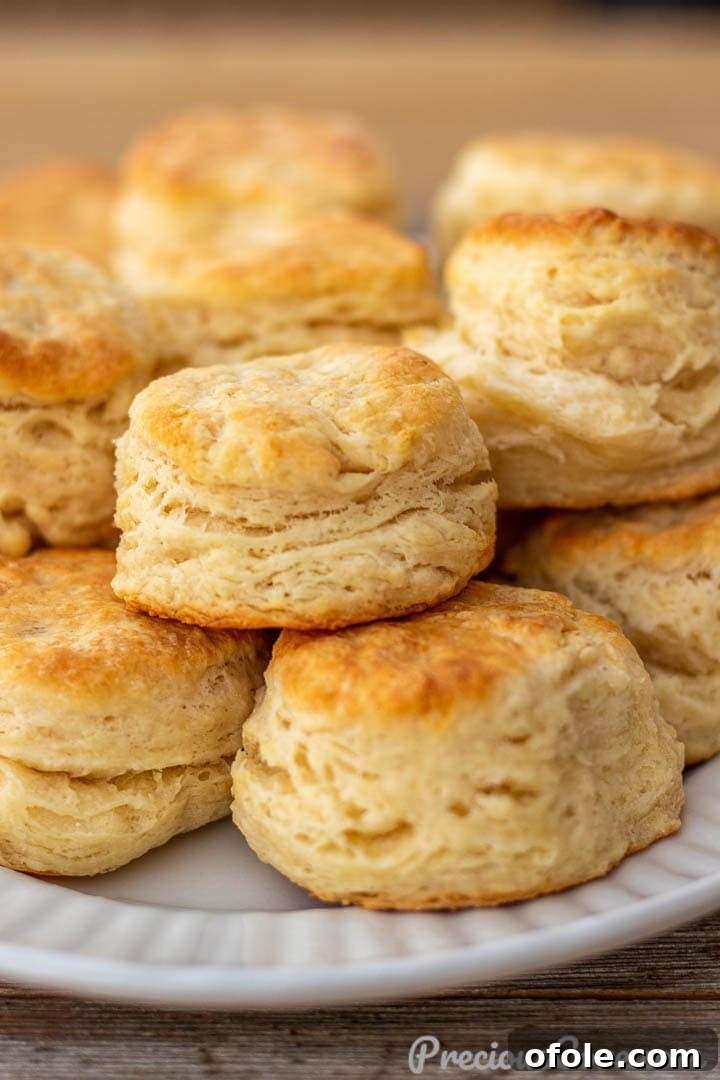
Homemade Buttermilk Biscuits are a true delight – flaky, fluffy, buttery, and utterly irresistible. Whether served warm for breakfast, as a comforting brunch centerpiece, or as a perfect side dish to any meal, these biscuits promise to elevate your dining experience. In this comprehensive guide, I’m excited to share all my perfected tips and techniques to help you bake the absolute best biscuits you’ve ever tasted.
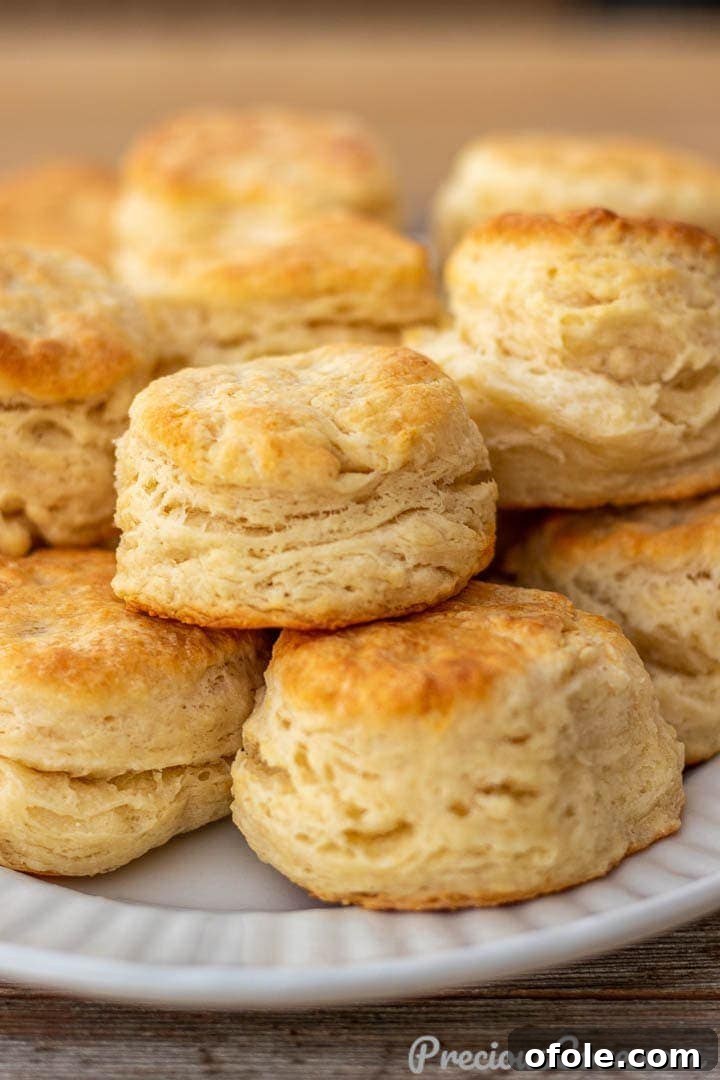
The Ultimate Guide to Flaky Homemade Buttermilk Biscuits
After countless batches and years of dedicated recipe testing, I’ve finally perfected the art of homemade buttermilk biscuits. This isn’t just another recipe; it’s the culmination of numerous tweaks and trials, resulting in a biscuit so spectacular, it will truly “knock your socks off!” These aren’t just any biscuits; they are consistently fluffy, incredibly moist, boast distinct flaky layers, and possess a rich, buttery flavor that stands on its own. They are equally phenomenal when split open and generously smeared with sweet preserves or a dollop of creamy butter. For an exquisite pairing, try them with homemade Apricot Preserves or our vibrant Healthy Strawberry Jam.
Why You’ll Love This Easy Buttermilk Biscuit Recipe
You’ll fall in love with these fluffy buttermilk biscuits not only for their incredible taste and texture but also for their surprising simplicity. In today’s fast-paced world, time is precious, and this recipe delivers astonishing results in just about 30 minutes from start to finish! This incredible speed is achieved through a streamlined process that minimizes prep work without sacrificing quality. As a busy parent, finding recipes that are both rewarding and quick is a game-changer. This easy biscuit recipe has become a staple in my kitchen, allowing me to whip up warm, comforting biscuits for breakfast or any meal, even on the busiest mornings. It’s truly a testament to how effortless delicious homemade baking can be, proving that you don’t need hours in the kitchen to enjoy freshly baked goods.
If you’re a biscuit enthusiast, be sure to explore our other fantastic recipes, like the incredibly simple 3-Ingredient Biscuits and our decadent Cream Cheese Biscuits, offering delightful variations for every palate.
Table of Contents
- Essential Ingredients for Buttermilk Biscuits
- How To Make Homemade Buttermilk Biscuits: Step-by-Step
- Expert Tips For The Perfect Homemade Biscuits
- Favorite Tools For Homemade Biscuits
- Buttermilk Biscuits Recipe Card
Essential Ingredients for Buttermilk Biscuits
Crafting perfect buttermilk biscuits requires a few key ingredients, each playing a vital role in achieving that coveted flaky and tender texture. Using high-quality, fresh ingredients will always yield the best results. Here’s a closer look at what you’ll need and why each component is so important:
- Cold Unsalted Butter: This is arguably the most crucial ingredient for flaky biscuits. Using cold butter, specifically unsalted to allow you to control the overall salt levels, creates tiny pockets of steam as it melts in the hot oven. This steam then pushes the dough layers apart, resulting in those desirable light and airy flaky layers. It’s essential that your butter is straight from the fridge and either cut into small pieces or, even better, grated.
- All-Purpose Flour: The foundation of our biscuits. All-purpose flour provides the necessary structure and tender crumb. While self-rising flour can be used in some biscuit recipes, this particular recipe calls for all-purpose, allowing for precise control over the leavening agents and ensuring consistent results every time.
- Baking Powder and Baking Soda: These are our dynamic duo of leavening agents. Baking powder provides the primary lift, creating a light and airy texture. Baking soda, on the other hand, reacts with the natural acidity of the buttermilk to give an extra boost to the rise and contributes to the biscuits’ incredible tenderness. Using both ensures maximum fluffiness and a perfect rise.
- Salt: Essential for balancing the flavors and enhancing the richness of the butter and the tang of the buttermilk. Don’t skip it, as it prevents the biscuits from tasting bland and brings out the full depth of flavor in every bite.
- Granulated Sugar: A small amount of sugar in this recipe doesn’t make the biscuits overtly sweet, but rather serves a few important purposes. It aids in browning the crust to a beautiful golden hue, contributes to a more tender texture, and adds a subtle depth of flavor that complements the richness of the butter and buttermilk.
- Cold Buttermilk: The star ingredient and namesake! Buttermilk provides a distinctive tangy flavor that is characteristic of classic Southern biscuits. More importantly, its acidity reacts with the baking soda to create carbon dioxide, which helps the biscuits rise significantly and contributes to their incredibly tender crumb and soft texture. It’s crucial to keep your buttermilk chilled until the very moment you are ready to incorporate it into the dough.
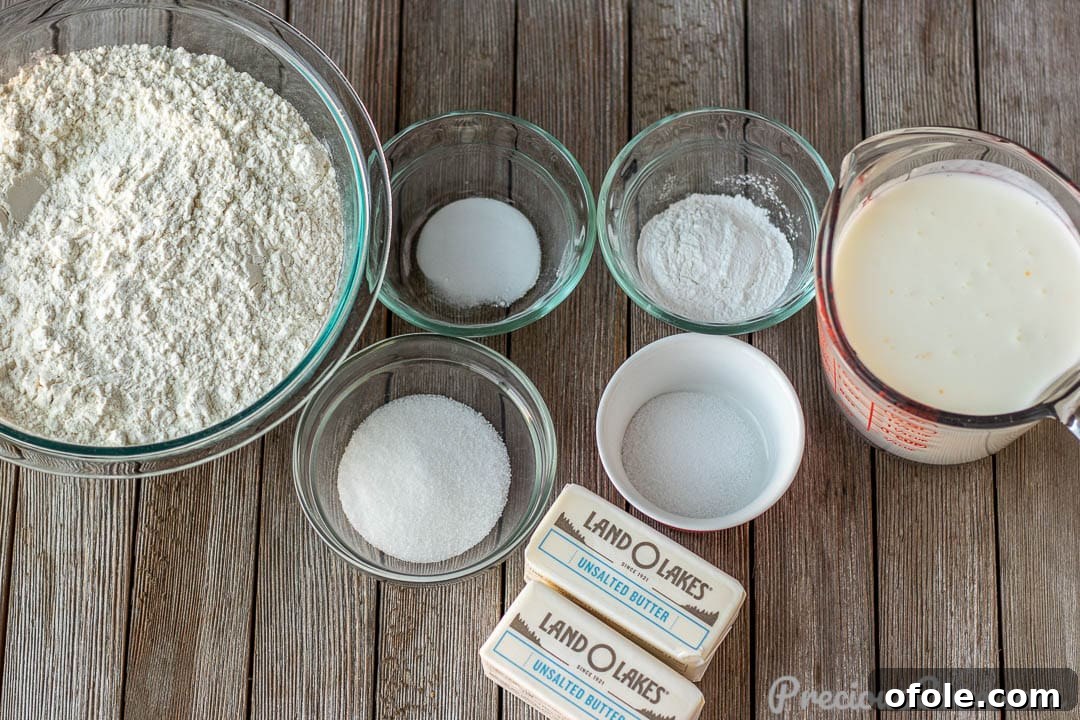
For the precise measurements of each ingredient and a printable version, please refer to the detailed recipe card located further down this page.
How To Make Homemade Buttermilk Biscuits: Step-by-Step
Creating these perfect flaky buttermilk biscuits is simpler than you might think, especially when you understand the purpose behind each step. Follow these instructions closely for a truly outstanding result, guaranteeing light, airy, and deeply flavorful biscuits every time. Remember to consult the full recipe card below for exact ingredient quantities and any additional tips.
- Prepare Your Workspace and Preheat Oven: Begin by preheating your oven to a hot 425°F (220°C). This high temperature is vital for a rapid rise and golden crust. Simultaneously, line a large baking sheet with parchment paper. This simple step prevents sticking, ensures easier cleanup, and contributes to more even baking. Having your oven preheated and tray ready ensures a quick transfer once the dough is prepared, keeping the butter cold.
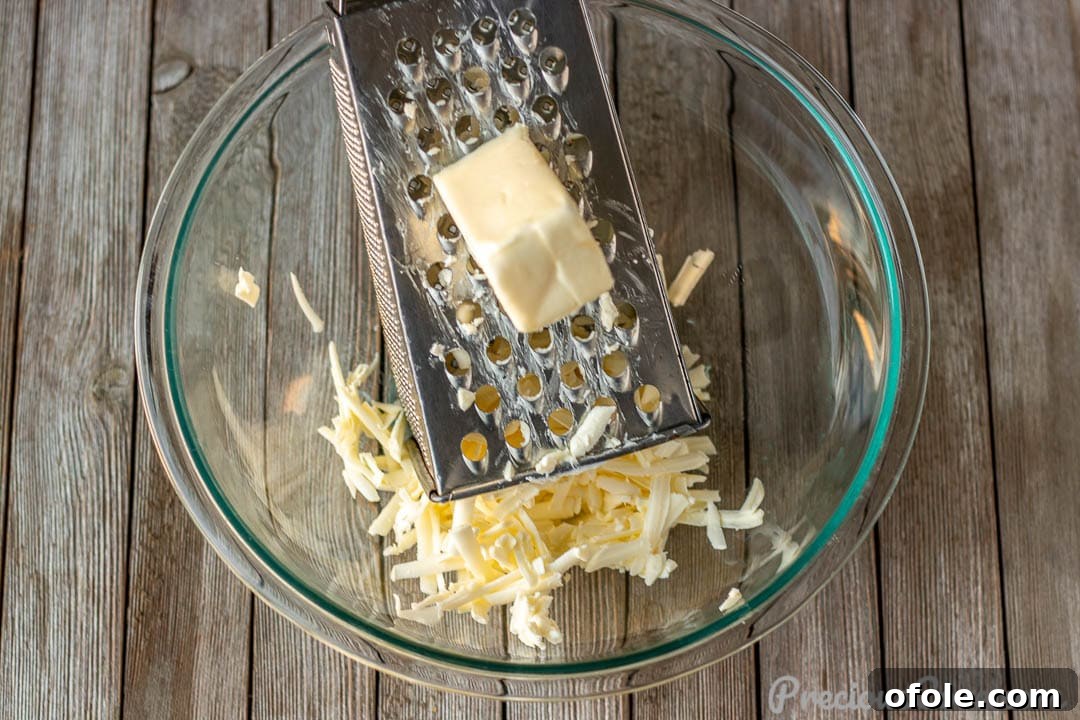
- Prepare the Cold Butter: Take your very cold unsalted butter directly from the refrigerator. Using the large holes of a box grater, grate the butter directly into a spacious mixing bowl. Grating the butter is a masterful technique as it creates tiny, uniform pieces that are easily incorporated into the flour without overworking the dough. This even distribution of cold butter is absolutely crucial for creating those coveted flaky layers, as it allows for maximum steam production during baking.
- Combine Dry Ingredients with Butter: To the bowl with the grated butter, add the all-purpose flour, baking powder, baking soda, salt, and granulated sugar. Use your fingertips to gently mix and incorporate the butter into the dry ingredients. Work quickly and lightly to keep the butter as cold as possible. The mixture should resemble coarse crumbs with visible pea-sized pieces of butter throughout. It’s important not to melt the butter with the heat from your hands; the goal is to coat the butter in flour. A pastry blender or a food processor (used with very short, quick pulses) can also achieve this if you prefer.
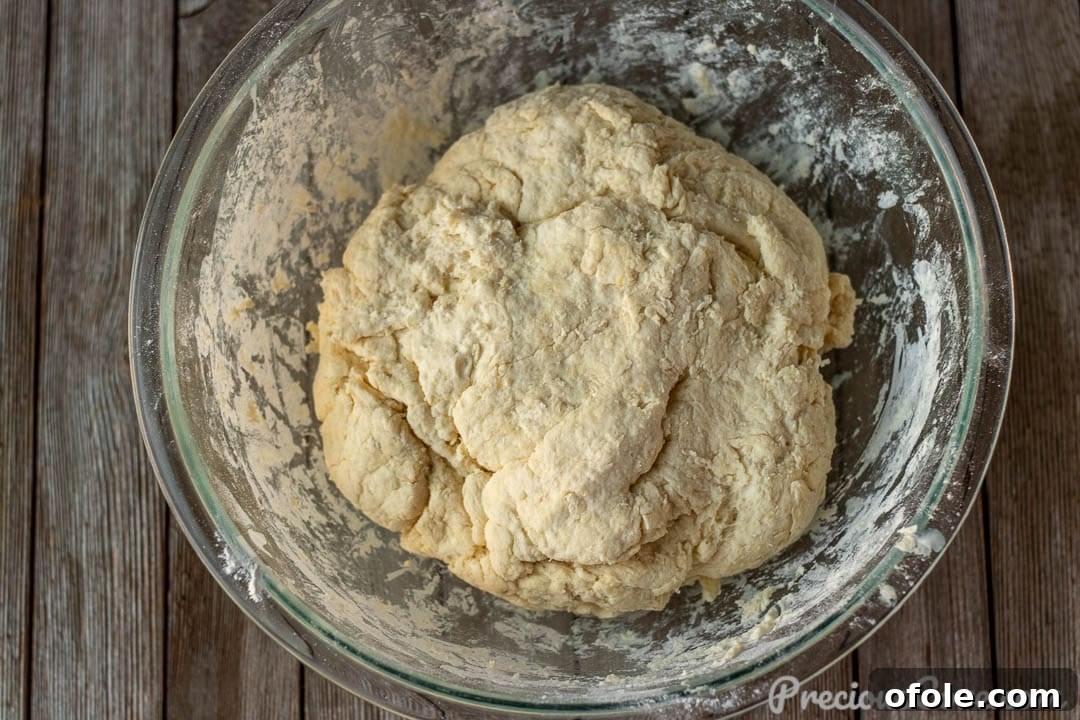
- Incorporate the Cold Buttermilk: Now, pour in the cold buttermilk. Mix just until a shaggy dough forms. Use a wooden spoon or your hands, but remember the golden rule of biscuits: do not overmix at this stage! Overworking the dough will develop the gluten too much, which will result in tough, hockey-puck-like biscuits instead of light, tender ones. The dough will still look a bit rustic and perhaps uneven, and that’s perfectly fine.
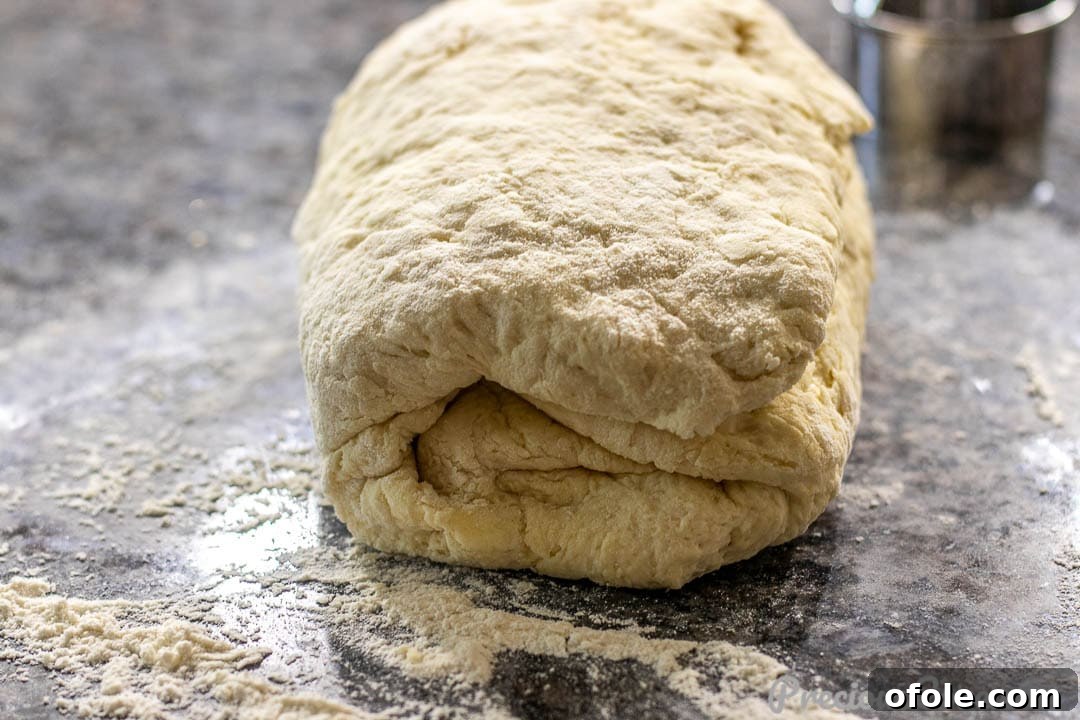
- Create Layers for Flakiness (The Folding Technique): Lightly flour a clean work surface (a silicone mat works wonderfully here). Transfer the shaggy dough onto it. Gently press the dough down or roll it out into an oblong shape, approximately half an inch thick. This is where the magic happens for flaky layers! Fold the dough into thirds, like you’re folding a letter. Turn the dough horizontally, then gently press or roll it out again to half an inch thick. Repeat this folding and rolling process two more times. In total, you should fold the dough three times; this strategic layering process builds incredible, distinct layers that will puff up beautifully in the oven, giving your biscuits their signature flakiness. Handle the dough with a gentle touch to avoid overworking.
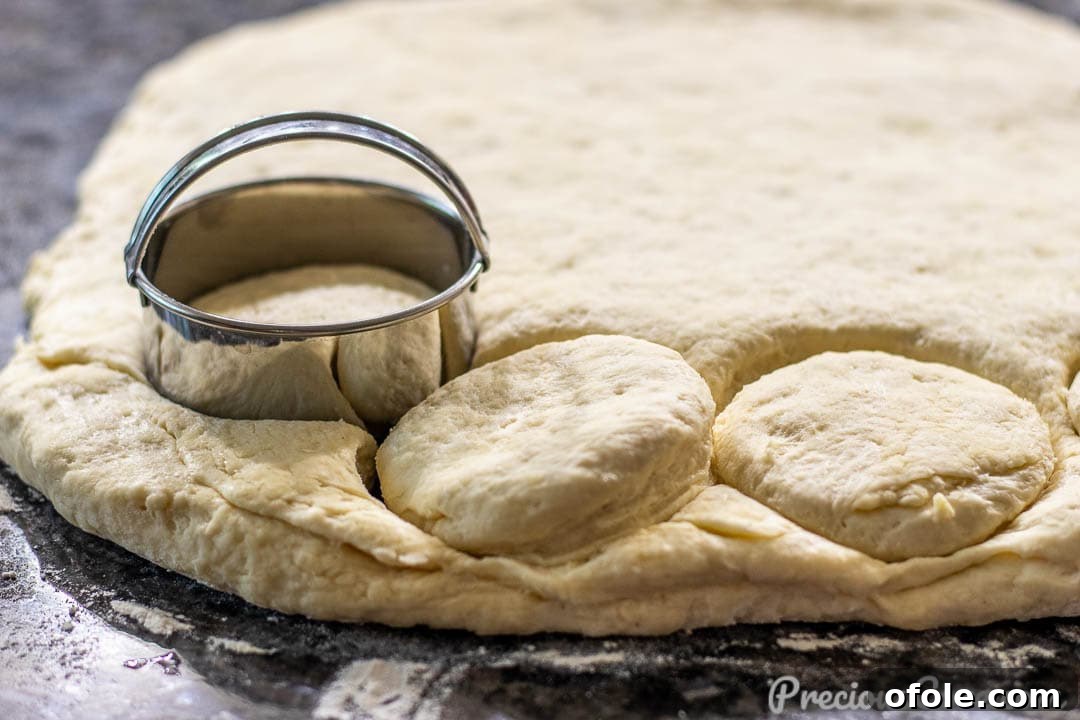
- Cut the Biscuits with Precision: Once the layering is complete, roll the dough out one last time to a uniform half-inch thickness. Now, grab your 2.5-inch biscuit cutter (or the rim of a sharp-edged glass). Press straight down firmly into the dough to cut out rounds. This step is critically important: Do not twist the cutter! Twisting seals the edges of the biscuit, which will prevent it from rising properly and creating those beautiful, separated layers. A clean, straight cut is key to a sky-high rise. Carefully gather any dough scraps, gently press them together (again, do not knead them vigorously), and cut out any additional biscuits from the remaining dough.
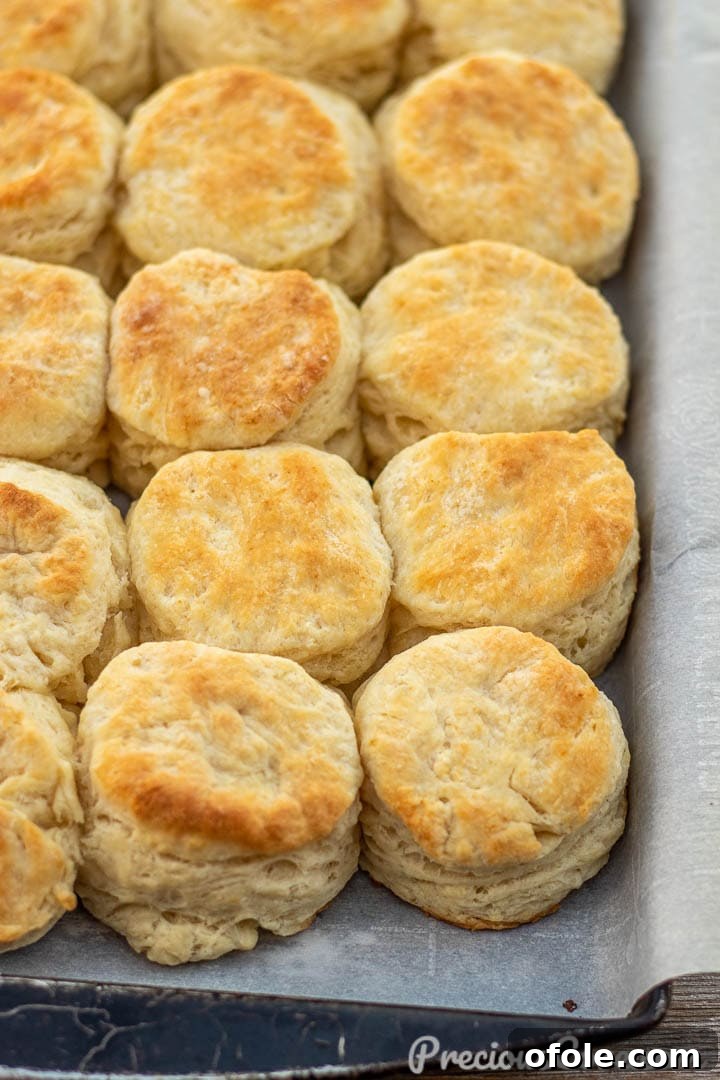
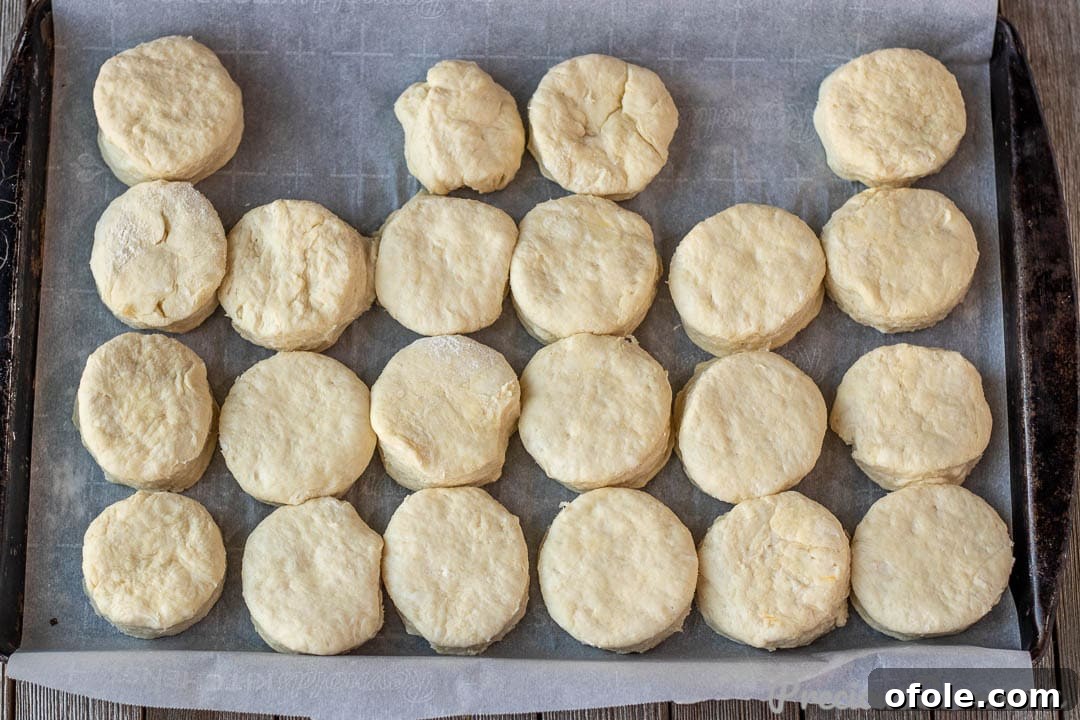
- Arrange on Baking Sheet for Optimal Rise: Place the cut-out biscuits onto your prepared baking sheet. For the best rise and to achieve that classic “pull-apart” texture, arrange them so they are lightly touching each other. This proximity provides mutual support during baking, encouraging the biscuits to climb higher rather than spreading outwards. This technique is a beloved secret of Southern bakers for maximizing fluffiness.
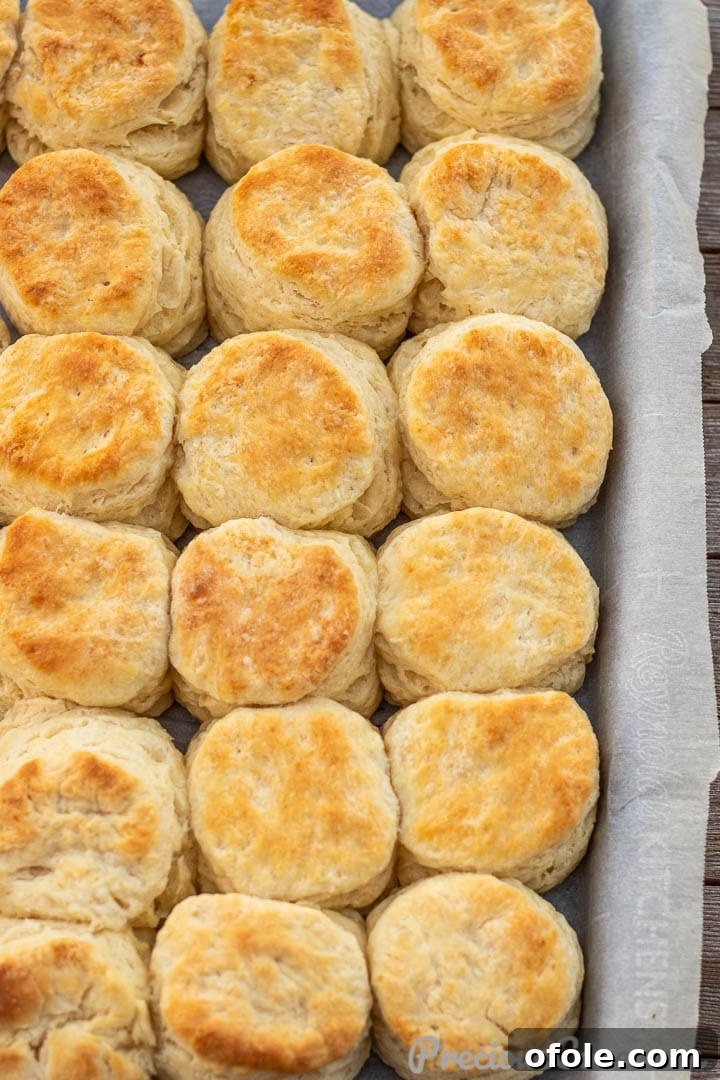
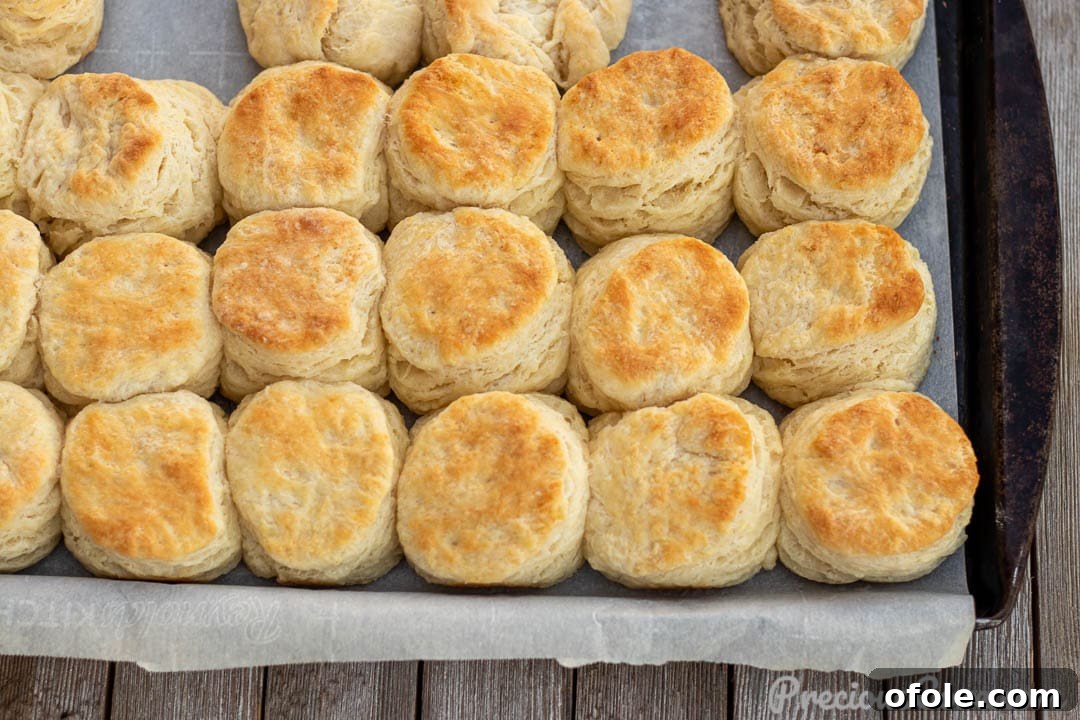
- Bake to Golden Perfection: Transfer the baking sheet to your preheated 425°F (220°C) oven. Bake for approximately 12-15 minutes. Baking time can vary slightly depending on your oven, so keep a close eye on them. The biscuits are done when their tops are beautifully golden brown and they have risen significantly, indicating their light and airy texture.
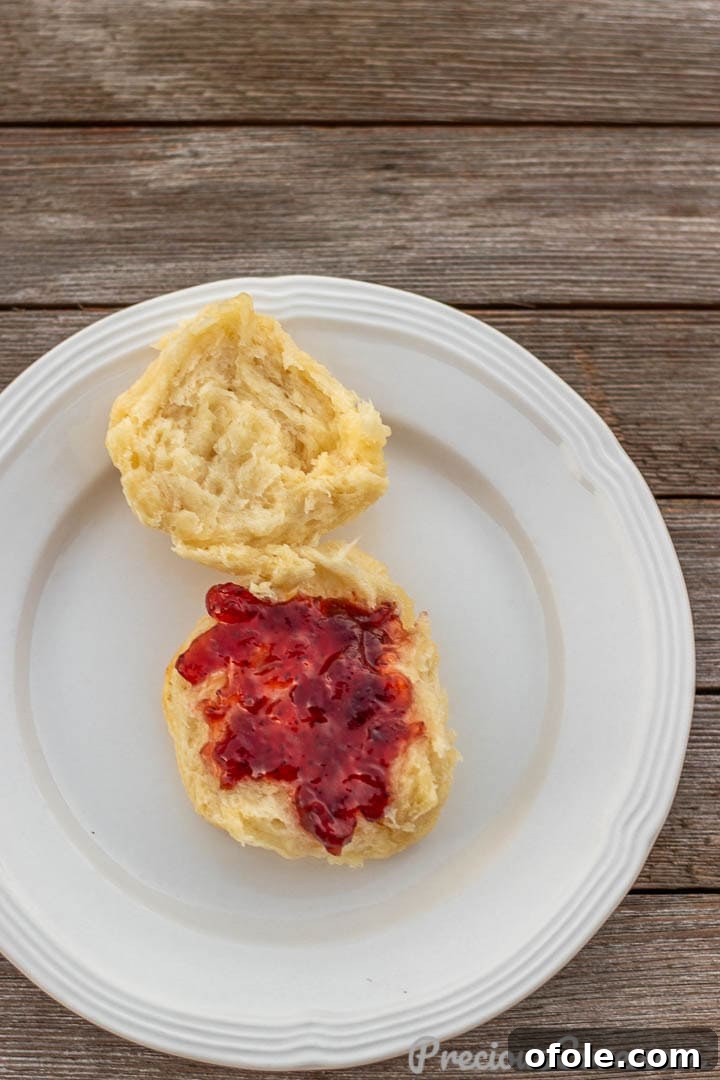
- Serve Warm and Enjoy: Once baked, remove the biscuits from the oven and serve them immediately while they are still warm. There’s truly nothing quite like a fresh, hot homemade biscuit. They are absolutely delightful on their own, allowing their rich buttery flavor to shine. For an extra treat, split them open and add a pat of butter, a drizzle of honey, or a generous spoonful of your favorite jam or preserves.
Craving another comforting bake? Don’t miss out on another delicious recipe: our easy Cornbread Without Buttermilk, perfect for a different kind of comforting bread.
Expert Tips For The Perfect Homemade Buttermilk Biscuits
Achieving truly perfect homemade buttermilk biscuits involves a few key techniques and considerations that go beyond just the ingredients. Mastering these expert tips will consistently deliver flaky, tender, and sky-high biscuits that will impress everyone:
- Keep Everything COLD: This is arguably the most fundamental and important rule for achieving flaky biscuits. The magic lies in the cold butter: as it melts in the hot oven, it releases steam, which creates pockets that push the dough layers apart, forming those coveted flaky strata. Cold buttermilk also helps maintain the butter’s firm temperature, preventing it from melting prematurely. Therefore, do not remove your butter and buttermilk from the fridge until the very moment you are ready to use them. If your kitchen tends to be warm, consider chilling your mixing bowl, and even your flour, in the freezer for 10-15 minutes before you begin.
- Grate Your Butter for Optimal Distribution: Grating cold butter using the large holes of a box grater is a culinary secret and a game-changer for biscuit-making. This method ensures that the butter is evenly distributed in tiny pieces throughout the flour without requiring excessive mixing, which could lead to overworking the dough. This method is far more efficient than cutting butter into cubes and significantly helps maintain its cold temperature. Alternatively, you could pulse cold butter and flour in a food processor, but be very careful with short bursts to avoid over-processing. You should still see visible bits of butter resembling small peas or flakes; these are what create the tender, flaky texture.
- The Magic of Buttermilk (and an Easy Homemade Substitute): Buttermilk is essential not just for its signature tangy flavor that defines Southern biscuits, but also for its crucial acidic properties. When buttermilk reacts with baking soda, it creates carbon dioxide gas. This reaction is what contributes significantly to the biscuit’s impressive rise and its incredibly tender, soft texture. If you don’t have buttermilk on hand, don’t worry! You can easily make your own substitute at home: pour 1 tablespoon of white vinegar or lemon juice into a liquid measuring cup, then fill the rest of the cup with regular milk (any fat percentage will work) until it reaches the 1-cup mark. Stir gently and let it sit for 5-10 minutes until it slightly curdles. For this recipe, you would need two such cups.
- Handle the Dough Gently – Do NOT Knead: Unlike bread dough, biscuit dough should never be kneaded vigorously or for an extended period. Overworking the dough develops gluten excessively, which results in tough, dense, and chewy biscuits instead of light, flaky, and tender ones. Mix only until the ingredients are just combined and the dough comes together in a shaggy mass. When performing the folding and rolling technique, use a light, gentle touch to maintain those delicate layers.
- No Twisting When Cutting Biscuits: When using a biscuit cutter, whether it’s a dedicated cutter or the rim of a sharp-edged glass, it is paramount to press straight down firmly into the dough and then lift straight up. Do not twist the cutter! Twisting motion seals the edges of the dough, which prevents the individual biscuit layers from fully separating and rising beautifully in the oven. A clean, sharp cut is the key to achieving a sky-high, beautifully layered rise.
- Let Them Touch on the Baking Sheet: Arrange your cut biscuits so that their sides are lightly touching each other on the parchment-lined baking sheet. This isn’t just for efficiently fitting more biscuits on the tray; it serves a crucial purpose in baking. This proximity provides mutual support, encouraging the biscuits to rise taller rather than spreading outwards. This technique is a beloved and time-honored secret often seen in traditional Southern baking for maximizing fluffiness and height.
- Proper Storage and Reheating for Freshness: To keep your homemade buttermilk biscuits at their best, store any leftovers in an airtight container or a sealed bag at room temperature for up to 2 days, or in the refrigerator for up to 5 days. For reheating, the oven is your best friend for restoring their original crispness and warmth: place them on a baking sheet at 300°F (150°C) for about 10-15 minutes until warmed through. For a quicker option, you can reheat them in the microwave for 20-30 seconds per biscuit, though they may become a bit softer.
Loved this recipe for flaky buttermilk biscuits? Be sure to explore my popular Cream Cheese Biscuits and our incredibly simple 3-Ingredient Biscuits recipes for more delightful baking adventures!
Favorite Tools For Homemade Buttermilk Biscuits
Having the right tools can make all the difference in achieving perfect biscuits with ease and efficiency. While many kitchen items can be improvised, certain tools are particularly helpful for consistent, outstanding results. Here are some of my go-to items that I highly recommend for making homemade buttermilk biscuits:
- Biscuit Cutters: A good set of biscuit cutters with sharp edges is essential for making clean, precise cuts. This is crucial for allowing the biscuits to rise properly. I highly recommend using the 2.5-inch size for ideal individual portions and a classic biscuit shape.
- Measuring Cups and Spoons Set: Accurate measurements are absolutely crucial in baking, especially for ratios of flour to leavening agents. A reliable, clearly marked set ensures your ingredients are perfectly portioned every time, which is key to consistent success.
- Parchment Paper: An invaluable aid for easy cleanup and, more importantly, for preventing your biscuits from sticking to the baking sheet. It also helps with more even heat distribution across the bottom of the biscuits, contributing to a uniform bake.
- Box Grater: While not explicitly linked in the original, a sturdy box grater (specifically the large holes) is incredibly useful for quickly and efficiently grating cold butter into fine pieces, which as discussed, is a cornerstone of flaky biscuit technique.
- Large Mixing Bowl: A spacious mixing bowl allows you to comfortably combine all your ingredients without flour escaping or making a mess, providing ample room for the gentle mixing required for biscuit dough.
- Rolling Pin: A good quality rolling pin, whether traditional or French-style, is essential for evenly rolling out the dough to the desired thickness for both layering and cutting, ensuring consistent biscuit height and texture.
If you try this delightful homemade buttermilk biscuit recipe, please take a moment to leave a star rating below. Your feedback and rating are incredibly helpful to other aspiring bakers in our community and mean a lot to me! Thank you for your support!
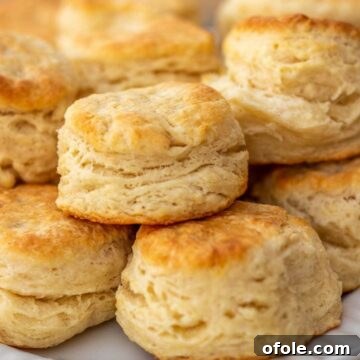
Classic Homemade Buttermilk Biscuits
The ultimate flaky, fluffy, and buttery biscuits, incredibly easy to make with just a few simple ingredients! Perfect for breakfast, brunch, or as a delightful side dish, especially during the holidays.
Print Recipe
Rate This Recipe
Ingredients
- 1 cup unsalted butter (226 grams), cold and grated
- 4 cups all-purpose flour (500 grams), plus more for work surface
- 4 teaspoons baking powder
- 1/2 teaspoon baking soda
- 1 teaspoon salt
- 2 tablespoons granulated sugar
- 2 cups buttermilk (500 ml), cold
Instructions
- Preheat your oven to 425°F (220°C). Line a large baking sheet with parchment paper.
- Grate the cold unsalted butter into a large mixing bowl using the largest holes of a box grater.
- To the grated butter, add the flour, baking powder, baking soda, salt, and sugar. Gently mix with your fingertips until the mixture resembles coarse crumbs with pea-sized pieces of butter. Do not overmix.
- Pour in the cold buttermilk. Mix gently with a spoon or your hands just until a shaggy dough forms. Be careful not to knead the dough.
- Lightly flour a clean work surface. Transfer the dough onto it. Gently press or roll the dough to about a half-inch thickness. Fold the dough into thirds (like a letter). Turn the dough horizontally, then gently press or roll it again to half an inch thick. Repeat this folding and rolling process two more times, for a total of three folds.
- After the final fold, roll the dough one last time to a uniform half-inch thickness.
- Using a 2.5-inch biscuit cutter (or a sharp-edged cup), press straight down firmly into the dough to cut out rounds. Do NOT twist the cutter, as this seals the edges and prevents rising. Gather any scraps, gently press them together (without kneading), and cut out remaining biscuits.
- Place the cut biscuits on your prepared baking sheet, ensuring they are lightly touching each other. This helps them rise higher.
- Bake for about 12-15 minutes, or until the tops are golden brown and they have risen beautifully.
- Serve warm, ideally with butter, jam, or your favorite toppings. Enjoy!
Recipe Notes
- Buttermilk Substitute: If you don’t have buttermilk, combine 1 tablespoon of white vinegar or lemon juice with regular milk to make 1 cup. Let it sit for 5-10 minutes until it curdles slightly. For this recipe, you’ll need two such cups.
- Avoid Kneading: Overworking the dough develops gluten, leading to tough biscuits. Mix and handle the dough as little as possible.
- No Twisting Cutter: Press straight down and lift up when cutting biscuits to allow for maximum rise and flakiness.
- Biscuits Should Touch: Placing biscuits close together on the baking sheet provides mutual support and encourages a taller, fluffier rise.
Nutrition Information
- Serving Size:
- 1 biscuit
- Calories:
- 183 kcal
- Carbohydrates:
- 21 g
- Protein:
- 3 g
- Fat:
- 10 g
- Saturated Fat:
- 6 g
- Polyunsaturated Fat:
- 0.5 g
- Monounsaturated Fat:
- 2 g
- Trans Fat:
- 0.4 g
- Cholesterol:
- 26 mg
- Sodium:
- 243 mg
- Potassium:
- 59 mg
- Fiber:
- 1 g
- Sugar:
- 2 g
- Vitamin A:
- 308 IU
- Calcium:
- 77 mg
- Iron:
- 1 mg
Additional Recipe Details
- Course: Breakfast, Brunch, Side Dish
- Cuisine: American, Southern
- Keywords: Buttermilk Biscuits, Flaky Biscuits, Homemade Biscuits, Easy Biscuits
Tried this recipe? Share your creations!
Mention @preciouscore or tag #PreciousCore on Instagram!
*This post contains affiliate links, which means I may earn a small commission if you make a purchase through them, at no extra cost to you.