
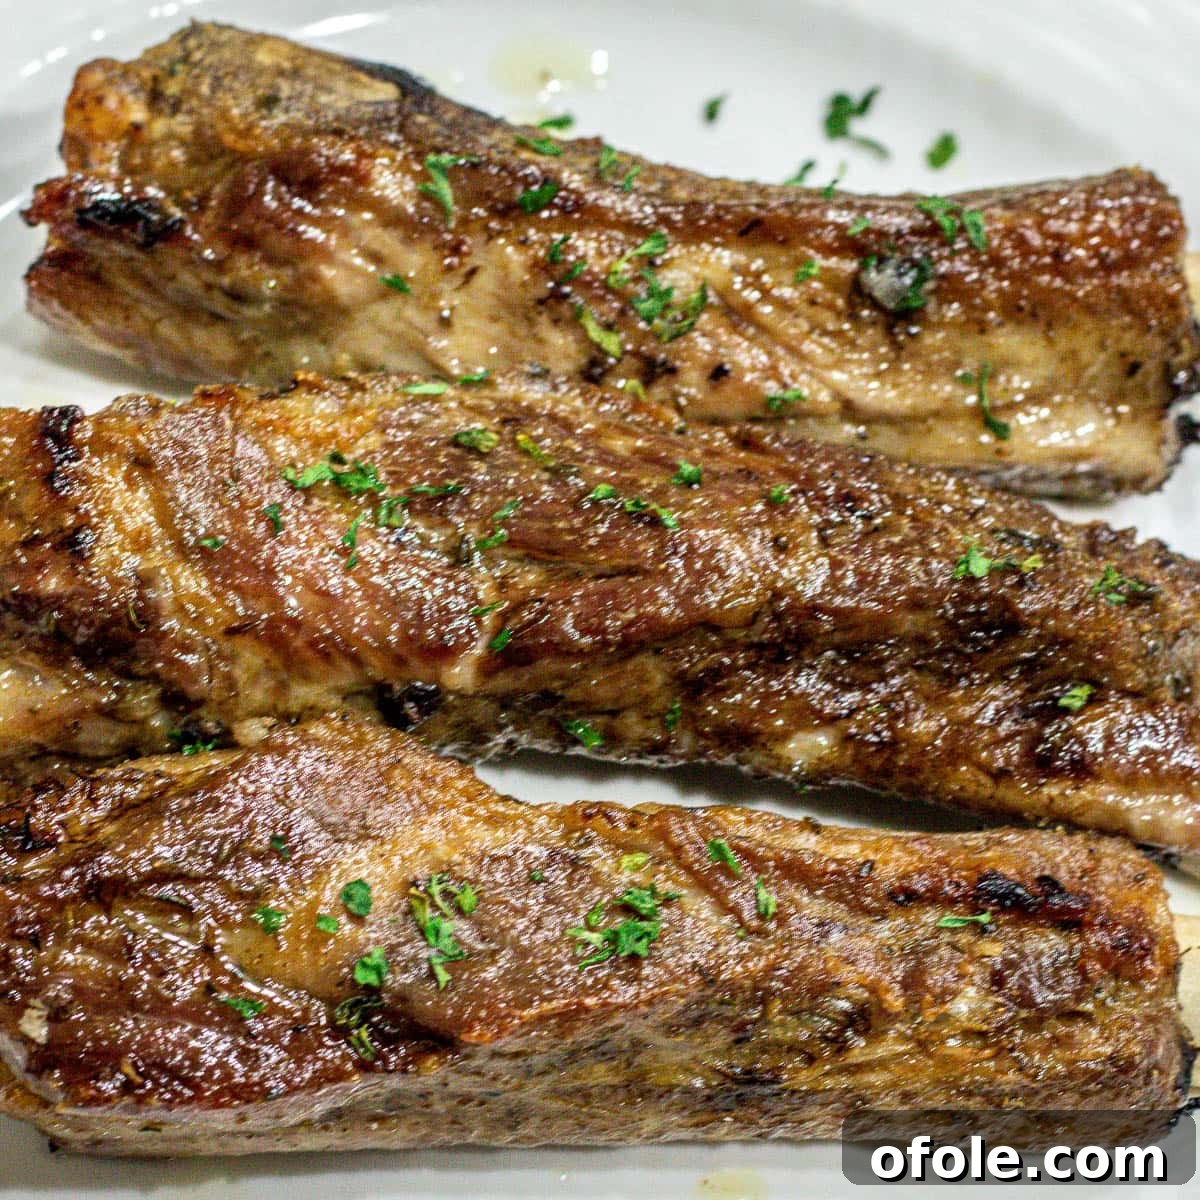
Prepare to savor the most delicious, fall-off-the-bone tender Baked Dry Rub Ribs you’ve ever experienced! This recipe simplifies the art of cooking perfect ribs, transforming a humble rack into a culinary masterpiece with minimal effort. Using a potent yet simple homemade dry rub, these succulent pork ribs are versatile enough for a casual weeknight dinner yet elegant enough to star as the centerpiece of your holiday feast or any special occasion. Forget the grill or long hours with a slow cooker – your oven is about to become your secret weapon for rib perfection.
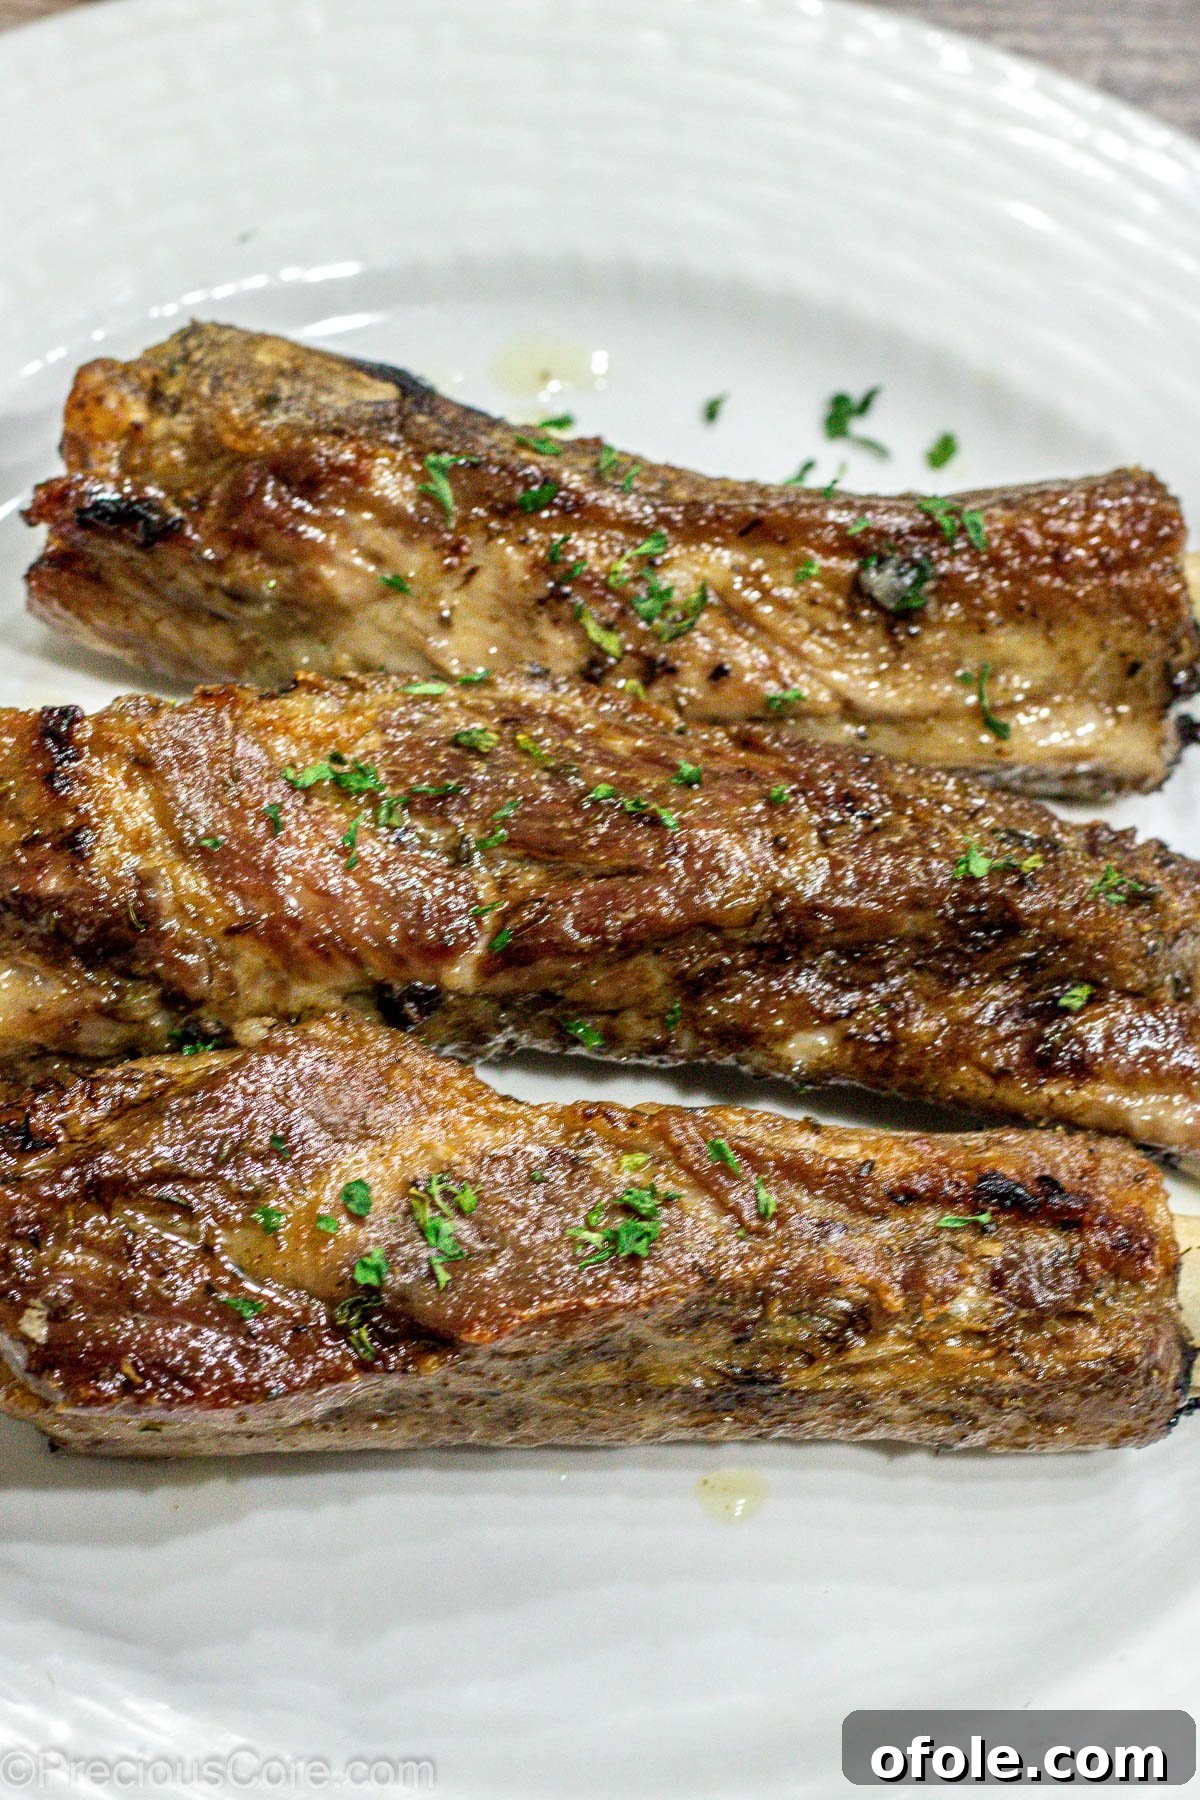
There’s an undeniable magic when racks of ribs slowly cook in the oven, filling your home with an intoxicating aroma. This recipe consistently earns rave reviews, particularly from my own children who simply adore the rich flavor and melt-in-your-mouth tenderness of these pork ribs. Pair them with comforting 3 Cheese Mac and Cheese, perfectly Roasted Baby Potatoes, or a vibrant medley of Sauteed Vegetables, and you’ve got a complete, unforgettable meal ready to impress.
Every time these oven-baked dry-rubbed ribs grace our table, it feels like a celebration. I recall making them for Christmas dinner a couple of years ago, and our visiting friends were absolutely smitten, declaring them the “best ribs ever.” It’s a testament to how phenomenal this recipe truly is – simple ingredients, extraordinary results. You don’t need fancy equipment or a culinary degree to achieve restaurant-quality ribs right in your own kitchen.
Table of Contents
- Why You’ll Love This Recipe
- Ingredients For Baked Ribs With Dry Rub
- How To Bake Dry Rub Ribs
- Expert Tips for Perfect Ribs
- Variations and Substitutions
- Recipe Frequently Asked Questions
- What To Serve It With
- More Easy Dinner Recipes
- Baked Dry Rub Ribs Recipe Card
Why You’ll Love These Ultimate Baked Dry Rub Ribs
Beyond their incredible flavor, these oven-baked dry rub ribs offer a host of advantages that make them a go-to recipe for any home cook:
- Effortlessly Simple: This recipe is surprisingly easy, requiring minimal hands-on time. Most of the work is done by your oven! You’ll spend about 15 minutes on prep, and then let the low heat work its magic, transforming tough meat into tender perfection. It’s perfect for busy weeknights when you want maximum flavor with minimum fuss.
- Pantry-Friendly Dry Seasonings: Say goodbye to chopping fresh herbs and ingredients. Our secret lies in a carefully balanced blend of dried seasonings that you likely already have in your spice rack. This means less prep work and a more consistent flavor profile every single time. The simple combination of everyday spices creates an unexpectedly complex and utterly delicious rub.
- Incredibly Flavorful: These ribs are a true testament to the fact that you don’t need a complicated ingredient list to create an extraordinary meal. The homemade dry rub penetrates deep into the meat as it bakes, infusing every bite with a perfect balance of savory, aromatic, and slightly sweet notes. The final broil adds a caramelized crust that locks in juices and amplifies the rich taste.
- Remarkably Versatile: Whether you serve them as a hearty appetizer alongside a homemade hot sauce or a sweet BBQ sauce for a saucier experience, or as the main course with a refreshing lettuce salad or fluffy easy coconut rice, these tender ribs adapt beautifully. The succulent meat can be enjoyed in countless ways, making it a flexible addition to your culinary repertoire.
- Perfect for Any Season: Enjoy delicious ribs year-round without being dependent on the weather. These oven-baked ribs are a convenient alternative to firing up the grill in winter or waiting all day for slow cooker ribs. Your oven efficiently delivers consistently tender and flavorful results, no matter the season.
We are confident you’ll adore these delectable ribs as much as my family does. They’re officially “kid-approved” and a constant hit on the blog!
Key Ingredients for Baked Ribs with Dry Rub
Crafting truly exceptional dry rub ribs requires just a few quality ingredients: your chosen cut of ribs, a touch of oil, and a selection of aromatic spices for the homemade dry rub. Each component plays a vital role in achieving that sought-after tender, flavorful result.
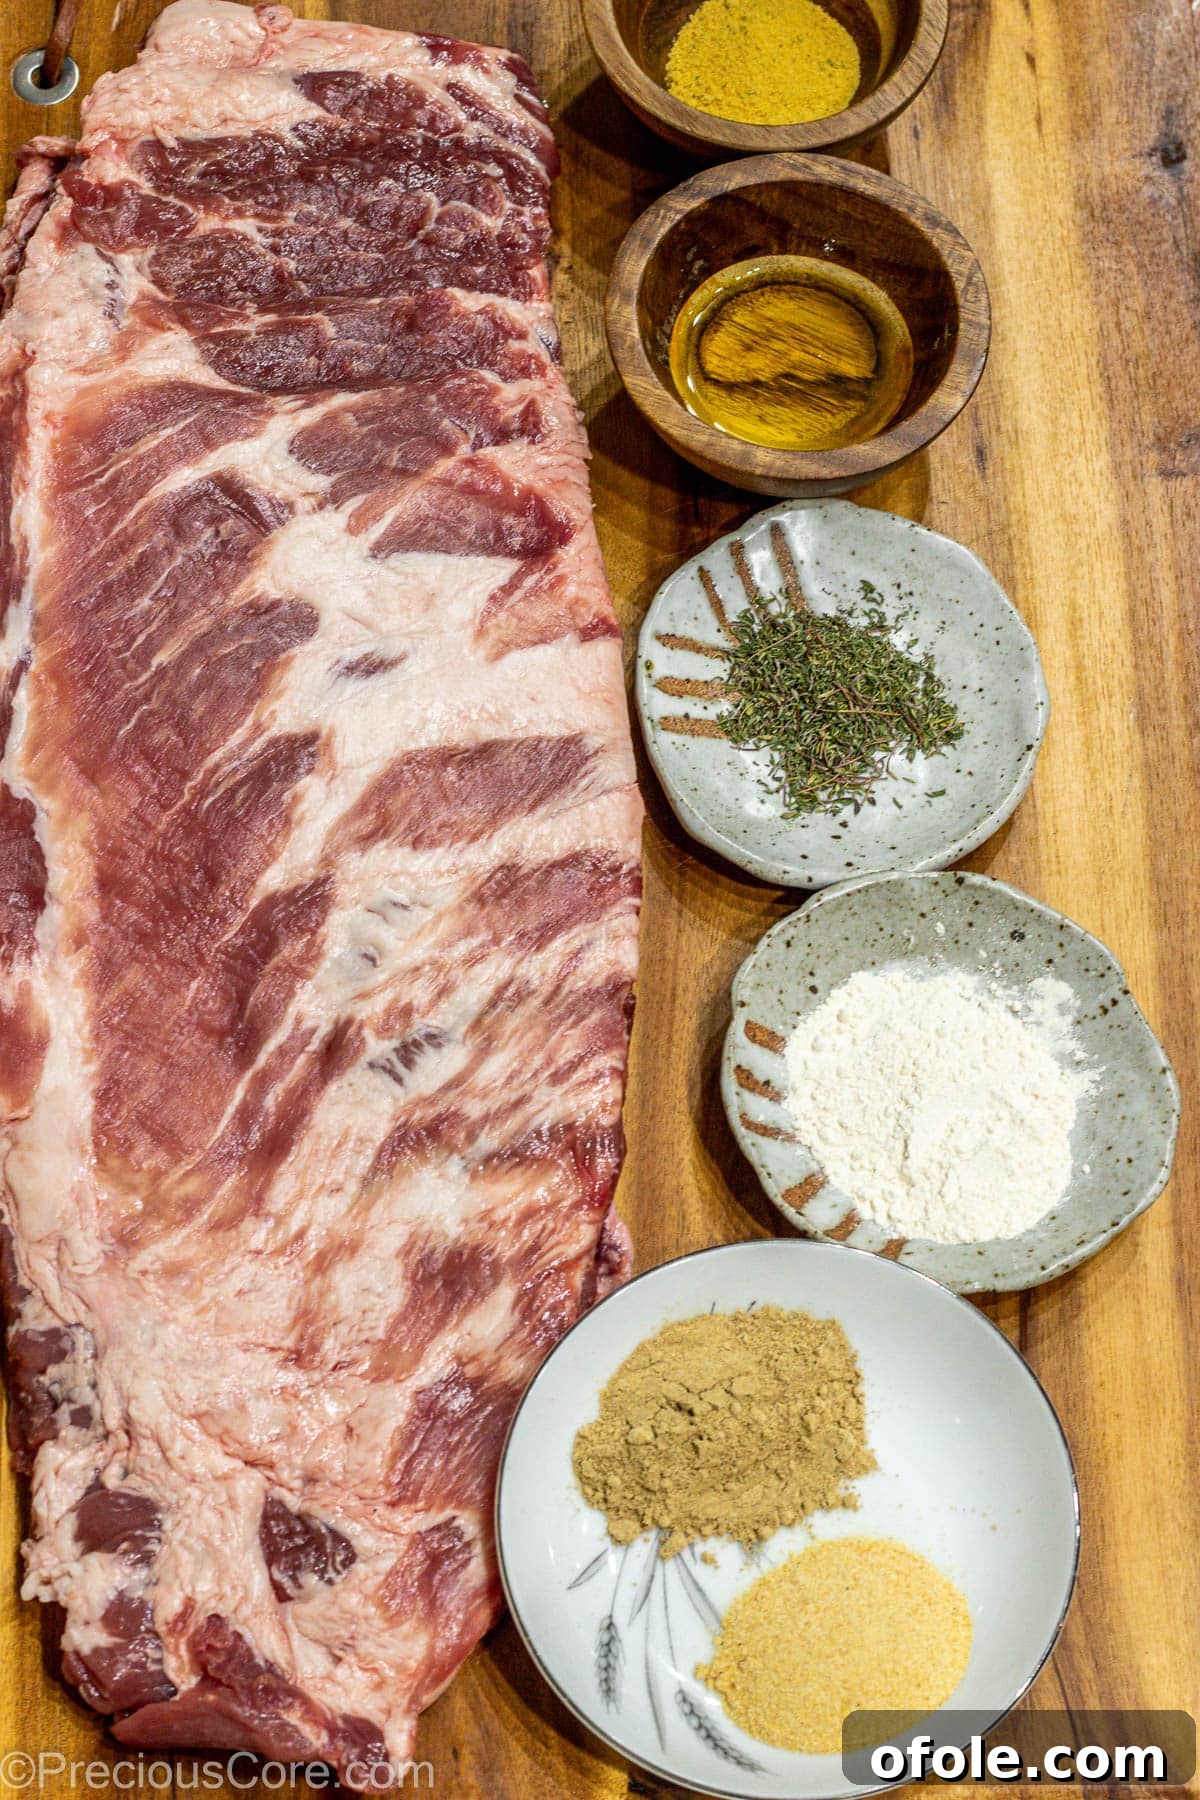
- Spare Ribs (St. Louis Style Ribs): For this recipe, we recommend a 4-pound rack of spare ribs, ideally St. Louis style, which are trimmed to a more uniform, rectangular shape with the sternum bone and cartilage removed, making them easier to handle and cook evenly. You can purchase a whole rack or individual ribs, though we’ll discuss cutting them later for optimal seasoning.
- Olive Oil: A couple of tablespoons of olive oil serve as a binding agent for the dry rub, helping the spices adhere better to the meat and promoting a beautiful crust during baking and broiling. It also contributes a subtle richness.
- Salt: Essential for seasoning and enhancing all other flavors. You can use standard table salt or kosher salt. Remember that kosher salt has a larger grain and is less concentrated than table salt, so you might need to use a slightly larger quantity if substituting.
- Chicken Bouillon Powder: This might seem like an unconventional addition, but chicken bouillon powder is a fantastic secret ingredient. It doesn’t make the ribs taste like chicken; instead, it provides a deep, savory umami punch that elevates the overall flavor profile of the pork, making it incredibly addictive.
- Rib Rub Spices and Herbs: This carefully selected blend forms the heart of our dry rub, delivering a symphony of flavors:
- Garlic Powder: Offers a foundational savory, pungent note.
- Ginger Powder: Adds a subtle warmth and aromatic complexity, distinguishing this rub from others.
- Onion Powder: Complements the garlic, providing another layer of savory depth.
- Dried Thyme: Contributes an earthy, herbaceous aroma that pairs wonderfully with pork.
- Ground Black Pepper: Delivers a gentle heat and a classic peppery finish.
How to Bake Dry Rub Ribs: A Step-by-Step Guide to Perfection
Achieving perfectly tender and flavorful oven-baked ribs is a straightforward process when you follow these simple steps:
- Prepare the Ribs and Dry Rub: Begin by patting your rack of ribs thoroughly dry with paper towels. This crucial step helps the rub adhere better and ensures a crispier exterior. Next, locate and remove the thin, tough outer membrane, often called “silver skin,” from the bone side of the ribs. This membrane, if left on, can make the ribs chewy and prevent the seasonings from fully penetrating the meat. In a separate small bowl, combine all your dry rub spices (salt, chicken bouillon powder, black pepper, garlic powder, ginger powder, onion powder, and dried thyme). Mix them well to create a uniform blend.
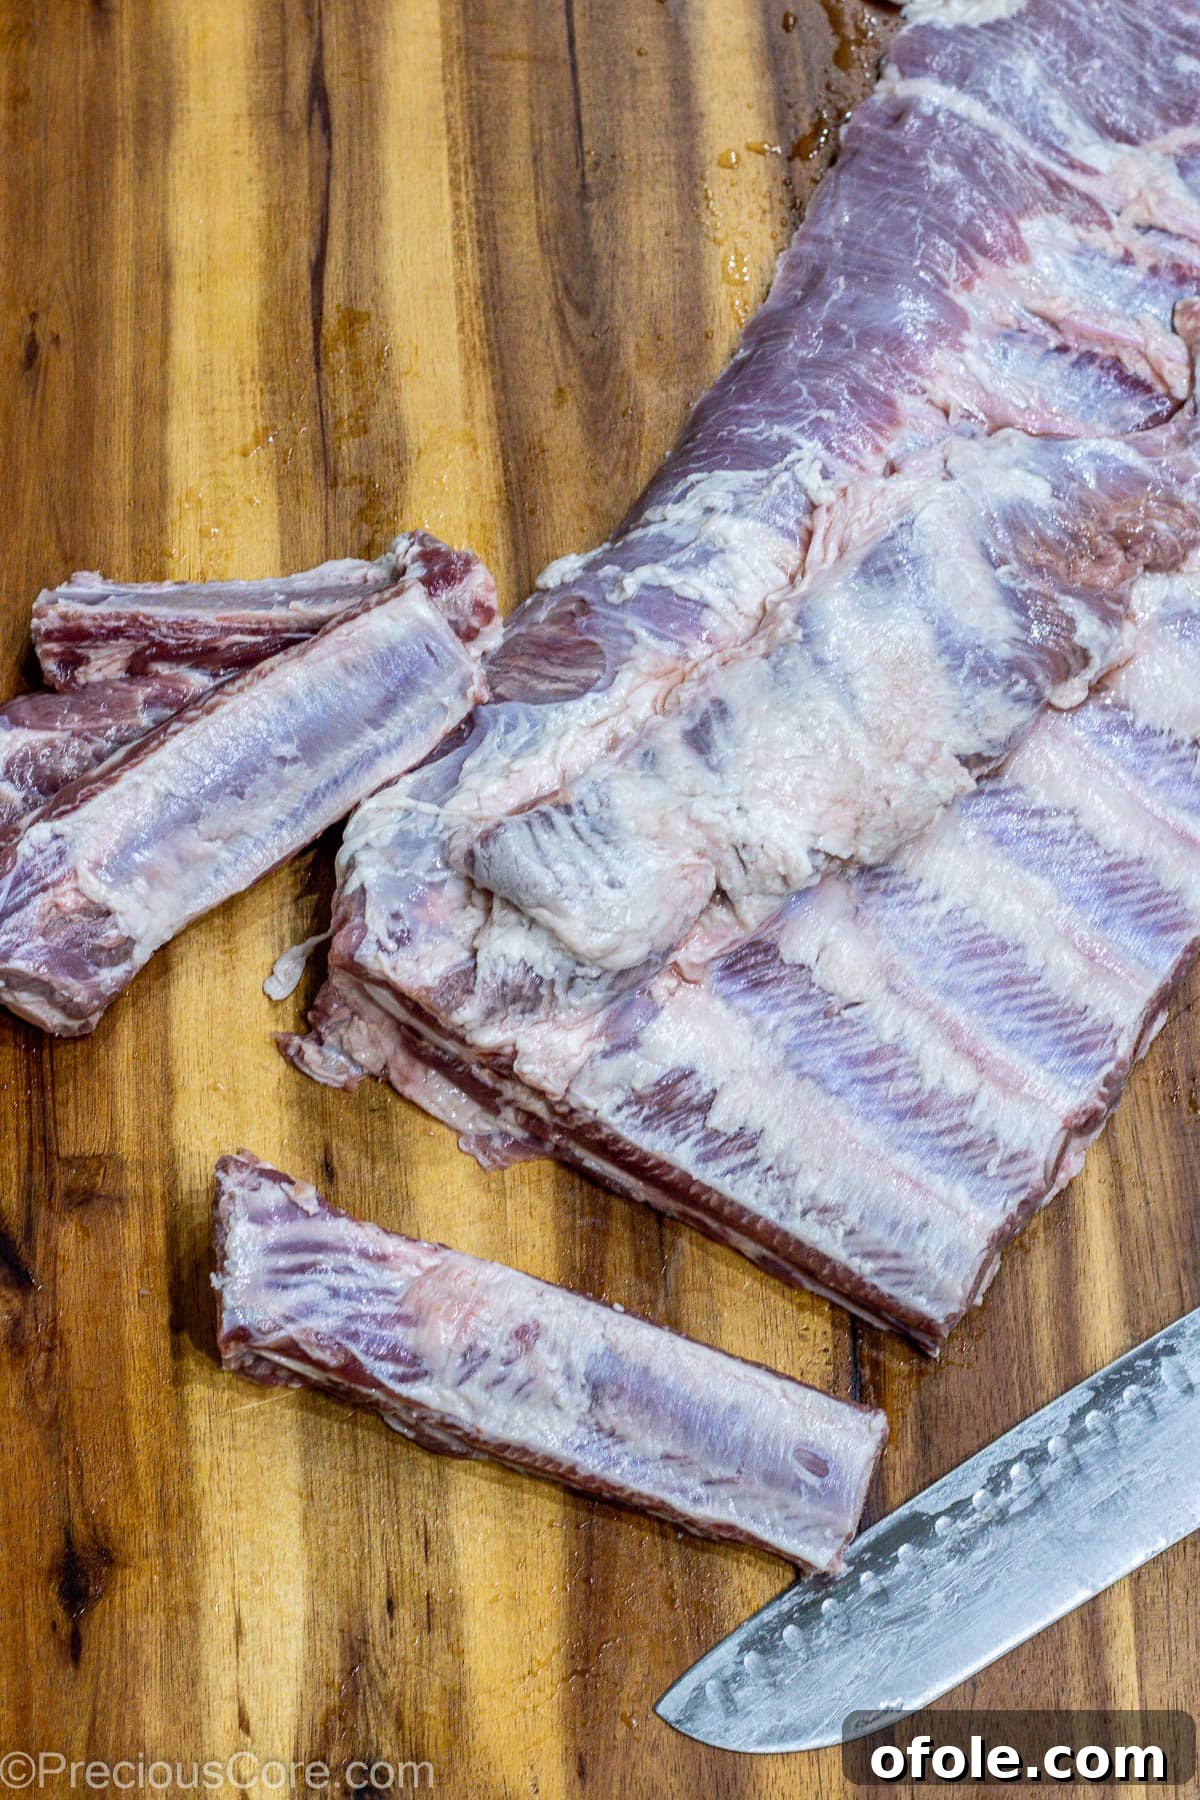
- Cut and Season the Ribs for Maximum Flavor: This is a key step for optimal flavor absorption. Instead of seasoning a whole rack, cut the rack of ribs into individual portions (or 2-3 bone segments if preferred). Cutting them first allows the dry rub to coat all sides of each rib piece, ensuring every bite is packed with flavor. The easiest way to cut them is with the bone side facing up, using the bones as a natural guide for your knife. Once cut, drizzle the rib portions with olive oil and toss to coat lightly.
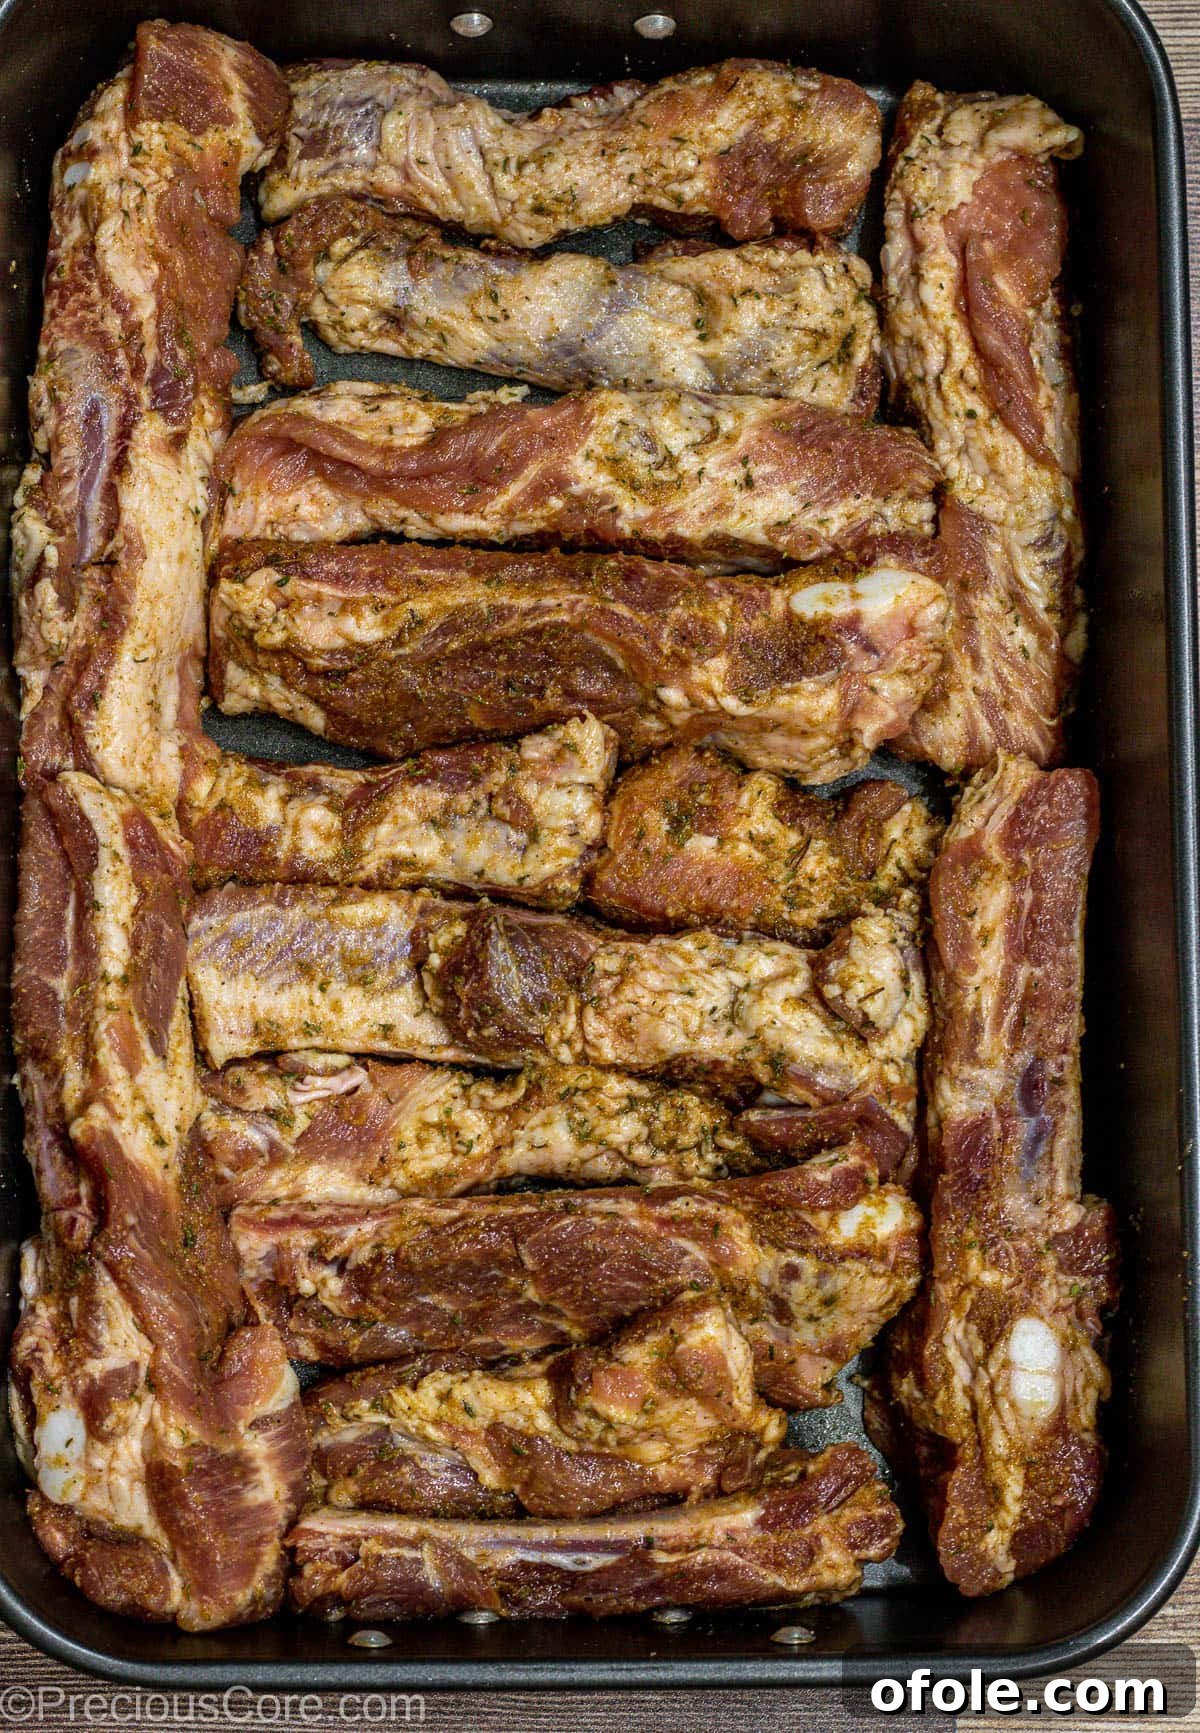
- Apply the Dry Rub Generously: Add the prepared spice mixture to the oiled rib portions. Using clean hands, mix everything together thoroughly, ensuring each rib is completely coated on all sides – front, back, and edges. Don’t be shy; a generous coating of the dry rub is what gives these ribs their incredible taste. Once seasoned, arrange the ribs in a 9×13 inch baking dish (or a similarly sized pan), ensuring the meaty side faces up.
- Bake Low and Slow for Tenderness: Tightly cover the baking dish with aluminum foil. This creates a steamy environment that tenderizes the ribs without drying them out. Place the covered dish in a preheated oven at a low temperature of 300 degrees F (150 degrees C) and bake for 1 hour and 30 minutes. Baking at this lower heat is crucial for achieving truly fall-off-the-bone tender results. Higher temperatures will cause the meat to seize up and become tough and dry, so patience is key here.
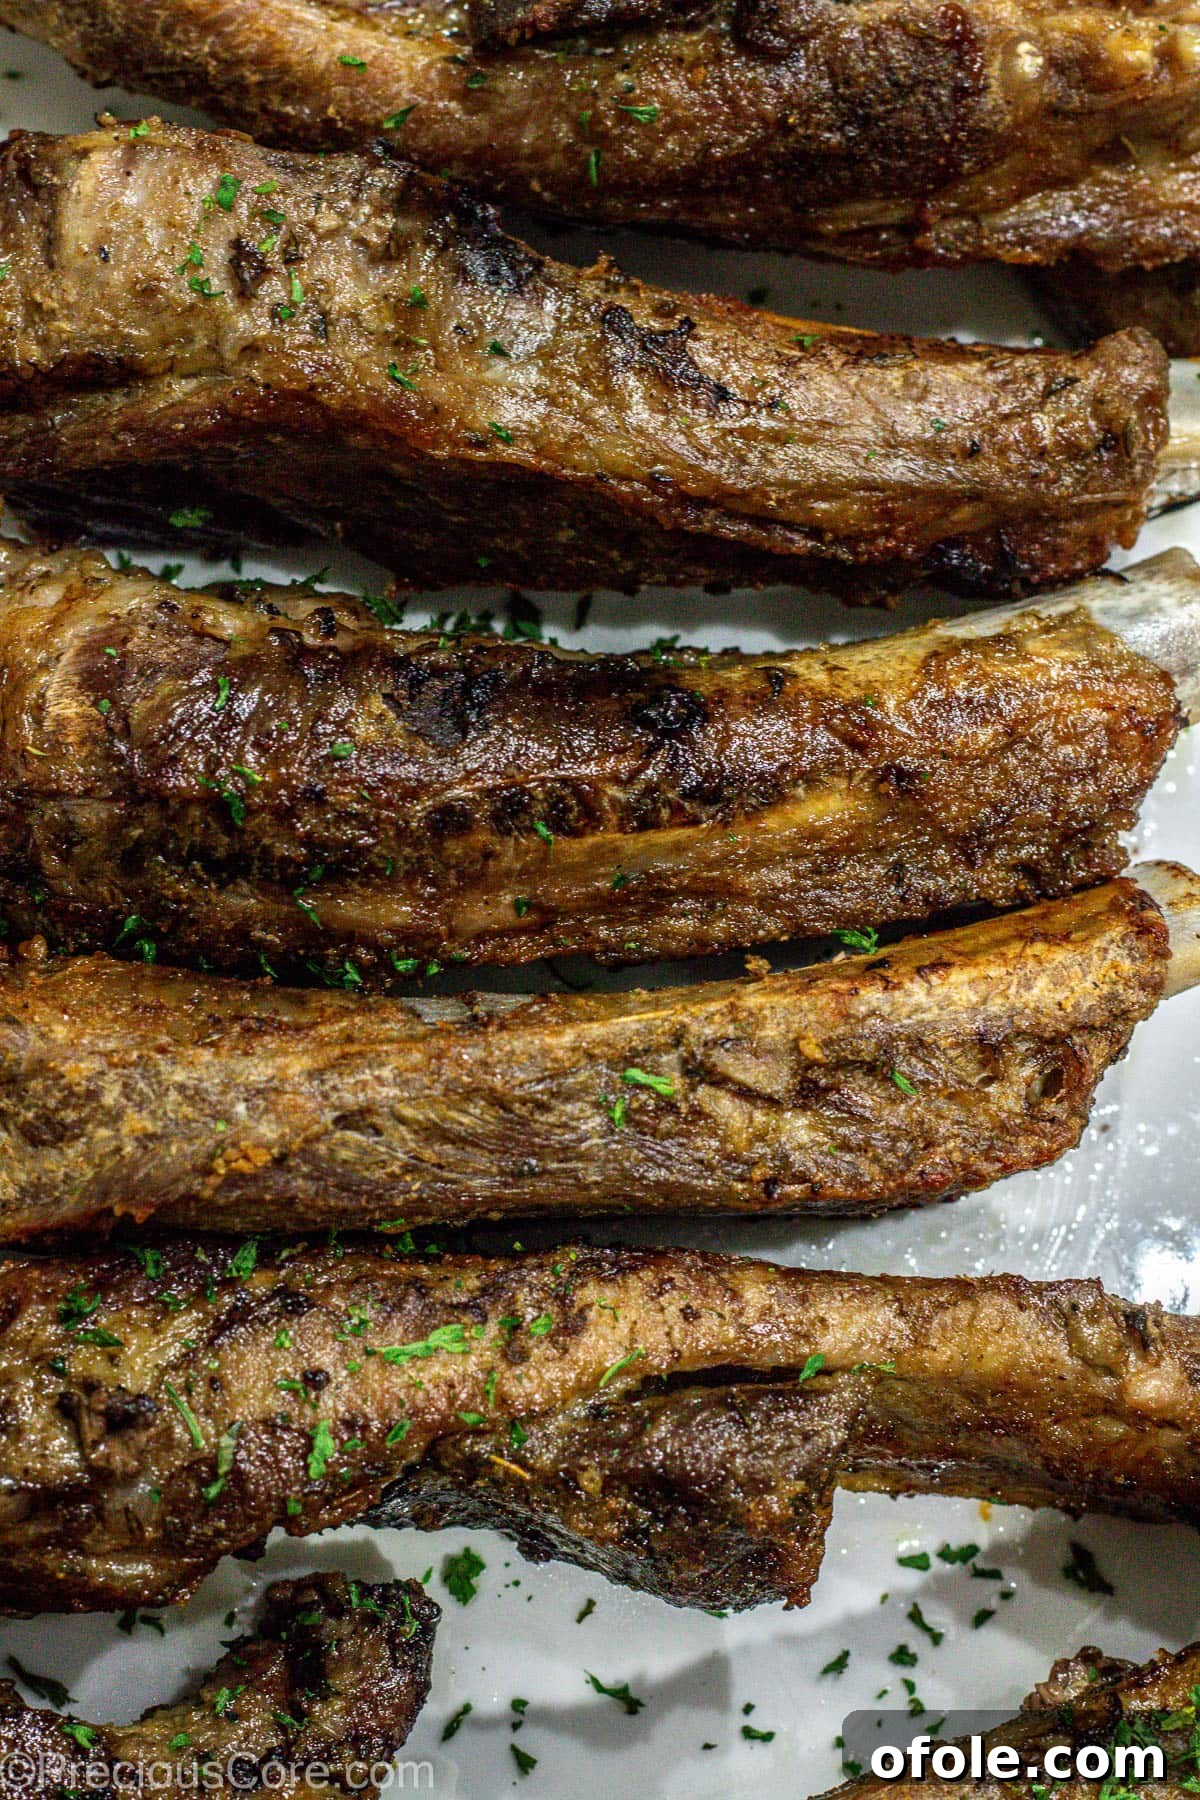
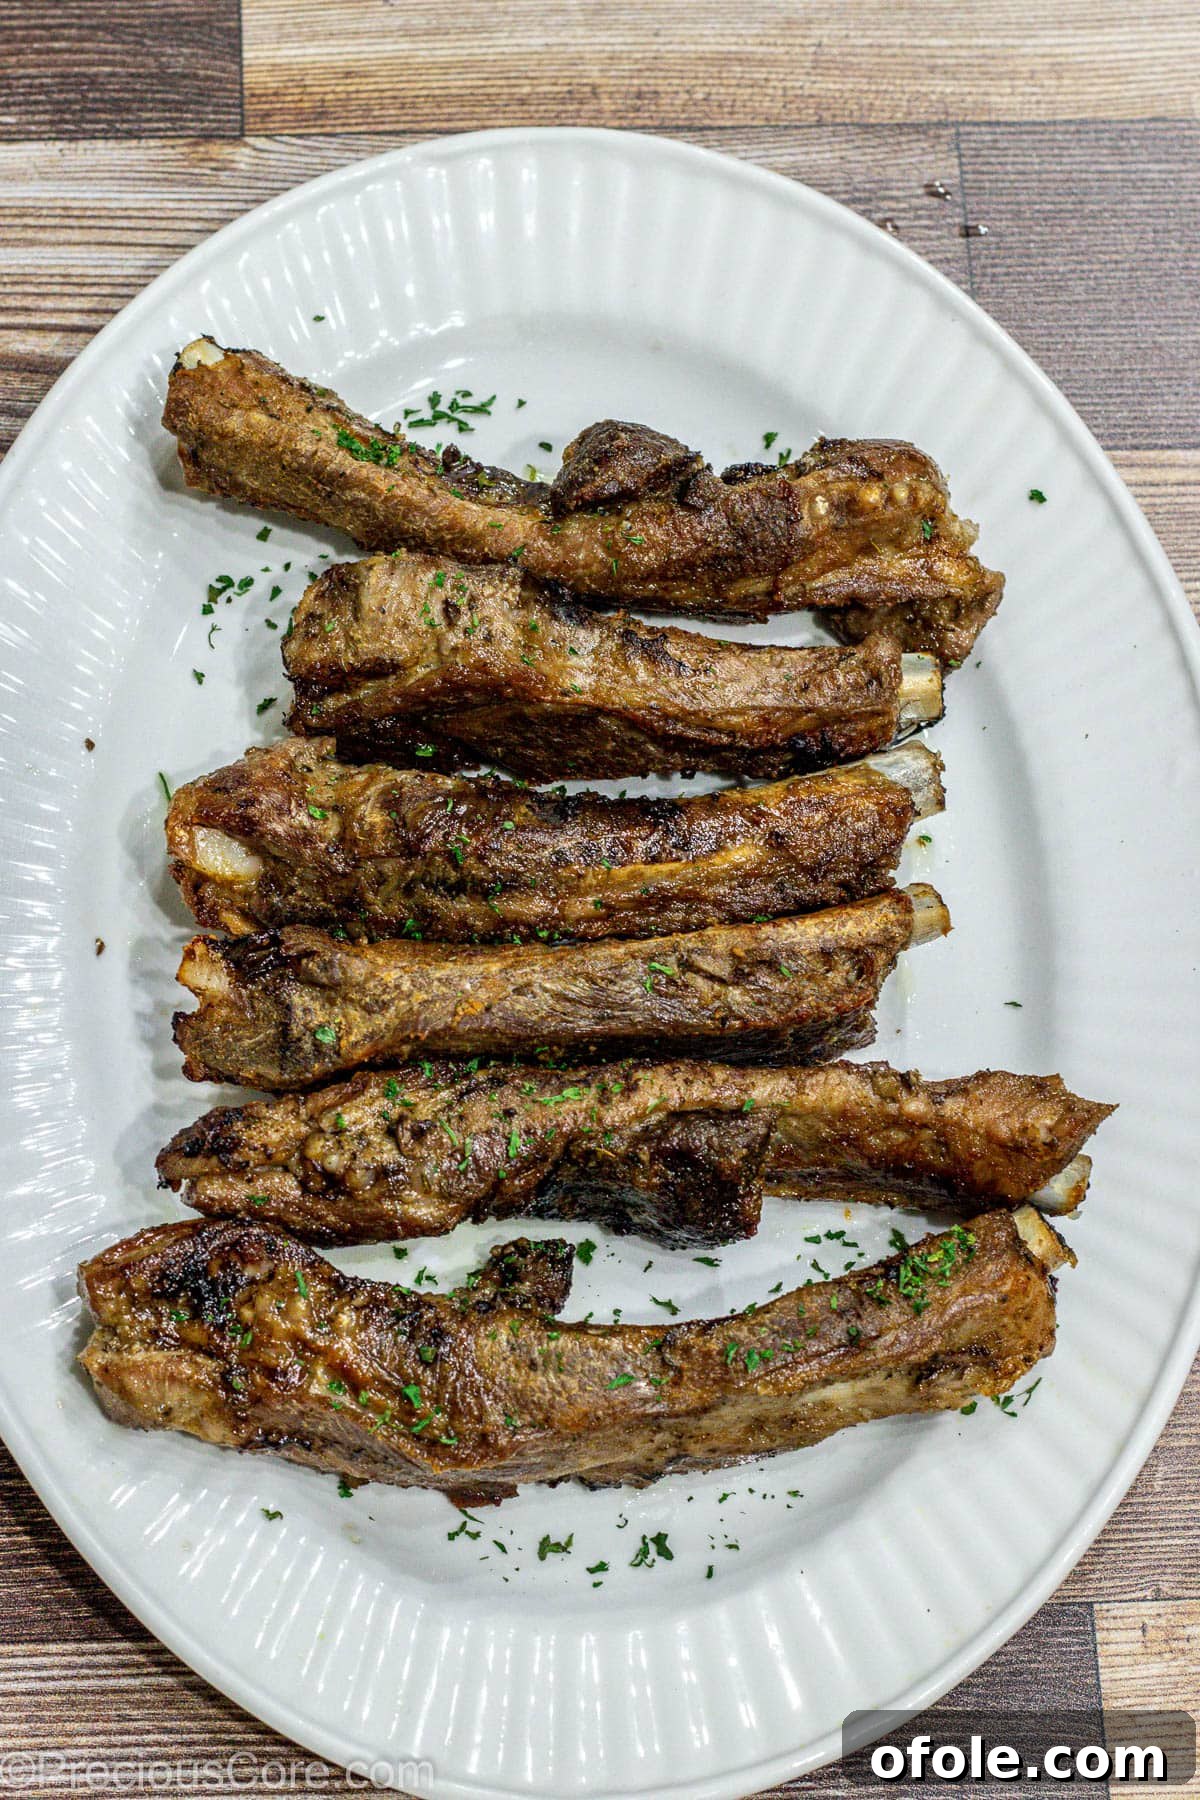
- Finish with a Flavorful Broil: After the initial baking, carefully remove the ribs from the oven. At this point, they will have released some liquid; you can drain this away if desired. Transfer the ribs to a wire rack set over a baking sheet lined with aluminum foil (this makes cleanup much easier). Place the baking sheet with the ribs under your oven’s broiler for 5 minutes. Watch them closely, as broilers can vary in intensity and caramelization happens quickly. Flip the ribs over and broil for another 5 minutes, or until you achieve a beautiful, caramelized crust and deep, rich color on both sides.
- Serve and Enjoy: Remove the perfectly broiled ribs from the oven and serve them warm with your favorite side dishes. Get ready for an explosion of flavor and a texture that will have everyone reaching for more!
Expert Tips for Achieving Perfect Baked Dry Rub Ribs
To ensure your dry rub ribs are absolutely perfect every time, keep these invaluable tips in mind:
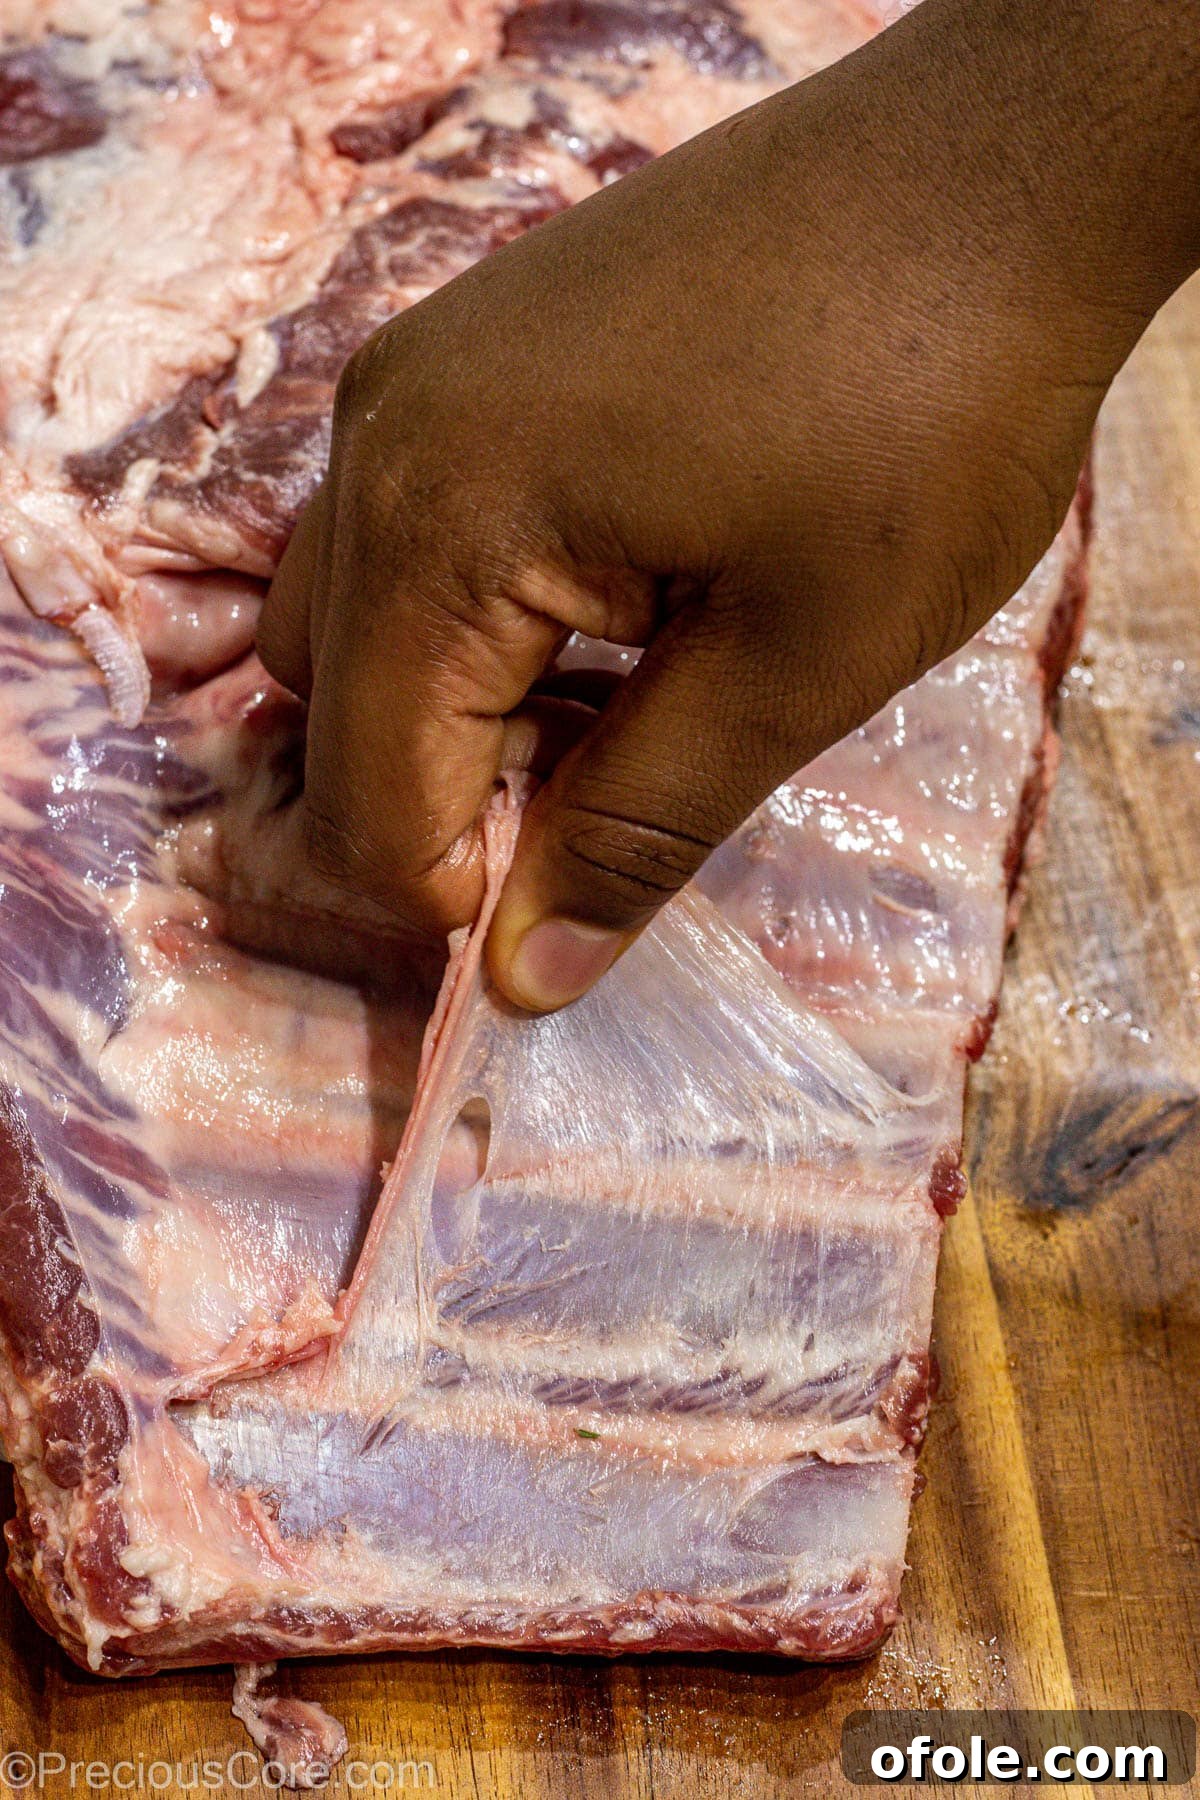
- Mastering Membrane Removal: The easiest way to remove the silver skin membrane from the back of the ribs is to do it before you cut the rack into individual portions. Lay the rack on a cutting board, bone-side up. Using a small, sharp paring knife or chef’s knife, carefully slide it under the membrane at one end of the rack, lifting a small edge until it’s loose enough to grasp. Then, with the help of a paper towel (which provides a better grip), firmly grasp the loose edge of the membrane with your hands and steadily pull it away from the rib bone. It should peel off in one satisfying piece. Don’t skip this step; it makes a huge difference in the final texture of your ribs.
- Sharp Knife for Clean Cuts: While it might seem obvious, having a truly sharp knife (a chef’s knife or a sturdy boning knife) is essential for safely and cleanly cutting the ribs into individual portions. A dull knife can slip, causing injury, or butcher the meat, making uniform cooking more difficult.
- Optimal Rib Storage: If you find yourself with irresistible leftover ribs (a rare occurrence!), allow them to cool completely to room temperature. Once cooled, cover them tightly with plastic wrap or transfer them to an airtight container. Promptly move them to the refrigerator. Do not leave cooked ribs at room temperature for extended periods to prevent bacterial growth. Properly stored, they’ll remain delicious for 3-4 days.
- Checking for Doneness and Tenderness: While the baking time provided is generally reliable, you can always confirm doneness and tenderness with an internal temperature check. Once the ribs reach an internal temperature of about 200 degrees Fahrenheit (93 degrees C), the collagen has sufficiently broken down, resulting in wonderfully tender meat. The USDA states that pork is safe to eat once it reaches 145 degrees Fahrenheit (63 degrees C), but for that desirable fall-off-the-bone texture, aiming for a higher temperature around 200-203°F is ideal.
- The Magic of Broiling: Do not underestimate or skip the broiling stage! This short, high-heat burst is what truly transforms your ribs, guaranteeing a gorgeous, flavorful caramelization on the outside. The dry rub intensifies in flavor, developing a deeper, more complex profile, and the slightly charred outer coating provides a delightful texture contrast to the succulent interior. It’s the final flourish that makes these ribs irresistible.
Flavorful Variations and Smart Substitutions for Your Ribs
Once you’ve mastered the basic recipe, feel free to get creative and customize your dry rub ribs with these exciting variations and substitutions:
- Amp Up the Heat (Spicy Ribs): For those who love a fiery kick, easily incorporate some heat into your dry rub. Add a generous pinch or two of cayenne pepper, a teaspoon of chili powder, or even a smoky chipotle powder to the spice blend. Start with a smaller amount and adjust to your preferred level of spiciness.
- Try Beef Ribs: While this recipe is optimized for pork spare ribs, it works wonderfully with beef ribs as well. The cooking time might need a slight adjustment depending on the thickness and cut of the beef ribs (they may require a bit longer), but the dry rub and baking method will yield similarly tender and flavorful results.
- Barbecue Sauce Finish (Saucy Ribs): If you crave saucy ribs, you can certainly brush your baked and broiled ribs with your favorite barbecue sauce before serving. For the best result, warm your chosen BBQ sauce slightly, then brush it evenly over the ribs in the last few minutes of broiling, or immediately after they come out of the oven. This creates a sticky, caramelized glaze. You can use a high-quality store-bought sauce or whip up your own homemade version for an extra personal touch. Dipping a brush directly into a small bowl of sauce is an easy, mess-free way to apply it.
Beyond these suggestions, there are many “secret ingredients” you could explore to make your ribs uniquely yours. Consider a dash of liquid smoke for a hint of grill flavor, replacing some of the salt with garlic salt for a more intense garlic punch, adding dry mustard for a tangy undertone, or incorporating a tablespoon of brown sugar or turbinado sugar into the rub for a touch of sweetness and extra caramelization. If this is your very first time making this rib recipe, we recommend sticking to the original dry rub to truly appreciate its balanced flavor, then let your culinary adventurousness shine on your next batch!
Love pork as much as we do? Don’t miss out on these other fantastic recipes: our perfectly Pan Seared Boneless Pork Chops and the rich, comforting Pork Tenderloin In Creamy Mushroom Sauce.
Recipe Frequently Asked Questions
You can cook ribs immediately after applying the dry rub. However, for deeper flavor penetration, you can rub them and let them rest in the refrigerator for at least 30 minutes, or even overnight (up to 12-24 hours). If refrigerating, cover them loosely.
Bake dry rub ribs at 300 degrees Fahrenheit (150 degrees C) for approximately 1 hour and 30 minutes. This low-and-slow method ensures the ribs become incredibly tender. After baking, finish them by broiling for 5-10 minutes (flipping once) to develop a beautiful, caramelized crust.
Yes, absolutely! It’s essential to cover the ribs tightly with aluminum foil during the initial baking stage. This traps moisture, creating a steamy environment that tenderizes the meat and prevents it from drying out. Once they are tender, remove the foil for the broiling step to achieve a gorgeous color and crispy exterior.
Delicious Side Dishes: What To Serve With Baked Dry Rub Ribs
Baked Dry Rub Ribs are incredibly versatile and pair beautifully with a wide array of side dishes. Here are some of our favorites:
- Creamy Buttermilk Mashed Potatoes
- Crisp Garlic Butter Green Beans
- Warm Garlic Butter Rolls
- Flavorful Easy Roasted Potatoes
- Sweet Fried Plantains (for a unique twist)
- Ultimate 3 Cheese Mac and Cheese
- Classic Deviled Eggs
- Creamy Coleslaw or a simple garden salad for freshness.
- Corn on the cob, either boiled, grilled, or roasted.
More Easy Dinner Recipes You’ll Love
Looking for more simple yet delicious meal ideas? Explore these other fantastic dinner recipes that are sure to become family favorites:
- Pan Seared Boneless Pork Chops
- Pan Seared Lamb Chops
- Perfect Pan Grilled Salmon
- Juicy Pan Seared Ribeye Steak
- Quick Pan Seared Tilapia
- Pork Tenderloin In Creamy Mushroom Sauce
We truly hope you enjoy this Baked Dry Rub Ribs recipe as much as our family does. If you love this recipe, please consider leaving a star rating below in the recipe card. Your feedback means the world to us!
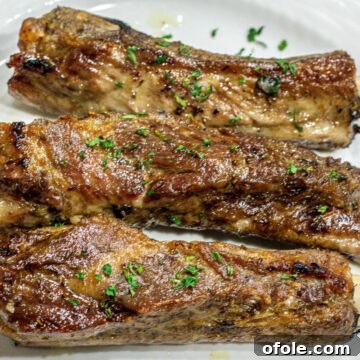
Baked Dry Rub Ribs
The tastiest Baked Dry Rub Ribs you will ever have! Made with a simple dry rub, these pork ribs are easy enough to make for weeknights and fancy enough to make for the holidays or special occasions.
Ingredients
- 4 pounds spare ribs (St. Louis Style recommended)
- 2 Tablespoons olive oil
- 1 teaspoon salt
- 2 teaspoons chicken bouillon powder
- ¼ teaspoon ground black pepper
- 1 Tablespoon garlic powder
- 1 Tablespoon ginger powder
- 1 Tablespoon onion powder
- ½ Tablespoon dried thyme
Instructions
- Preheat oven to 300 degrees F (150 degrees C).
- Prepare the ribs: Pat the ribs dry with paper towels. If the ribs are not separated, remove the membrane from the back of the rack first (see expert tips), then cut the rack into individual ribs (1-2 bone portions).
- Add the olive oil to the rib portions in a large mixing bowl and toss to combine, ensuring each piece is lightly coated.
- To the oiled ribs, add the salt, chicken bouillon powder, black pepper, garlic powder, ginger powder, onion powder, and dried thyme.
- Mix everything together thoroughly with clean hands, ensuring the seasoning completely coats all surfaces of the ribs.
- Place the seasoned ribs in a 9×13 inch baking dish, arranging them meaty side up.
- Cover the baking dish tightly with aluminum foil. This is crucial for retaining moisture and tenderizing the meat.
- Place the covered baking dish in the preheated oven and cook for 90 minutes.
- While the ribs bake, prepare a large baking sheet (18×13 inch) by lining it with aluminum foil. If you have one, place a wire baking rack on top of the foil. If not, lightly brush or spray the foil with oil to prevent sticking.
- Once baked, remove the ribs from the oven. Carefully drain any accumulated cooking liquid. Transfer the ribs from the baking dish to the prepared baking rack (or directly onto the oiled foil).
- Increase oven temperature to high broil. Place the ribs back in the oven and broil for 5 minutes. Remove, flip each rib to the other side, and broil for another 5 minutes, or until a beautiful, slightly charred crust forms.
- Remove the ribs from the oven and serve warm with your favorite side dishes. Enjoy!
Notes
- Ribs: You can use a 4-pound rack of spare ribs or already individual ribs. Both will work well. For a different flavor, consider substituting with beef ribs, adjusting cooking time as needed.
- Rosemary: Fresh or dried rosemary pairs wonderfully with pork. Feel free to add ½ teaspoon dried rosemary or a small sprig of fresh rosemary to the rub for an extra aromatic layer.
- Spicy: To introduce heat, mix ½ to 1 teaspoon of cayenne pepper or chili powder into your dry rub seasoning blend.
Nutrition
Additional Info
Mention @preciouscore or tag #PreciousCore!