

The Ultimate Guide to Baking Soft & Fluffy Homemade Milk Bread (Pain au Lait)
There’s an undeniable magic that fills the kitchen when fresh bread is baking – that comforting aroma, the gentle warmth, and the anticipation of biting into a perfectly soft loaf. Sometimes, the most beautiful culinary journeys begin with an unexpected detour. Just recently, what was planned as a different recipe post took a delightful turn when internet woes struck. Instead of letting disappointment win, I embraced the challenge and transformed my kitchen into a bustling bakery, dedicated to the art of homemade bread. The result? An utterly irresistible batch of milk bread, locally known as ‘Pain au Lait’ in Cameroonian bakeries, that was so good, it completely overshadowed our planned dinner!
This isn’t just any bread; it’s a staple in many homes, cherished for its incredibly tender crumb, subtle sweetness, and delicate aroma. From the moment it comes out of the oven, its allure is undeniable. This recipe promises to bring that same bakery-quality experience right into your home, making you feel like a master baker even if you’ve never kneaded dough before. Get ready to discover the joy of baking a bread so soft, so fragrant, and so utterly delicious, your family will be begging for more.
Why You’ll Fall in Love with This Milk Bread Recipe
Homemade milk bread, or Pain au Lait, is more than just a simple loaf; it’s an experience. Its unique characteristics set it apart from other breads and make it a family favorite:
- Unparalleled Softness: Thanks to the inclusion of milk and butter, this bread boasts an incredibly tender, melt-in-your-mouth texture that stays soft for days.
- Delicate Sweetness: A subtle touch of sugar perfectly balances the rich flavor, making it versatile for both sweet and savory pairings.
- Irresistible Aroma: The smell of freshly baked milk bread filling your home is pure bliss, creating a warm and inviting atmosphere.
- Versatile & Comforting: Perfect for breakfast, as a snack, alongside a meal, or transformed into sandwiches. It’s comfort food at its finest.
- Simple Ingredients, Amazing Results: Made with common pantry staples, this recipe proves that extraordinary flavor doesn’t require exotic ingredients.
- Therapeutic Baking Process: The act of kneading, watching the dough rise, and seeing it transform in the oven is a wonderfully calming and rewarding experience.
Whether you’re a seasoned baker or taking your first steps into the world of yeast, this recipe is designed to be approachable and rewarding, guiding you to perfect loaves every time.
Essential Ingredients for Your Homemade Pain au Lait
Creating this delightful milk bread requires a few simple ingredients, each playing a crucial role in achieving that signature softness and flavor. Quality matters, so try to use fresh ingredients for the best results.
- 3 cups (approx. 375 grams) Bread Flour or All-Purpose Flour: Bread flour, with its higher protein content, provides a chewier texture and better structure. All-purpose flour can also be used for a slightly softer crumb.
- 1 teaspoon Active Dry Yeast: This is the leavening agent that makes our bread light and airy. Ensure your yeast is fresh and active for a successful rise.
- 3 tablespoons Unsalted Butter: Melted butter adds richness, moisture, and a tender crumb to the bread. Using unsalted butter allows you to control the overall salt content.
- 4 tablespoons Granulated Sugar: Sugar not only provides a subtle sweetness but also acts as food for the yeast, helping it activate and the dough rise effectively.
- ½ teaspoon Salt: Salt is vital for enhancing flavor and controlling yeast activity, preventing the bread from over-proofing too quickly.
- ¼ cup Evaporated Milk: Evaporated milk contributes to the bread’s incredible tenderness and a rich, creamy flavor. Whole milk can be substituted if evaporated milk isn’t available, but adjust the water slightly.
- 1 cup Warm Water: The ideal temperature for activating yeast is between 105-115°F (40-46°C). Water that is too hot will kill the yeast, while water that is too cold won’t activate it.
- 1 Large Egg: Used for the egg wash to give the bread a beautiful golden, glossy crust. A small amount might also be incorporated into the dough for added richness and structure, though this recipe primarily uses it for the wash.
Recommended Equipment for Baking Success
Having the right tools can make your bread-making experience smoother and more enjoyable. Here’s what you’ll need:
- Large Mixing Bowl: For combining and mixing your dough ingredients.
- Measuring Cups and Spoons: Accurate measurements are key in baking.
- Microwave-Safe Bowl or Small Saucepan: For melting butter.
- Rolling Board or Clean Countertop: A clean, spacious surface for kneading and shaping the dough.
- Rolling Pin: Essential for flattening and shaping the dough pieces.
- Sharp Knife or Bench Scraper: For dividing the dough and making decorative cuts.
- Greased Baking Tray: Or two, depending on the size of your loaves. Parchment paper can also be used.
- Plastic Wrap or Clean Kitchen Towel: For covering the dough during its rising periods.
- Pastry Brush: For applying the egg wash.
- Oven: Preheat it accurately for best baking results. An oven thermometer can be helpful.
- Wire Cooling Rack: For cooling the baked bread evenly, preventing sogginess.
Step-by-Step Baking Instructions for Perfect Pain au Lait
Follow these detailed steps to create your own batches of delectable homemade milk bread. Precision and patience are your best friends in bread baking!
Step 1: Activate the Yeast
In your large mixing bowl, combine the warm water and yeast. Stir gently to dissolve the yeast. Let it sit for 5-10 minutes. You should see a foamy layer form on the surface, which indicates that your yeast is active and ready to work its magic. If no foam appears, your yeast might be expired or the water temperature was off, and you should start again.
Step 2: Combine Wet Ingredients
Once your yeast is active, add the sugar, evaporated milk, and salt to the warm water-yeast mixture. Stir well with a whisk or spoon until the sugar and salt are fully dissolved. This ensures even distribution of flavor throughout the dough. Next, melt the butter in a microwave-safe bowl or small saucepan until just liquid. Add the melted butter to the mixture and stir thoroughly. This creates the rich, flavorful liquid base for our bread.
Step 3: Gradually Add Flour to Form the Dough
Begin adding the flour to the wet mixture, about a cup at a time. Start by mixing with a spoon or spatula until the dough becomes too stiff to stir. Then, switch to using your hands. Continue adding flour gradually and mixing until a shaggy, cohesive dough forms. It will still be somewhat sticky, but it should pull away from the sides of the bowl. Avoid adding all the flour at once; you might not need the full amount, or you might need a tiny bit more, depending on humidity.
Step 4: Knead the Dough to Develop Gluten
Transfer the dough onto a lightly floured rolling board or a clean countertop. Now comes the kneading! This is a crucial step for developing the gluten, which gives the bread its structure and elasticity. Knead the dough for about 10-15 minutes. Push the dough away from you with the heels of your hands, fold it back, and rotate. Repeat this motion until the dough becomes smooth, elastic, and no longer sticky. A good test for readiness is the “windowpane test”: stretch a small piece of dough thinly; if it forms a translucent membrane without tearing, it’s ready.
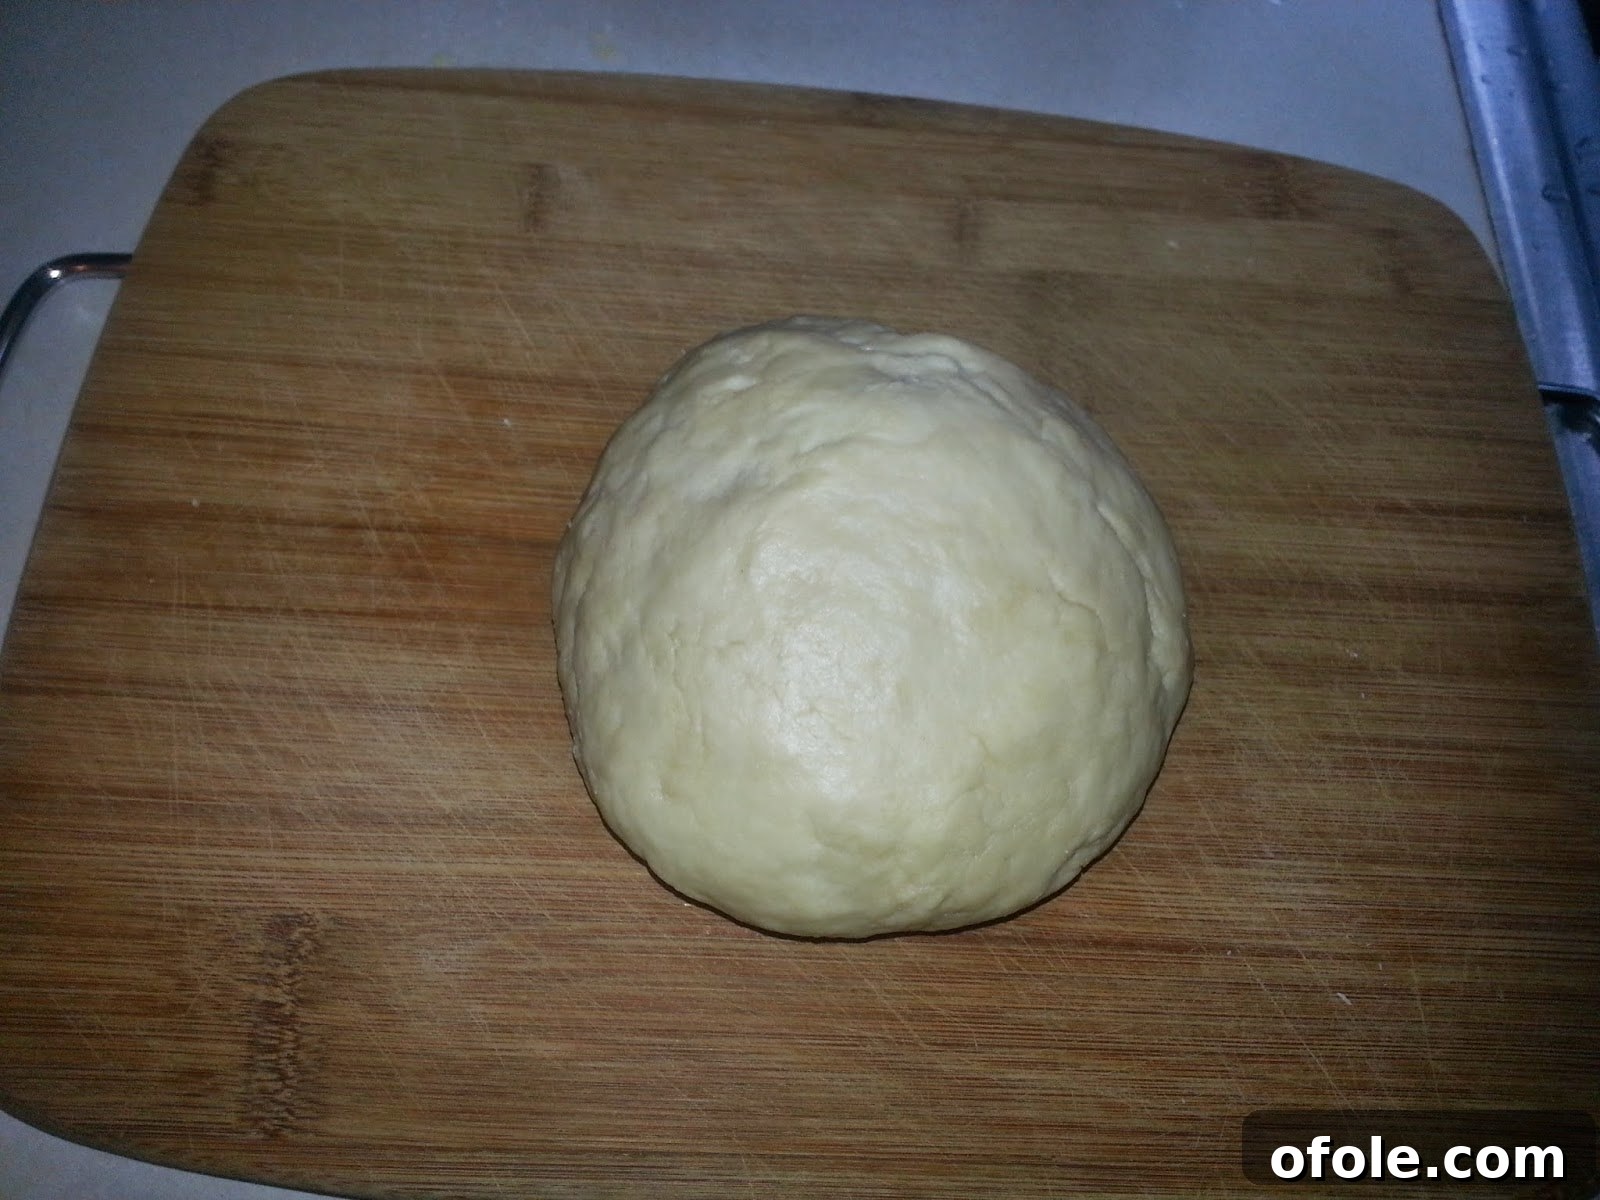
Step 5: First Rise (Bulk Fermentation)
Lightly grease your mixing bowl. Place the kneaded dough in the bowl, turning it once to coat the entire surface with a thin layer of oil. Cover the bowl tightly with plastic wrap or a clean, damp kitchen towel. Place it in a warm, draft-free spot (like a slightly warm oven that has been turned off, or near a sunny window) to rise for about 1 hour, or until it has roughly doubled in size. The warmer the spot, the faster the rise. This first rise allows the yeast to work its magic, developing flavor and volume.
Step 6: Divide and Shape the Dough
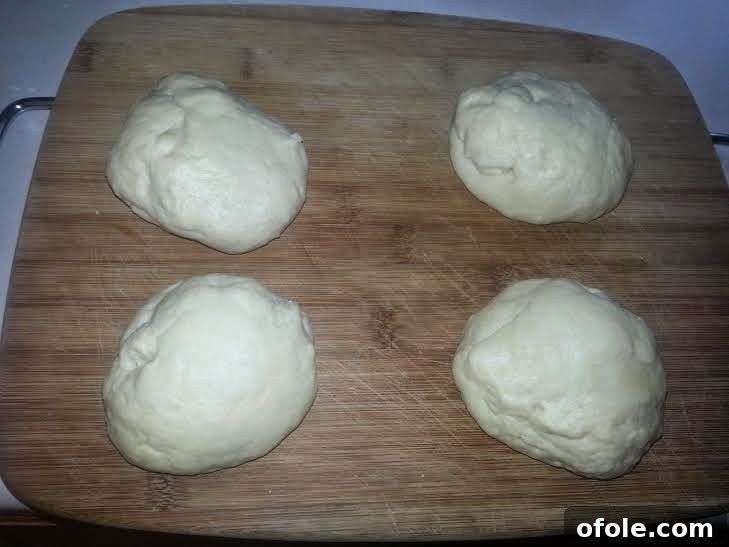
Gently punch down the risen dough to release the air. Transfer it back to your lightly floured surface. Now, using a sharp knife or a bench scraper, divide the dough into four equal pieces. Aim for consistency in size for even baking. Each piece will become a loaf.
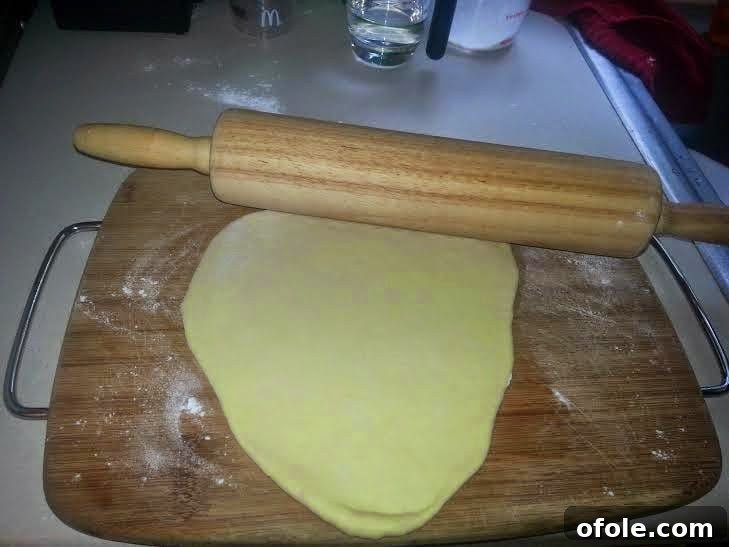
Take one piece of dough and, using a rolling pin, roll it out into an oval or rectangular shape, about 6-8 inches long. The dough should be relatively thin, but not transparent.
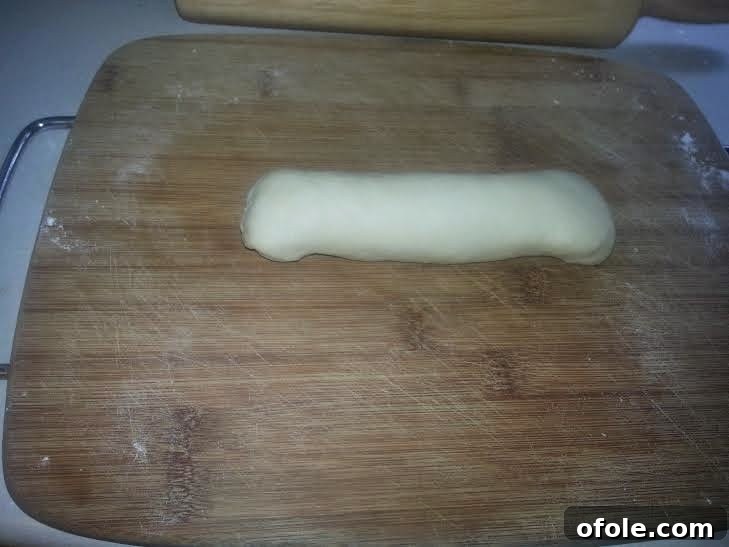
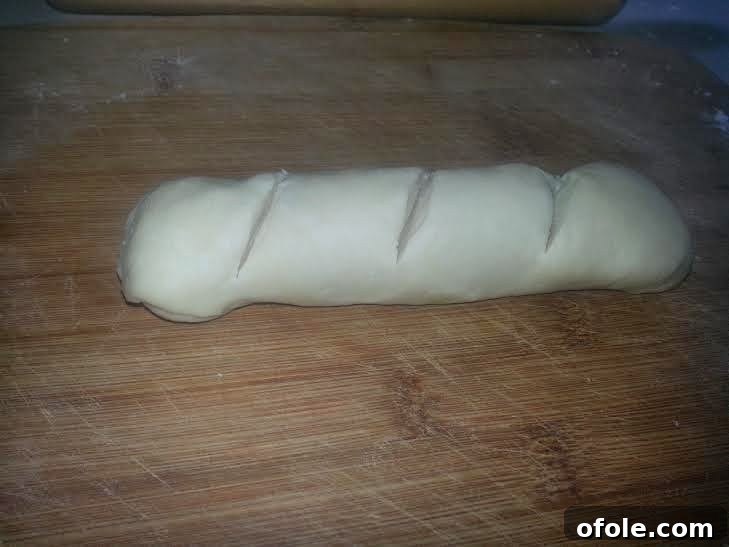
Starting from one of the shorter ends, tightly roll the dough towards the opposite end. This creates a neat log shape. Pinch the seam closed to prevent it from unraveling during baking.

Once rolled, gently fold in the edges of the dough log. This helps to create a more compact, uniform loaf shape and prevents the ends from drying out too much.
Finally, using a sharp knife, make three shallow, diagonal cuts across the top of the dough. These cuts are not just for decoration; they help the bread expand evenly in the oven and give it a professional bakery appearance.
Step 7: Second Rise (Proofing)
Lightly grease a baking tray or line it with parchment paper. Place the shaped dough loaves onto the prepared tray, ensuring they have enough space between them to expand. Cover the tray loosely with plastic wrap or a clean kitchen towel. Return the tray to a warm, draft-free place for another 45 minutes to 1 hour, or until the loaves have visibly puffed up and increased in size. They should look light and airy. This second rise, known as proofing, is essential for achieving a light and fluffy final product.

After the second rise, the loaves will look significantly larger and very puffy, indicating they are ready for the oven.

Step 8: Egg Wash and Baking
Preheat your oven to 300°F (148°C). In a small bowl, whisk the remaining egg (or a fresh one if you didn’t use any in the dough) with a tablespoon of water or milk. This creates a beautiful egg wash. Gently brush the tops of the risen loaves with this egg wash. The egg wash will give your bread a beautiful golden-brown color and a lovely sheen when baked.
Place the baking tray into the preheated oven. Bake for approximately 40 minutes, or until the loaves are golden brown on top and sound hollow when tapped on the bottom. Baking times can vary depending on your oven, so keep an eye on them. If they start browning too quickly, you can loosely tent them with aluminum foil.

Step 9: Cooling
Once baked, immediately transfer the hot loaves from the baking tray to a wire cooling rack. Allow them to cool completely before slicing and serving. Cooling bread on a wire rack prevents condensation from forming on the bottom, which can make the crust soggy. While it’s tempting to dig in right away, allowing the bread to cool fully helps the internal structure set and improves its texture and flavor.
Variation: Making Larger Loaves
If you prefer fewer, larger loaves, simply divide the dough into two equal portions instead of four in Step 6. Roll and shape each larger piece accordingly. The baking time might need to be adjusted slightly, potentially extending it by 5-10 minutes, but still aim for that rich golden-brown color and hollow sound when tapped.
Expert Tips for Milk Bread Success
Achieving bakery-level milk bread is within your reach with these helpful tips:
- Check Yeast Freshness: Always ensure your yeast is active. If it doesn’t foam, discard and use fresh yeast.
- Kneading is Key: Don’t skimp on kneading time. Proper gluten development is essential for a soft, chewy texture.
- Warm Environment for Rising: A warm, draft-free place is crucial for both rises. If your kitchen is cold, a turned-off oven with the light on (which generates a little heat) works wonderfully.
- Don’t Over-Flour: Resist the urge to add too much flour during kneading. A slightly sticky dough is better than a dry, dense one.
- Oven Temperature Accuracy: Use an oven thermometer to ensure your oven is at the correct temperature. Inaccurate temperatures can lead to under or over-baked bread.
- Patience with Proofing: Don’t rush the rising process. Properly proofed dough yields a lighter, airier bread.
- Cool Completely: Allow the bread to cool fully on a wire rack before slicing. This allows the internal structure to set and prevents a gummy texture.
Serving Suggestions for Your Delicious Milk Bread
The versatility of homemade milk bread is one of its greatest charms. Here are some delightful ways to enjoy your freshly baked loaves:
- Classic with Butter and Jam: A timeless combination that highlights the bread’s natural sweetness.
- Savory Sandwiches: Its soft texture makes it perfect for ham and cheese, egg salad, or any of your favorite sandwich fillings.
- French Toast: Transform day-old milk bread into an exquisite breakfast treat.
- With Coffee or Tea: A simple slice alongside your morning beverage is pure bliss.
- As a Side for Soups or Stews: The soft crumb is excellent for soaking up rich broths.
- Sweet Spreads: Nutella, peanut butter, honey, or cream cheese all pair wonderfully.
Storing Your Homemade Milk Bread
To keep your milk bread fresh and soft for as long as possible:
- Room Temperature: Store cooled bread in an airtight container or a large Ziploc bag at room temperature for up to 3-4 days.
- Freezing: For longer storage, slice the cooled bread and freeze in a freezer-safe bag for up to 2-3 months. Thaw individual slices as needed, or warm them directly from frozen.
Conclusion: The Reward of Homemade Goodness
Baking homemade milk bread is a truly rewarding experience, from the therapeutic process of kneading the dough to the intoxicating aroma that fills your kitchen, and finally, to the sheer delight of tasting a warm, soft slice. This Pain au Lait recipe brings the warmth and comfort of a Cameroonian bakery right into your home, offering a taste that’s both familiar and extraordinary.
Don’t be intimidated by yeast; with a little patience and these detailed instructions, you’ll be pulling perfect loaves from your oven in no time. So, gather your ingredients, clear your schedule, and embark on this delicious baking adventure. Your taste buds, and everyone around you, will thank you. Bon Appetit!