
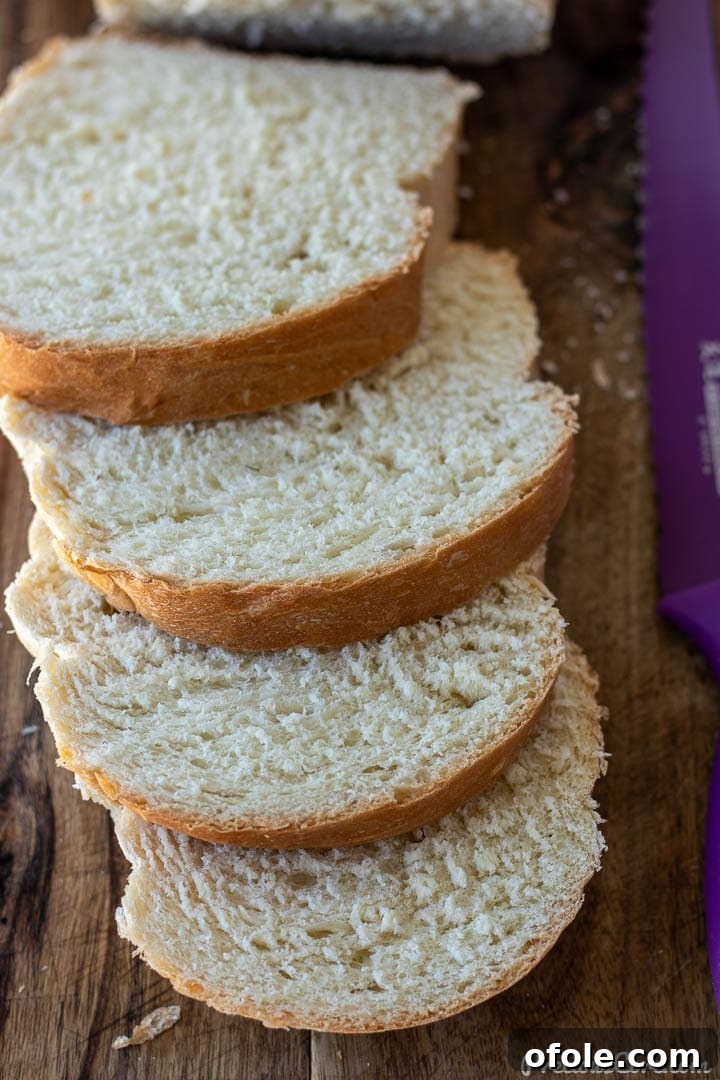
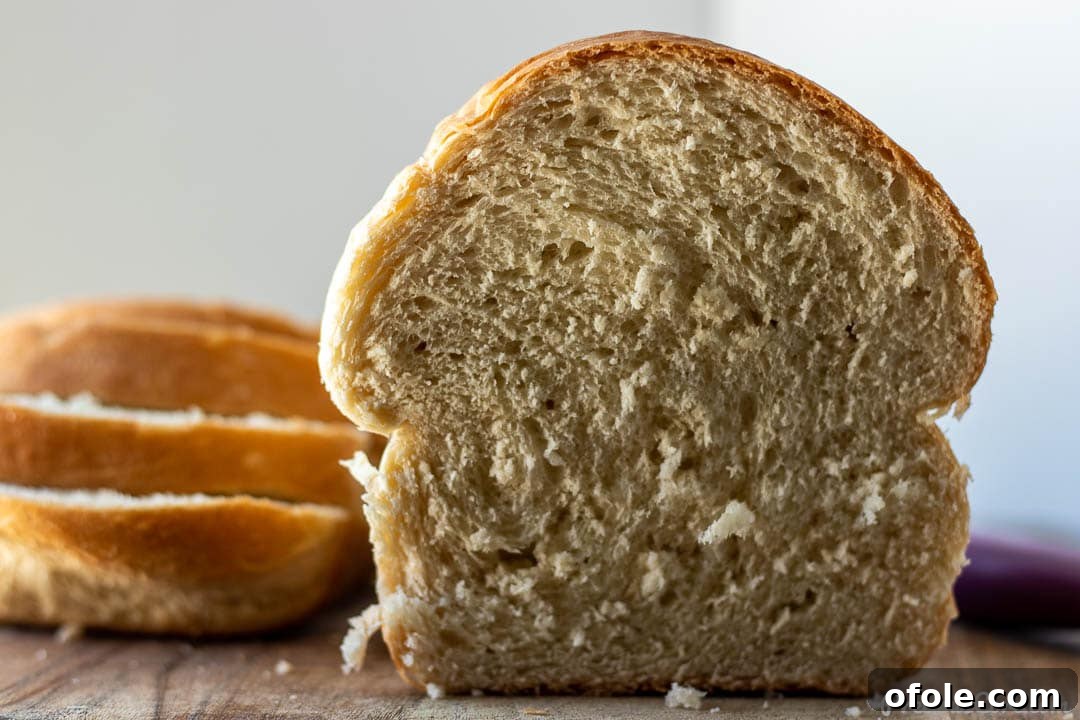
Welcome to the ultimate guide for crafting the most delightful, homemade Easy Sandwich Bread you’ll ever taste! This isn’t just a recipe; it’s an invitation to a fulfilling baking journey, especially designed for absolute beginners. Forget intimidating sourdough starters or complex techniques – this recipe promises consistently soft, incredibly fluffy, and utterly irresistible bread with minimal fuss. Imagine biting into a slice, still warm from the oven, with butter melting into its tender crumb. It’s an experience that truly transforms a simple meal into something extraordinary!
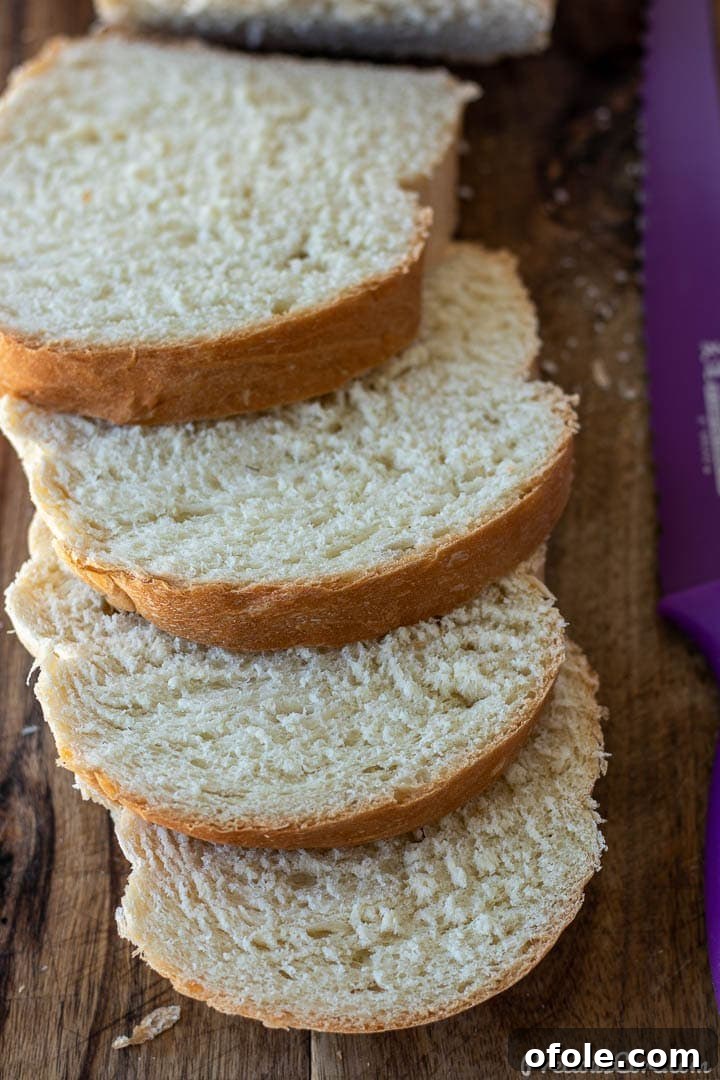
Once you master this simple homemade sandwich bread, a world of culinary possibilities opens up. Use it as the foundation for gourmet Chicken Mayonnaise Sandwiches, elevate your breakfast with Savory French Toast, or simply enjoy it toasted with your favorite spread. The convenience and superior taste of fresh, homemade bread are truly worth every moment spent in the kitchen.
Table of Contents
- Easy Sandwich Bread Recipe
- Why This Recipe is Perfect for Beginners
- The Science Behind Your Fluffy Loaf
- Key Ingredients for Our Easy Sandwich Bread
- Recipe Substitutions and Variations
- Step-by-Step Guide: Crafting Your Homemade Loaf
- Expert Tips for Perfect Homemade Bread
- Watch: Easy Sandwich Bread Tutorial Video
- Explore More Homemade Bread Recipes
- Easy Sandwich Bread Recipe Card
Easy Sandwich Bread Recipe: Your Gateway to Homemade Baking
For years, I’ve cherished the art of bread making, and nothing brings me more joy than sharing a genuinely easy homemade sandwich bread recipe that anyone, regardless of their baking experience, can master. This classic white sandwich bread stands in delightful contrast to more complex recipes like sourdough, as it requires no tricky sourdough starter or extensive preparation. It’s a simple, straightforward path to enjoying fresh, wholesome bread right from your own oven.
Why This Recipe is Perfect for Beginners
Many aspiring bakers are intimidated by the perceived difficulty of making bread from scratch, often believing it requires specialized equipment or advanced skills. This recipe shatters those myths. It’s a truly no-fuss option, making it an excellent starting point for anyone looking to bake their first loaf. From start to finish, you’re looking at approximately two hours – a remarkably short time for such a rewarding outcome. Who knew that achieving soft, pillowy white sandwich bread could be so accessible?
One of the greatest advantages of this recipe is that it proves you don’t need an expensive bread machine. All you need are a couple of standard loaf pans, about six cups of flour, and a handful of other common kitchen staples. The process is incredibly hands-on and intuitive, building confidence with each step. Plus, if you’re keen to stock up on fresh bread, this recipe is easily doubled, allowing you to bake multiple loaves to enjoy throughout the week or freeze for later convenience.
This versatile homemade loaf isn’t just for sandwiches; it’s perfectly fluffy and ready to absorb rich flavors. Imagine it slathered with butter, dunked into hearty stews and soups, or transformed into a comforting batch of French toast. For a delightful twist, brush slices with melted butter and garlic for instant homemade garlic bread. The possibilities are truly endless, making this recipe a cornerstone for countless meals and snacks.
The Science Behind Your Fluffy Loaf
Understanding the basic principles of bread making can significantly enhance your baking success. At the heart of this recipe is yeast, a living microorganism that thrives on sugar. When yeast is activated with warm water and fed sugar, it undergoes fermentation, producing carbon dioxide gas. This gas gets trapped within the gluten network developed during kneading, causing the dough to rise and giving the bread its characteristic light and airy texture. Proper temperature control for the water is crucial – too hot, and it kills the yeast; too cold, and it inhibits activation. Similarly, precise measurements of flour, water, and salt ensure the perfect balance for optimal gluten development and flavor. The oil contributes to the bread’s tenderness and moisture, keeping it soft for longer, while a hint of nutmeg adds a subtle layer of aromatic complexity that elevates the overall taste profile.
Key Ingredients for Our Easy Sandwich Bread
You’ll be delighted to find that this straightforward homemade bread recipe calls for just seven simple ingredients, most of which you likely already have in your pantry.
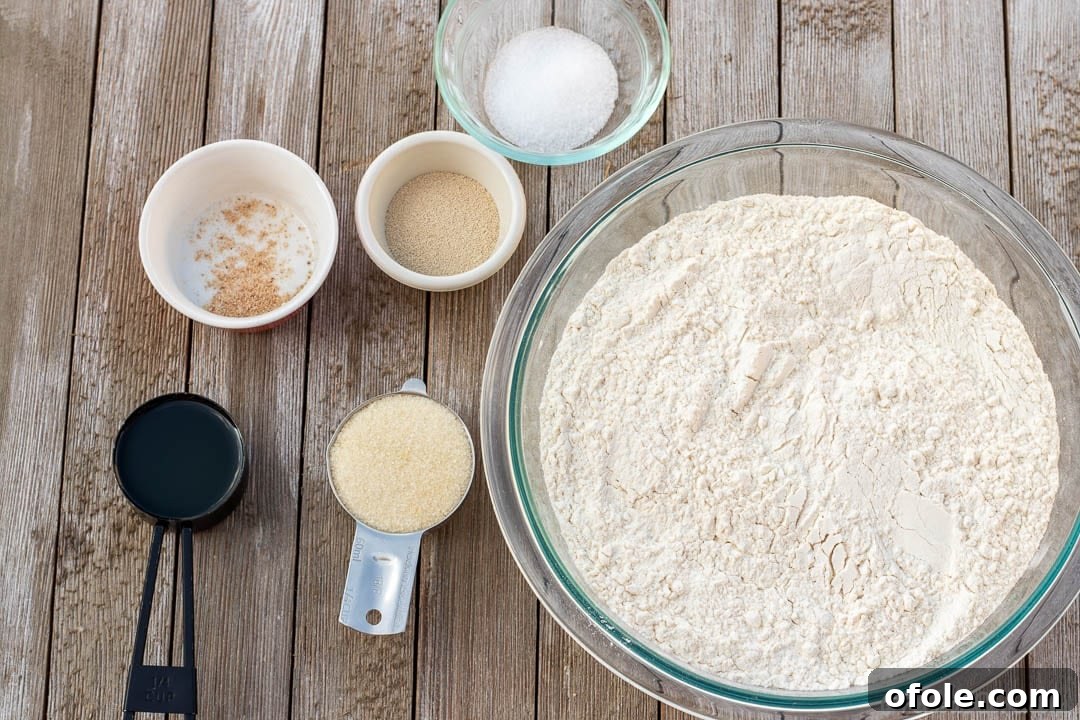
1. All-Purpose or Bread Flour: The foundation of our loaf. I’ve thoroughly tested this recipe with both all-purpose (plain) flour and bread flour, and both yield excellent results. Bread flour, with its higher protein content, develops more gluten, which can lead to a slightly chewier texture, but all-purpose flour works wonderfully for a softer crumb. Don’t let the choice of flour intimidate you; use what’s readily available. (For bread flour, brands like King Arthur are highly recommended.)
2. Yeast: The magical leavening agent. This is a classic yeast bread, so you’ll need either active dry yeast or instant dry yeast (also known as rapid rise). Both types function similarly, causing the dough to rise beautifully. Instant yeast can often be mixed directly with dry ingredients, while active dry yeast usually benefits from being “proofed” first in warm water to ensure its vitality.
3. Sugar: More than just for sweetness, sugar plays a crucial role. Granulated sugar or cane sugar will work perfectly. It acts as food for the yeast, helping it activate and produce carbon dioxide, which makes the bread light and airy. It also contributes to the lovely golden-brown crust and enhances the overall flavor of the bread.
4. Oil: For tenderness and moisture. Any neutral-tasting oil is suitable for this homemade bread. Vegetable oil, canola oil, or corn oil are excellent choices. You can also opt for a light olive oil if you prefer. The oil contributes to a softer crumb and helps keep the bread moist for longer.
5. Lukewarm Water: The activator for yeast. This recipe utilizes water rather than whole milk, making it a naturally vegan option. For optimal results, the water needs to be slightly warm, above room temperature, but not hot. The ideal temperature is around 105-115°F (40-46°C). Water that’s too hot can kill the yeast, while water that’s too cold won’t activate it effectively.
6. Salt: Essential for flavor and structure. Salt is incredibly important for balancing the flavors in your bread, preventing it from tasting bland. It also plays a role in controlling the yeast’s activity and strengthening the gluten structure, contributing to a better rise and texture.
7. Nutmeg: An optional flavor enhancer. I love to add a small amount of freshly grated nutmeg to this bread recipe. It imparts a subtle, warm flavor that complements the bread beautifully without being overpowering. If you have it on hand, I highly recommend including it for that extra touch of deliciousness.
Recipe Substitutions and Variations
Don’t be afraid to experiment with these simple substitutions to tailor the recipe to your preferences or what you have on hand:
- Flour: While all-purpose or bread flour is recommended, you can incorporate whole wheat flour for a heartier loaf. However, for a beginner-friendly recipe, I suggest substituting only 50% of the flour with whole wheat, using all-purpose or bread flour for the remaining half. This maintains a balance of texture and ease of handling.
- Yeast: If you have fresh yeast, you can certainly use it instead of instant or active dry yeast. Just remember that you’ll need to use twice the amount of fresh yeast to achieve the same leavening power.
- Salt: While table salt is generally used, sea salt works perfectly in a pinch. Adjust quantities slightly as sea salt crystals can be larger than table salt, leading to different salinity by volume.
- Sugar: For a slightly different flavor profile, you can substitute the granulated sugar with an equal amount of honey. Honey will also contribute to a beautiful golden crust and a subtle sweetness.
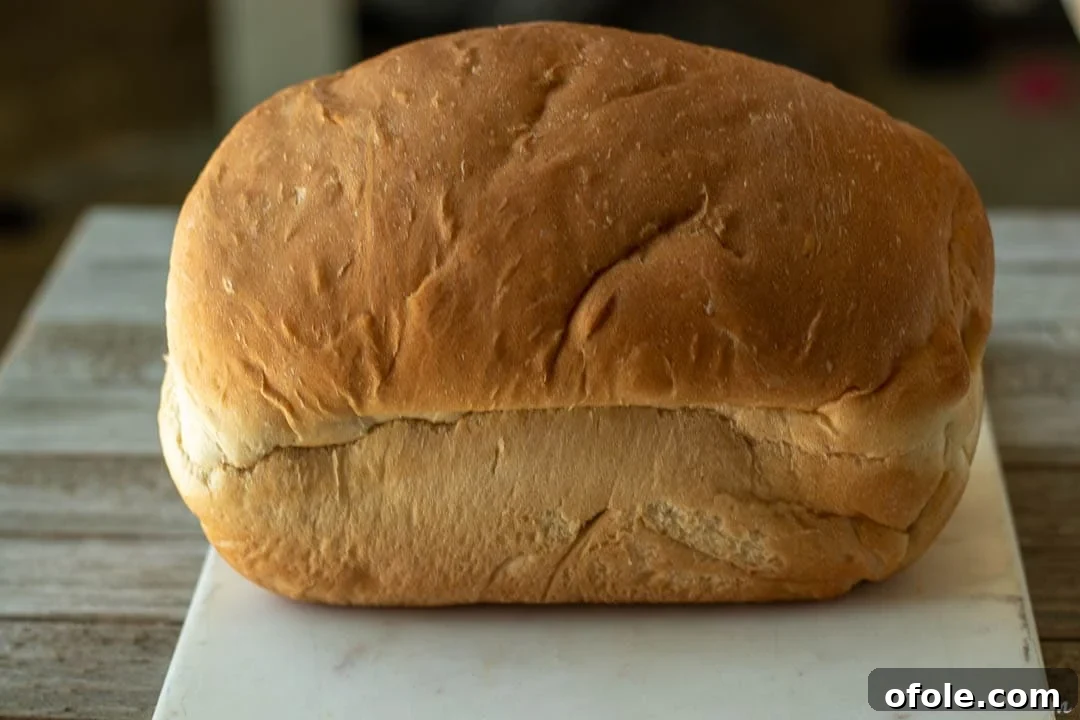
Step-by-Step Guide: Crafting Your Homemade Loaf
Making homemade bread might seem daunting, but with these clear steps, you’ll find the process incredibly rewarding. Follow along, and soon you’ll have two beautiful loaves!
1. Activate the Yeast: In a spacious mixing bowl, gently pour in your lukewarm water. Sprinkle the yeast over the water and let it sit undisturbed for 5 to 10 minutes. You’ll notice the mixture becoming creamy and slightly foamy; this is a clear sign that your yeast is alive and active, ready to work its magic. This step is crucial, as it ensures your bread will rise properly.
2. Combine Ingredients: To the yeast mixture in the bowl, add the remaining dry ingredients (flour, sugar, salt, and nutmeg if using) along with the oil. Use a sturdy wooden spoon or a spatula to mix everything together until a shaggy, cohesive dough begins to form. Don’t worry about perfect smoothness at this stage; just ensure all ingredients are incorporated.
3. Knead the Dough: Transfer the shaggy dough onto a clean, lightly floured surface. Begin to knead the dough by hand. The goal of kneading is to develop the gluten in the flour, which gives the bread its structure and elasticity. Knead for about 5 minutes, pushing the dough away from you with the heels of your hands, then folding it back towards you. If the dough feels too sticky to handle, sprinkle a tiny bit of additional flour onto your surface, being careful not to add too much, as excessive flour can make the bread dense. The dough should feel soft and slightly pliable, not overly stiff or sticky. Once kneaded, lightly grease a large bowl with a little oil, ensuring all sides are coated to prevent sticking. Place the dough ball into the greased bowl.
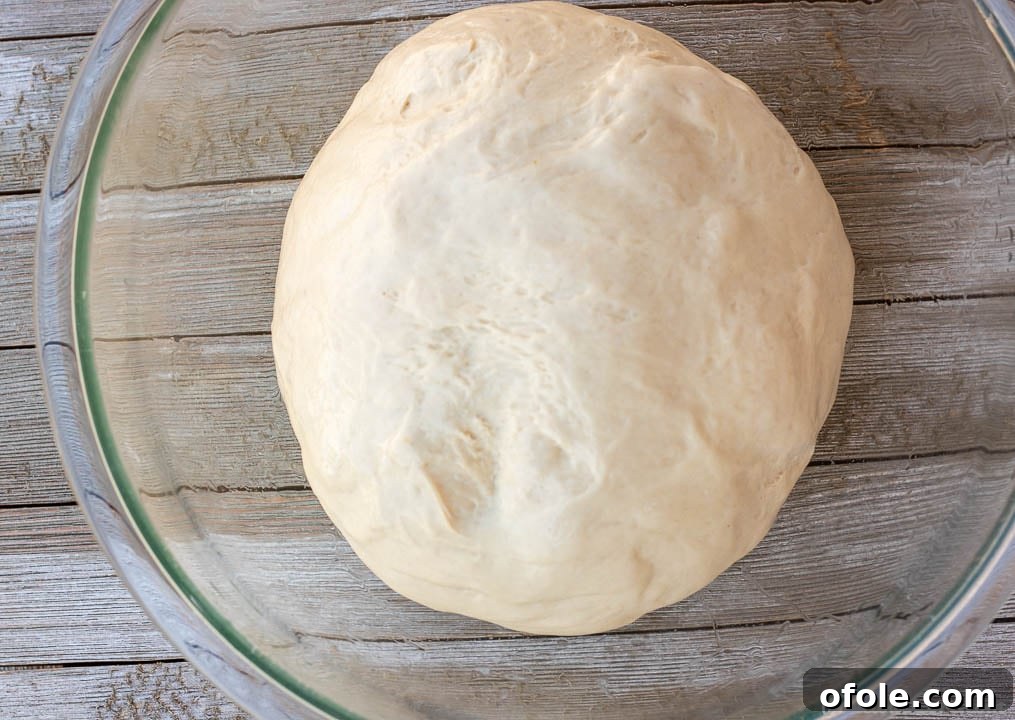
4. First Rise (Proofing): Cover the bowl tightly with a large plastic bag or plastic wrap. This prevents the surface of the dough from drying out and forming a crust. Place the covered bowl in a warm spot in your kitchen. An excellent warm place can be a slightly warmed oven (turn it on for just one minute, then turn it off) or simply a sunny spot on your counter. Let the dough rise until it has visibly doubled in size. This process, known as the first proof or bulk fermentation, typically takes 1 to 2 hours, depending on the warmth of your environment and the activity of your yeast.
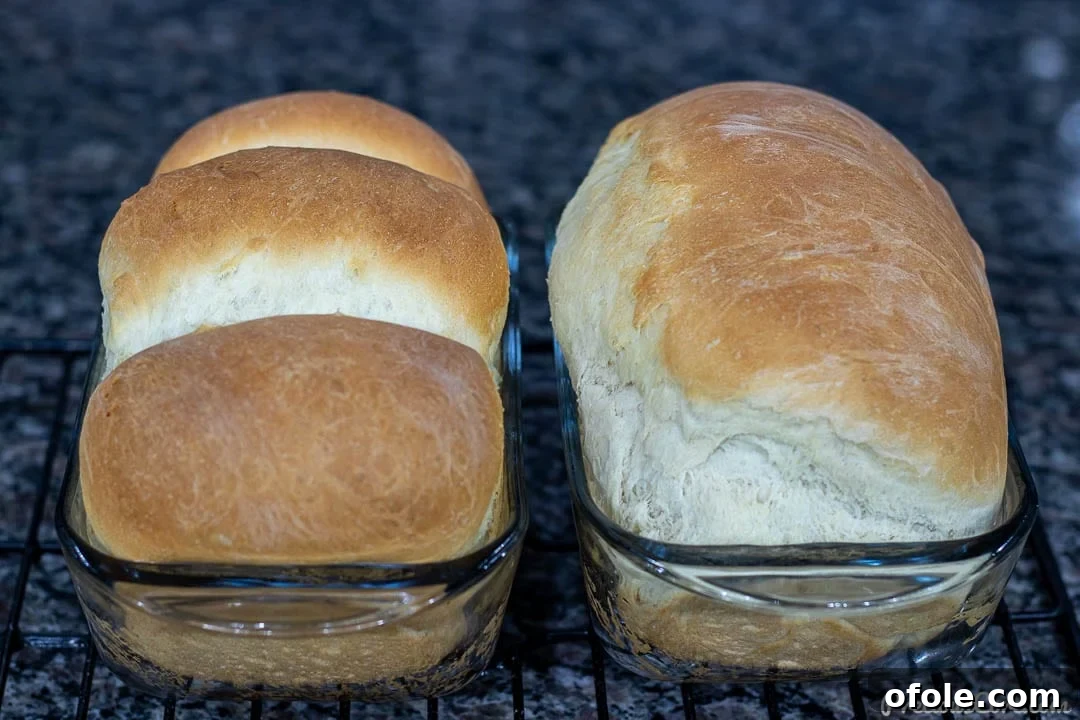
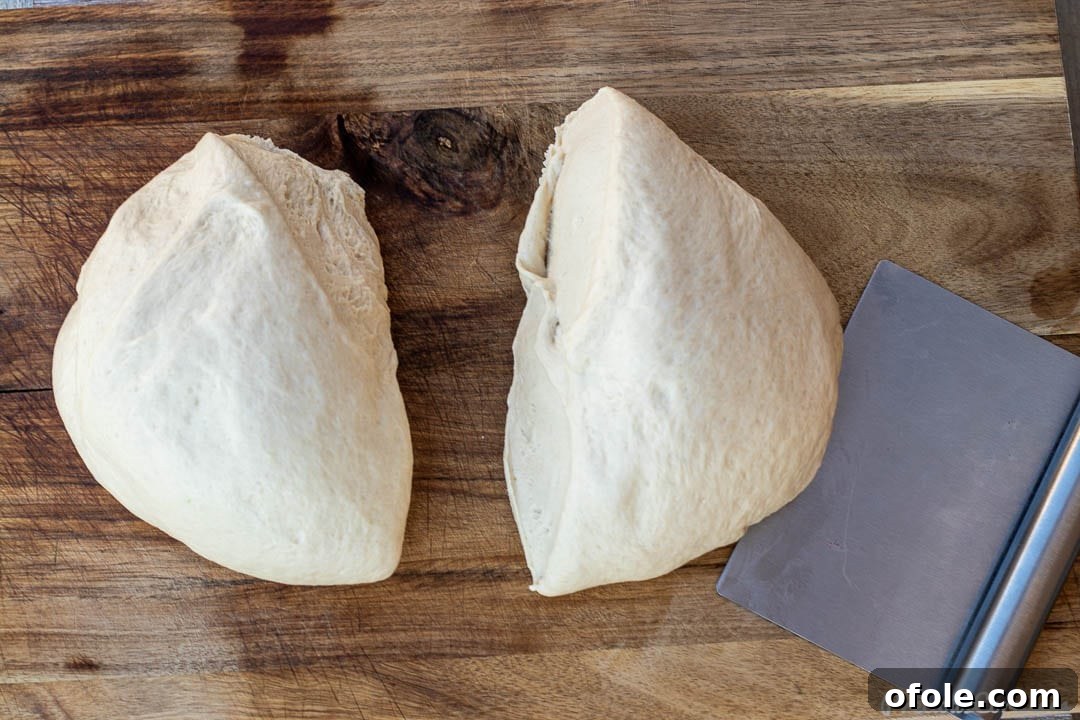
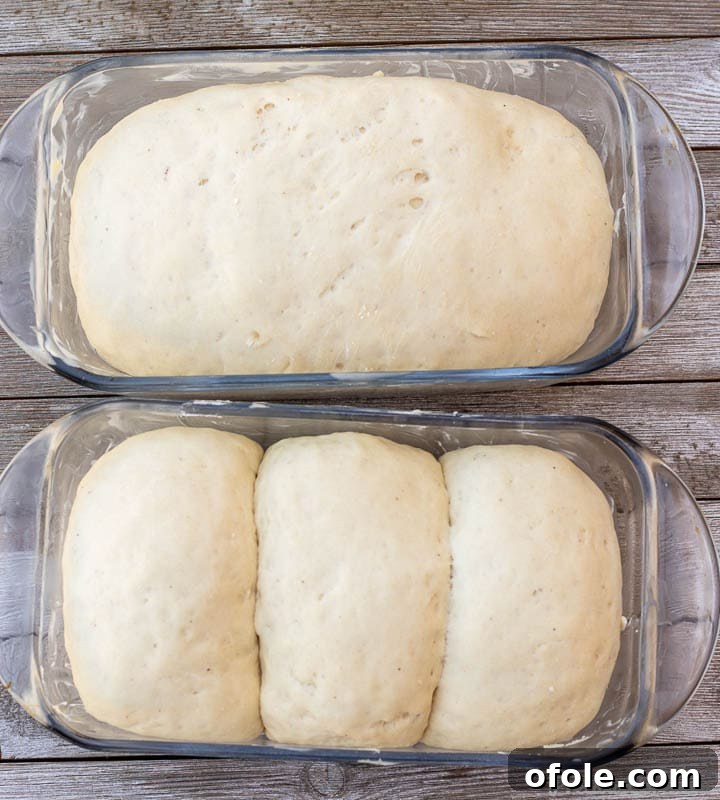
5. Punch Down and Shape: Once the dough has doubled, gently punch it down to deflate it and release the trapped gases. This step redistributes the yeast and helps create a finer, more even crumb. Turn the dough out onto your clean work surface (it should be less sticky now and might not need additional flour). Divide the dough into two equal portions. Now, shape each portion into a neat loaf. You can roll each piece into an oval, or even divide each portion into three smaller ovals and arrange them side-by-side in the pan for a pull-apart effect (as often shown in tutorials). Place the shaped dough into your prepared loaf pans, ensuring the seam side is facing down in the pan for a smooth top crust.
6. Second Rise (Final Proof): Cover the loaf pans loosely with plastic wrap or a clean, damp kitchen towel. Allow the dough to rise for a second time, for about 20 minutes, or until the dough has almost reached the top edges of the loaf pans. This is the final proofing, where the bread takes on its final shape and texture before baking.
7. Bake to Perfection: While the dough is on its second rise, preheat your oven to 350°F (175°C). If you desire a shiny, golden-brown crust, you can brush the top of the risen dough with an egg wash (one egg beaten with a tablespoon of water) just before baking. Carefully place the loaf pans into the preheated oven and bake for 30-35 minutes, or until the loaves are beautifully golden brown on top. For absolute certainty of doneness, you can check the bread’s internal temperature with a thermometer; it should register at least 195°F (90°C). Once baked, remove the pans from the oven and immediately transfer the hot loaves to a wire cooling rack. Allowing them to cool on a rack is essential for air circulation, preventing the bottoms from becoming soggy and ensuring a perfectly crisp crust.
Expert Tips for Perfect Homemade Bread
Even with an easy recipe, a few insider tips can elevate your bread-making game and ensure consistently perfect results:
- Optimal Storage: For immediate consumption within a day or two, store your freshly baked bread in a breathable bread bag or a paper bag at room temperature. For longer freshness, once completely cooled, wrap the loaf tightly in plastic wrap, then place it in an airtight container. Avoid refrigerating homemade bread, as the cool, dry air in a fridge can actually accelerate the staling process, making your bread dry and hard much faster. For extended storage (up to 3 months), slice the cooled loaf, then freeze the slices in an airtight freezer bag.
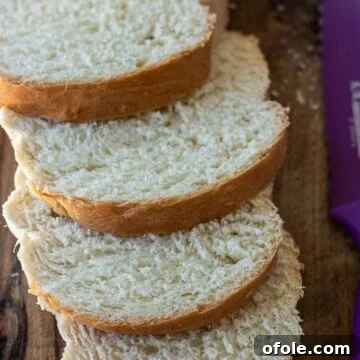
- Precision Cutting: To achieve neat, uniform slices, always use a sharp knife, preferably a serrated bread knife. The saw-like edge of a serrated knife glides through the crust and soft interior without compressing or tearing the bread, yielding beautifully even slices perfect for sandwiches or toast.
- Maintaining Moisture During Rise: While the dough undergoes its first rise, covering it with a clean, damp kitchen towel is an excellent alternative to plastic wrap. The slight moisture from the towel helps to create a humid environment, preventing the dough’s surface from drying out and forming a tough crust, which could hinder its rise.
- The Windowpane Test: To determine if your dough has been sufficiently kneaded, perform the “windowpane test.” After kneading for the recommended time, take a small piece of dough and gently stretch it with your fingers. If you can stretch it thin enough to see light passing through it without the dough tearing, then the gluten has been properly developed, and your dough is ready for its first rise. If it tears easily, continue kneading for another minute or two and test again.
- Using a Stand Mixer: If you prefer to use a stand mixer, attach the dough hook. While a stand mixer can reduce manual effort, be cautious not to overwork the dough, which can lead to a tough loaf. I recommend starting on a low speed to bring the ingredients together and form the dough. Once combined, you can continue kneading on low speed for 3-5 minutes, then finish with a brief hand-kneading session to truly feel the dough’s texture and ensure it reaches the ideal consistency without becoming over-developed.
Watch: Easy Sandwich Bread Tutorial Video
For a visual guide to perfecting your homemade loaf, watch me demonstrate the entire Easy Sandwich Bread Recipe in the video below. Seeing the steps in action can make all the difference, especially for new bakers. If you enjoy my baking tips and want to stay updated with more delicious recipes, please consider subscribing to my YouTube channel!
Explore More Homemade Bread Recipes
If you’ve fallen in love with making this easy sandwich bread, you’ll be thrilled to explore these other fantastic homemade bread recipes:
Easy Dinner Rolls
Easy Homemade French Bread
Cinnamon Rolls With Cream Cheese Frosting
Homemade Milk Bread
Shawarma Bread
Banana Bread Rolls
If you make this incredibly easy and delicious homemade sandwich bread, please take a moment to leave a star rating below. Your feedback helps other home bakers discover this recipe, and I absolutely love hearing about your baking successes! Thank you for your support!
Easy Sandwich Bread Recipe
15 mins
30 mins
1 hr 20 mins
2 hrs 5 mins
2 loaves
Rate
Print Recipe
Ingredients
- 6 cups bread or all purpose (plain) flour (750 grams)
- 2 cups lukewarm water (110 degrees F / 43 degrees C)
- 1 tablespoon active dry yeast
- 1/4 cup vegetable oil (canola oil, corn oil, peanut oil would work)
- 1/4 cup granulated sugar (or cane sugar)
- 2 teaspoons salt
- 1/4 teaspoon freshly grated nutmeg
Instructions
Proof the yeast.
-
Pour the lukewarm water into a large mixing bowl. Add the yeast and let it sit for 5 minutes. It will become creamy and slightly foamy, indicating the yeast is active.
-
To the mixing bowl, add the sugar, oil, flour, and salt. Mix thoroughly with a wooden spoon until all ingredients are combined and a shaggy dough forms.
-
Transfer the mixture onto a clean working surface. Begin to knead to form a dough. If it feels too stiff, sprinkle on a little water, a teaspoon at a time. The dough should be soft and slightly sticky for the best results, as softer dough generally yields softer bread.
-
Conversely, if the dough is excessively sticky and difficult to manage, sprinkle a little flour (about a teaspoon) onto the dough and knead. Repeat, adding small amounts of flour as needed, until the dough can be handled without sticking excessively to your hands or the work surface.
-
Knead the dough for a full 5 minutes to develop the gluten, which is essential for the bread’s structure and texture.
-
Rub a light layer of oil all over the inside of a large mixing bowl. Place the kneaded dough into the bowl, turning it once or twice to coat all sides with oil. Cover the bowl with plastic wrap or a large plastic bag and place it in a warm spot to rise.
-
To create an ideal warm environment, I often preheat my oven for about 1 minute, then turn it off. This creates the perfect cozy atmosphere for yeasted dough to rise consistently.
-
Allow the dough to rise for 1-2 hours, or until it has noticeably doubled in size.
-
Gently punch the dough down to release the excess air, then transfer it to your work surface and divide the dough into two equal portions.
-
Generously grease two standard 9 by 5 inch loaf pans. This prevents sticking and ensures easy removal after baking.
Shape the dough and put into prepared loaf pans.
-
For one loaf, divide one portion of dough into 3 equal smaller portions. Shape each smaller portion into an oval, then arrange these three ovals side-by-side in one loaf pan. (Refer to the video for a visual demonstration of this shaping method.)
-
For the second loaf, take the remaining portion of dough and gently roll it out with a rolling pin into a rectangle. Then, roll it up tightly with your hands to form a log, tucking in the ends to create a neat shape. Place this log into the other prepared loaf pan.
-
Allow both loaves to rise in a warm place for an additional 20 minutes, or until they have nearly reached the top of the loaf pans.
-
While the loaves are proofing, preheat your oven to 350 degrees Fahrenheit (180 degrees Celsius).
-
Carefully place the loaf pans into the preheated oven and bake for 30-35 minutes, or until the tops are beautifully golden brown. Around the 30-minute mark, check on your bread; if it’s browning too quickly, loosely tent it with aluminum foil to prevent over-browning.
-
Once baked, remove the loaves from the oven and let them rest in their pans for about 5 minutes before carefully transferring them to a cooling rack. Allow them to cool completely on the wire rack before slicing and enjoying your perfect homemade bread!
Notes
2. The addition of nutmeg in this recipe is entirely optional, but I highly recommend it if you can. It truly elevates the bread’s flavor with a subtle, aromatic note that isn’t at all overpowering.
3. This recipe has been tested with both bread flour and all-purpose flour, and both yield excellent, fluffy results!
4. The nutritional information provided is calculated per slice of bread, assuming that each loaf is cut into 10 slices for a total of 20 slices per recipe.
Nutrition
Carbohydrates: 298g |
Protein: 46g |
Fat: 32g |
Saturated Fat: 7g |
Polyunsaturated Fat: 10g |
Monounsaturated Fat: 11g |
Trans Fat: 3g |
Sodium: 2347mg |
Potassium: 396mg |
Fiber: 10g |
Sugar: 26g |
Vitamin A: 8IU |
Vitamin C: 0.01mg |
Calcium: 66mg |
Iron: 3mg
Additional Info
Tried this recipe?
Mention @preciouscore or tag #PreciousCore!