
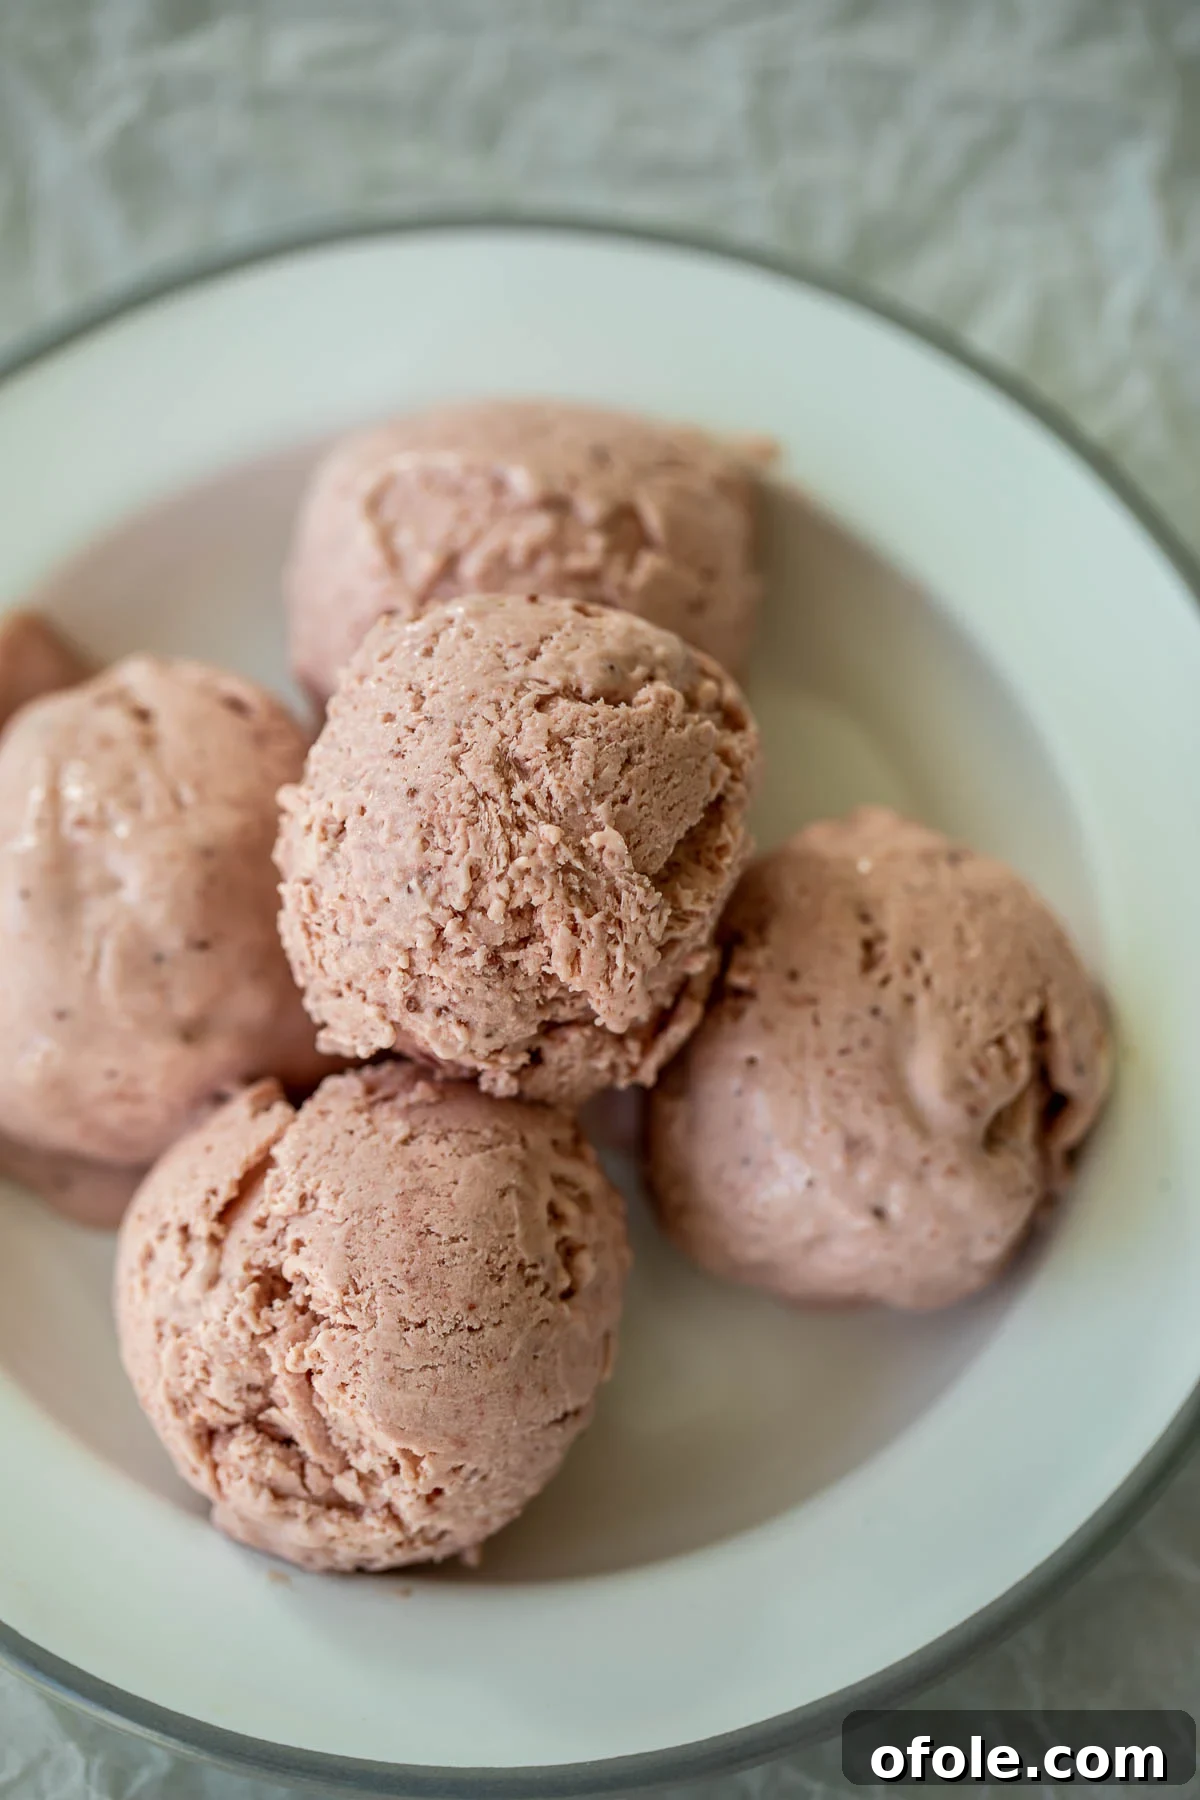
Prepare to be enchanted by the sheer delight of this **No-Churn Strawberry Ice Cream**! Forget about fancy equipment or complicated techniques; with just 5 simple ingredients, you can create a truly irresistible frozen treat right in your own kitchen. The best part? You absolutely do not need an ice cream machine to achieve perfectly creamy, scoopable ice cream that tastes like pure summer.
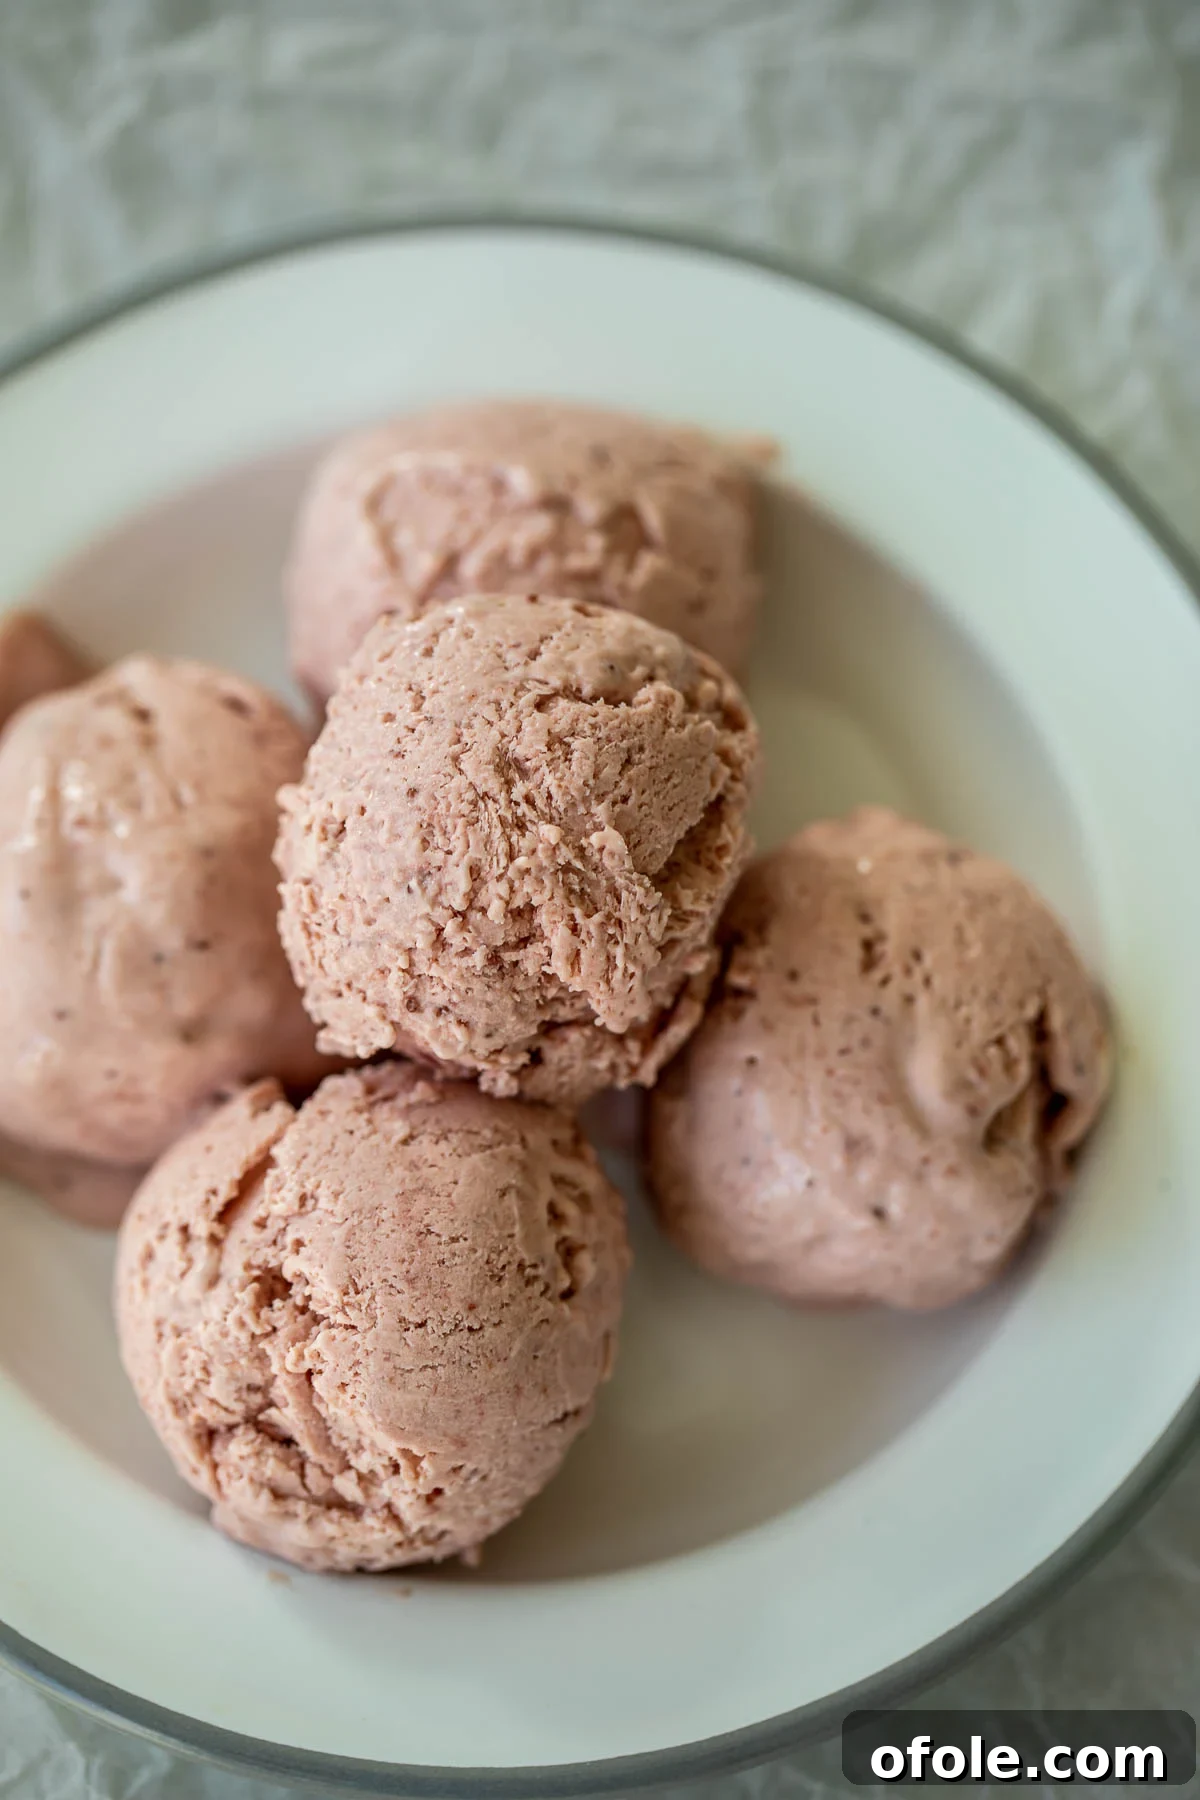
There’s something incredibly special about the arrival of strawberry season. Those beautiful, bright red berries gracing store shelves and farmer’s markets are a true signal of warmer days and lighter, more refreshing desserts. My recent obsession with these juicy gems has led to a flurry of strawberry-inspired creations, and frankly, I’m completely on a strawberry kick! From the delicate notes of a Strawberry Dutch Baby to the invigorating zest of Strawberry Limeade, I’ve savored every moment of this berry adventure. Soon, those delightful recipes will be here for you to enjoy.
Today, however, the spotlight shines brightly on the star of the show: homemade strawberry ice cream. This particular recipe draws inspiration from beloved classics like our Homemade Vanilla Ice Cream and the tropical bliss of our Mango Ice Cream, promising a familiar creaminess with a burst of fresh berry flavor. It’s designed for maximum impact with minimal effort, ensuring a smooth, rich texture without any churning required.
Table of Contents
- Why You’ll Love This No-Churn Ice Cream
- The Essential Ingredients
- Step-by-Step: Crafting Your Strawberry Ice Cream
- Expert Tips for Perfection
- Delicious Ice Cream Variations
- Kitchen Equipment You’ll Need
- Proper Storage for Homemade Ice Cream
- Serving Suggestions for Your Frozen Treat
- Watch The Recipe Video
- More Irresistible Ice Cream Recipes
- More Delightful Strawberry Recipes
- Other Sweet Desserts to Explore
- No Churn Strawberry Ice Cream Recipe Card
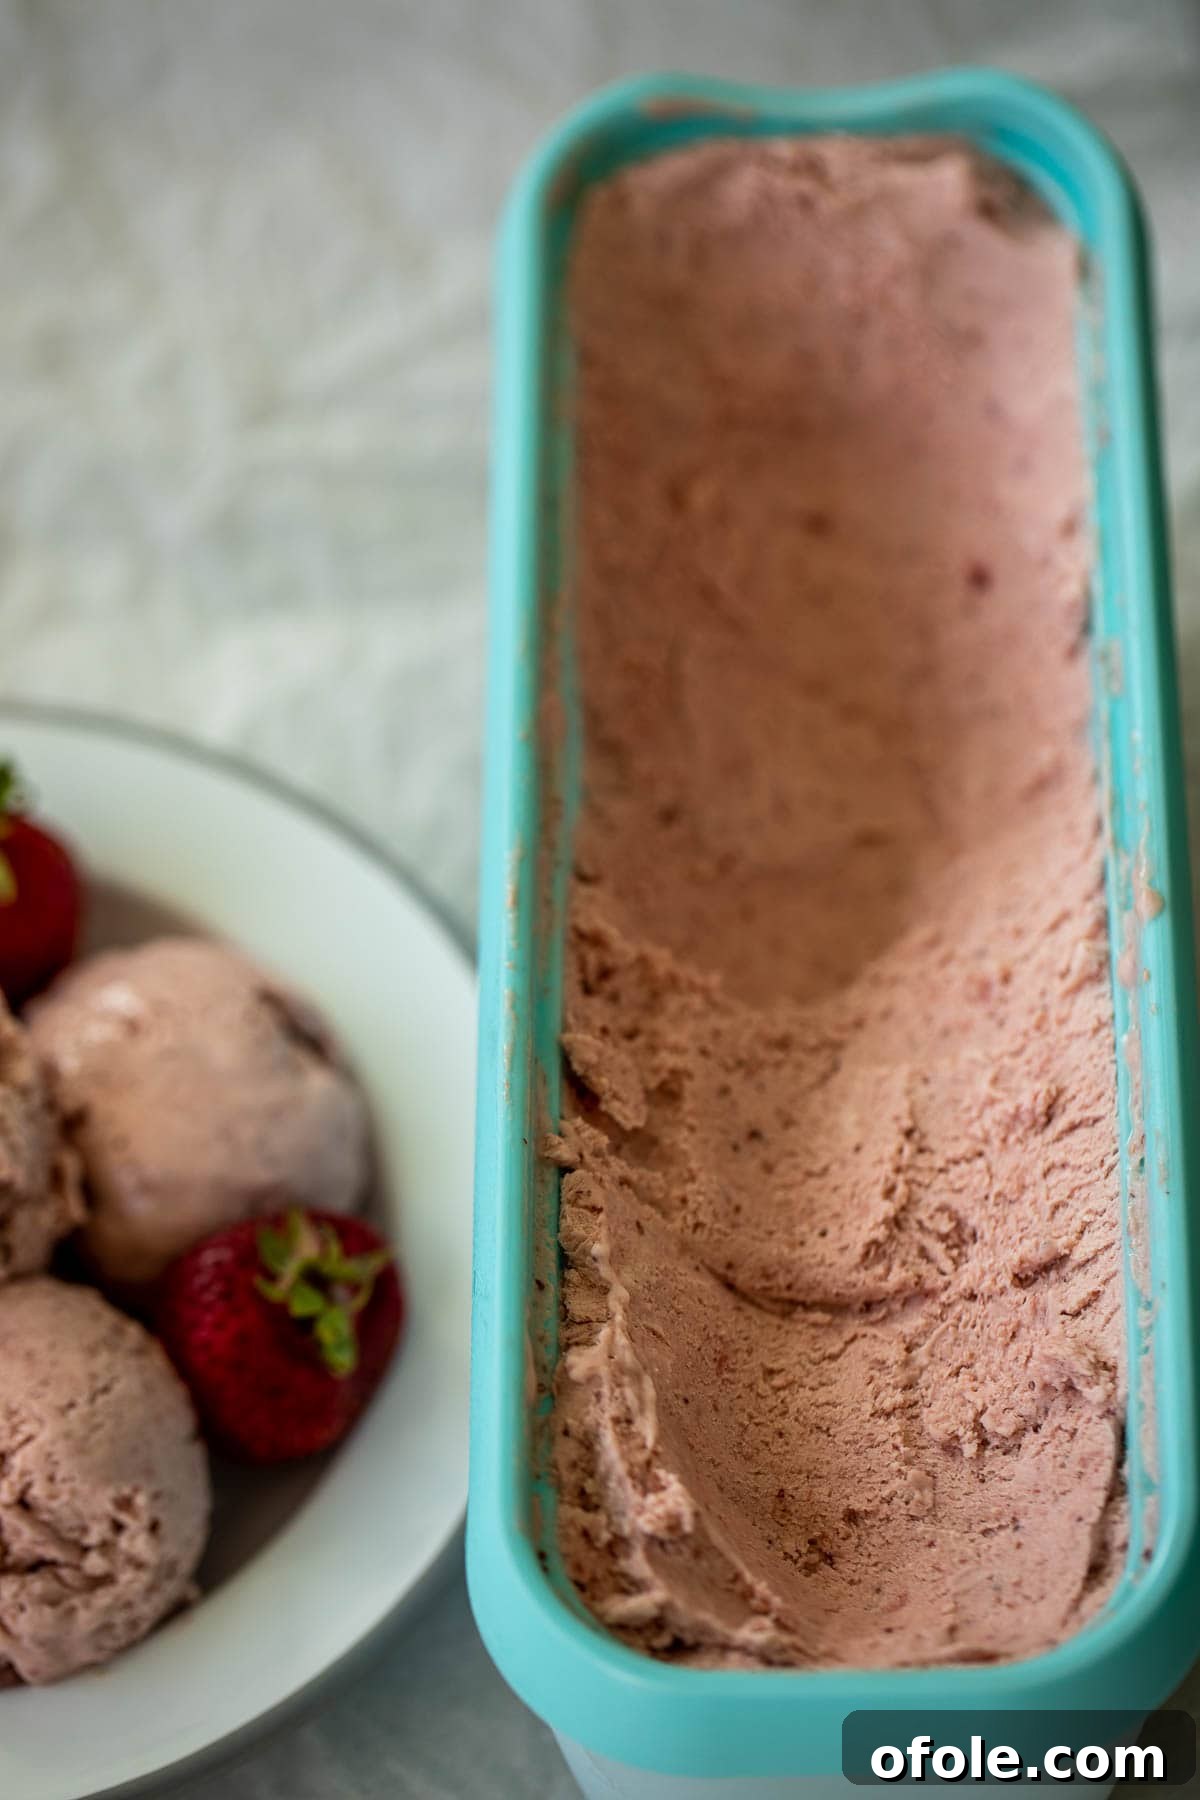
Why You’ll Love This No-Churn Ice Cream
If you’ve ever dreamt of making your own ice cream but felt intimidated by specialized machines, this recipe is for you. Here’s why this no-churn strawberry ice cream will become your new favorite:
- **Incredibly Easy:** Seriously, only 5 ingredients and minimal active time. If you can blend and whip, you can make this!
- **No Special Equipment:** Ditch the bulky ice cream maker. A hand mixer and a blender are all you need.
- **Creamy Perfection:** The combination of heavy cream and sweetened condensed milk creates an unbelievably smooth, rich texture without a single churn.
- **Bursting with Fresh Strawberry Flavor:** We don’t just add strawberries; we concentrate their natural sweetness and tang into a beautiful puree that infuses every bite.
- **Versatile:** Easily adaptable to other fruits and flavors, making it a foundation for endless dessert possibilities.
- **Perfect for Any Occasion:** A fantastic cool-down treat for hot summer days, a delightful dessert for parties, or simply a sweet indulgence for yourself.
The Essential Ingredients
Crafting this easy homemade strawberry ice cream without an ice cream machine relies on a handful of carefully selected ingredients. Each plays a crucial role in delivering that signature creamy texture and vibrant strawberry flavor.
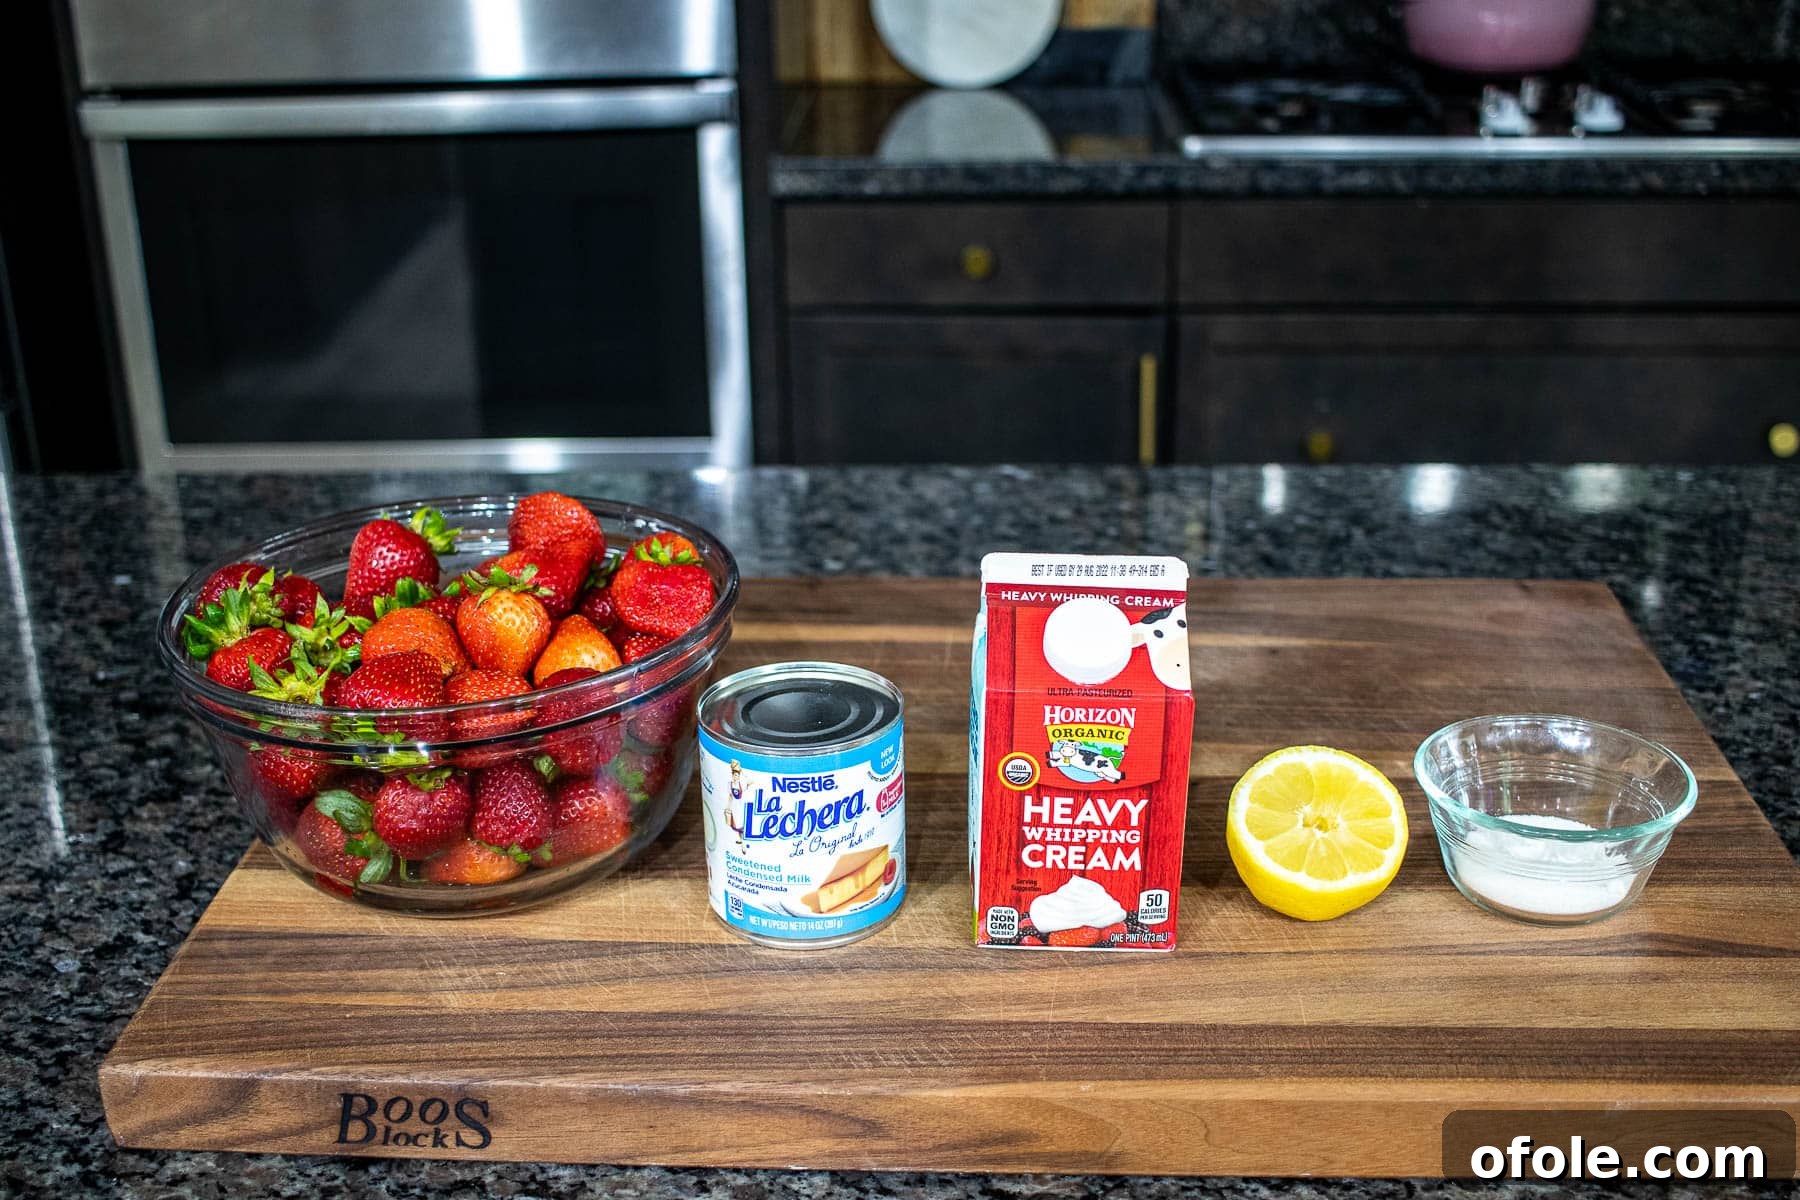
- Strawberries: The star of our show! I highly recommend using fresh, ripe strawberries for the most intense and authentic flavor. Look for berries that are bright red, plump, and fragrant. If fresh aren’t available, or if you prefer convenience, frozen strawberries can also be used. Just be sure to defrost them thoroughly before blending to ensure a smooth puree and prevent introducing excess ice crystals into your ice cream base. The natural sweetness and slight tartness of strawberries are key to this recipe’s balanced taste.
- Granulated Sugar: A modest amount of sugar is added to the strawberry puree not just for sweetness, but also to help the fruits maintain their vibrant color during the cooking process. It enhances the natural sweetness of the strawberries and balances their tartness, resulting in a more rounded and appealing fruit base.
- Freshly Squeezed Lemon Juice: A splash of lemon juice is a secret weapon here. It brightens the flavor of the strawberries, cutting through their sweetness with a refreshing tang. Crucially, like the sugar, it also helps preserve the beautiful red hue of the strawberries, ensuring your ice cream looks as good as it tastes. Always opt for fresh lemon juice over bottled for the best flavor.
- Heavy Whipping Cream: This is the foundation of our no-churn magic! Also known as heavy cream or simply whipping cream, it’s essential for creating the light, airy, and creamy base of the ice cream. When whipped, heavy cream incorporates air, providing the volume and structure that traditionally comes from churning. You can typically find heavy whipping cream in the dairy section of your local supermarket. In some regions, it might be labeled as double cream (British) or Devonshire cream. The higher fat content (typically 36% or more) is what allows it to whip into stiff peaks and prevents excessive ice crystal formation, giving our ice cream its luxurious texture.
- Sweetened Condensed Milk: This ingredient is a true no-churn hero! It serves multiple purposes:
- **Sweetness:** Provides the primary sweetness for the ice cream.
- **Creaminess:** Its thick, viscous texture contributes significantly to the overall creaminess.
- **Texture Control:** The high sugar content and viscosity help prevent large ice crystal formation, which is crucial for achieving a smooth, scoopable ice cream without an ice cream machine. It replaces the need for an egg custard base, simplifying the recipe immensely.
For exact quantities of each ingredient, please refer to the detailed recipe card below.
Step-by-Step: Crafting Your Strawberry Ice Cream
Creating this irresistible No-Churn Strawberry Ice Cream is a straightforward process, broken down into 4 simple, manageable steps. Follow these instructions carefully for the best results!
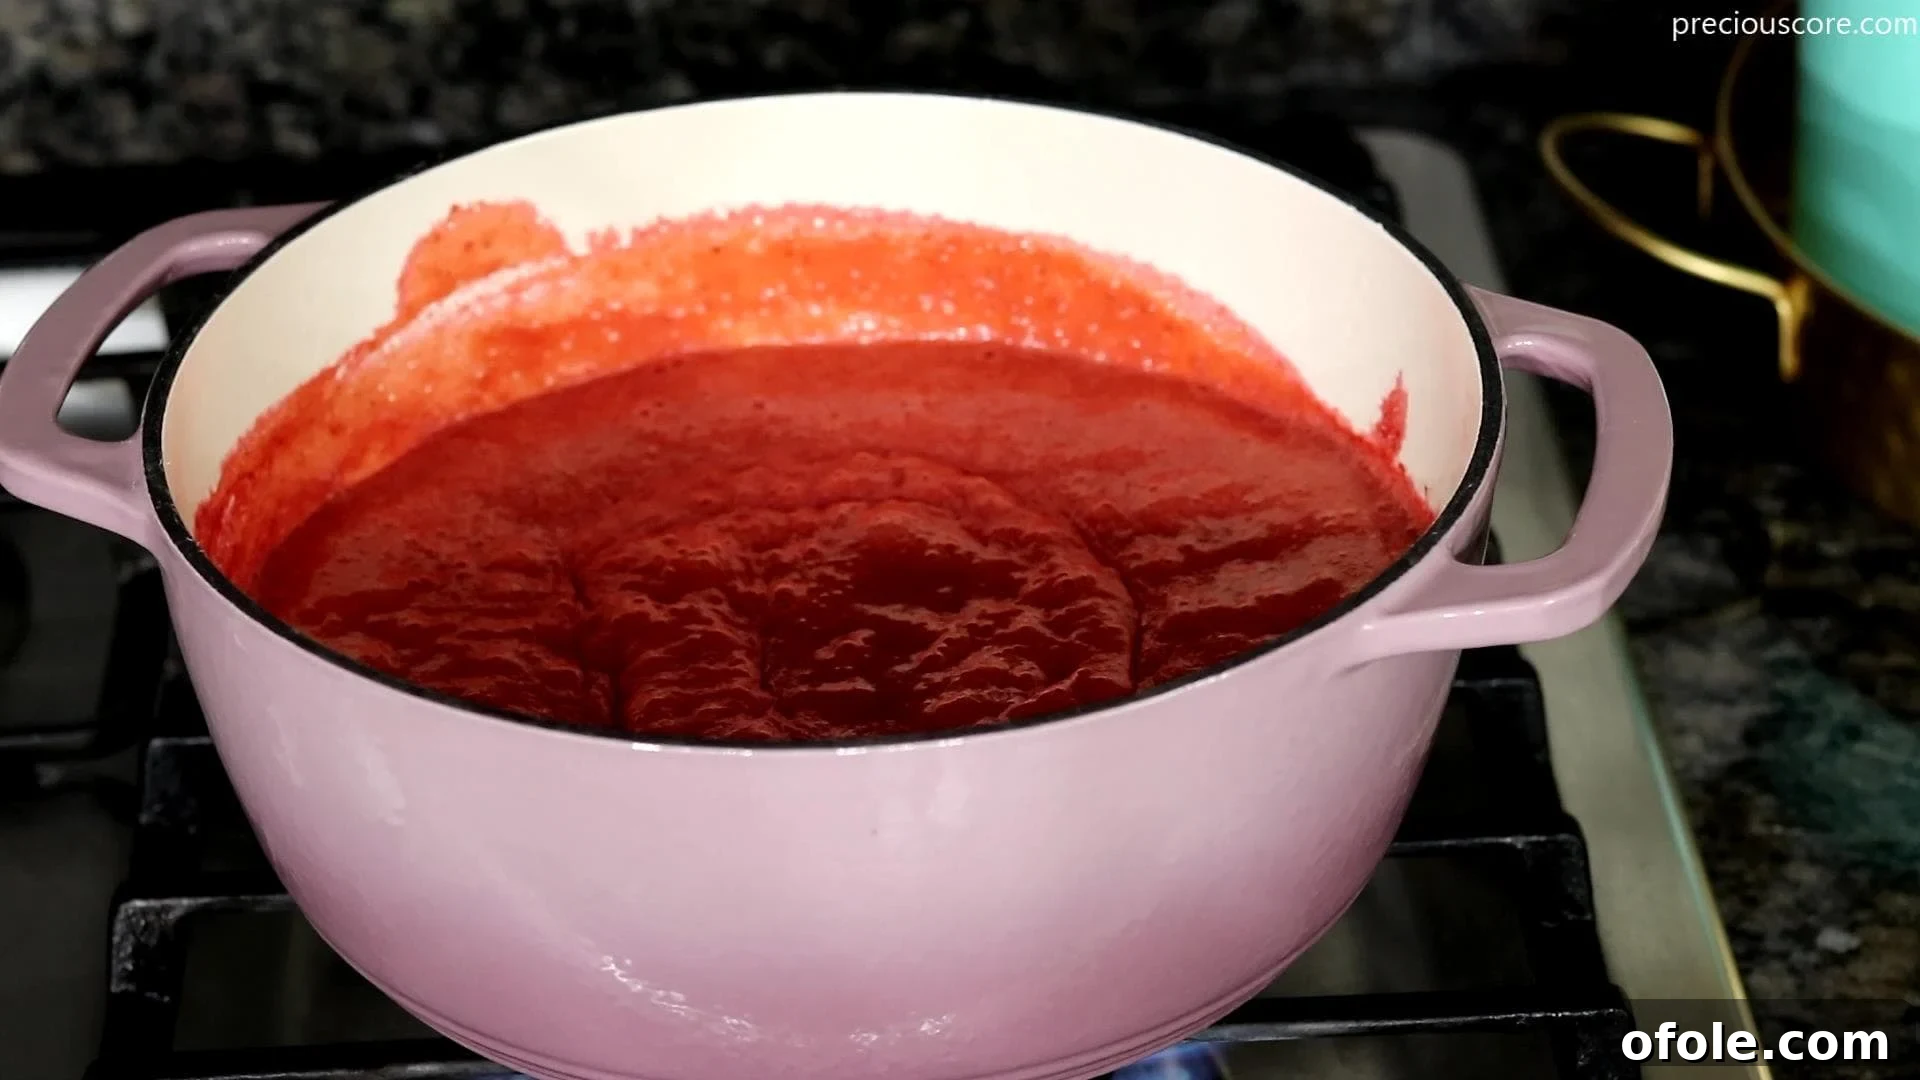
1. Prepare the Strawberry Puree: Begin by washing, hulling, and quartering your strawberries. Place them into a blender and process until you achieve a smooth puree. Transfer this vibrant puree into a medium-sized pot (a cast iron or non-stick pot works best to prevent sticking). Add the granulated sugar and freshly squeezed lemon juice. Bring the mixture to a rapid simmer over high heat, then reduce the heat to medium-low. Allow the puree to gently simmer, stirring occasionally, until it thickens and reduces by approximately half. This simmering process concentrates the strawberry flavor and reduces excess water content, which can lead to icy ice cream. Once reduced, remove from heat and let it cool completely. Then, transfer it to the fridge to chill thoroughly. A properly chilled puree is crucial for the next steps.
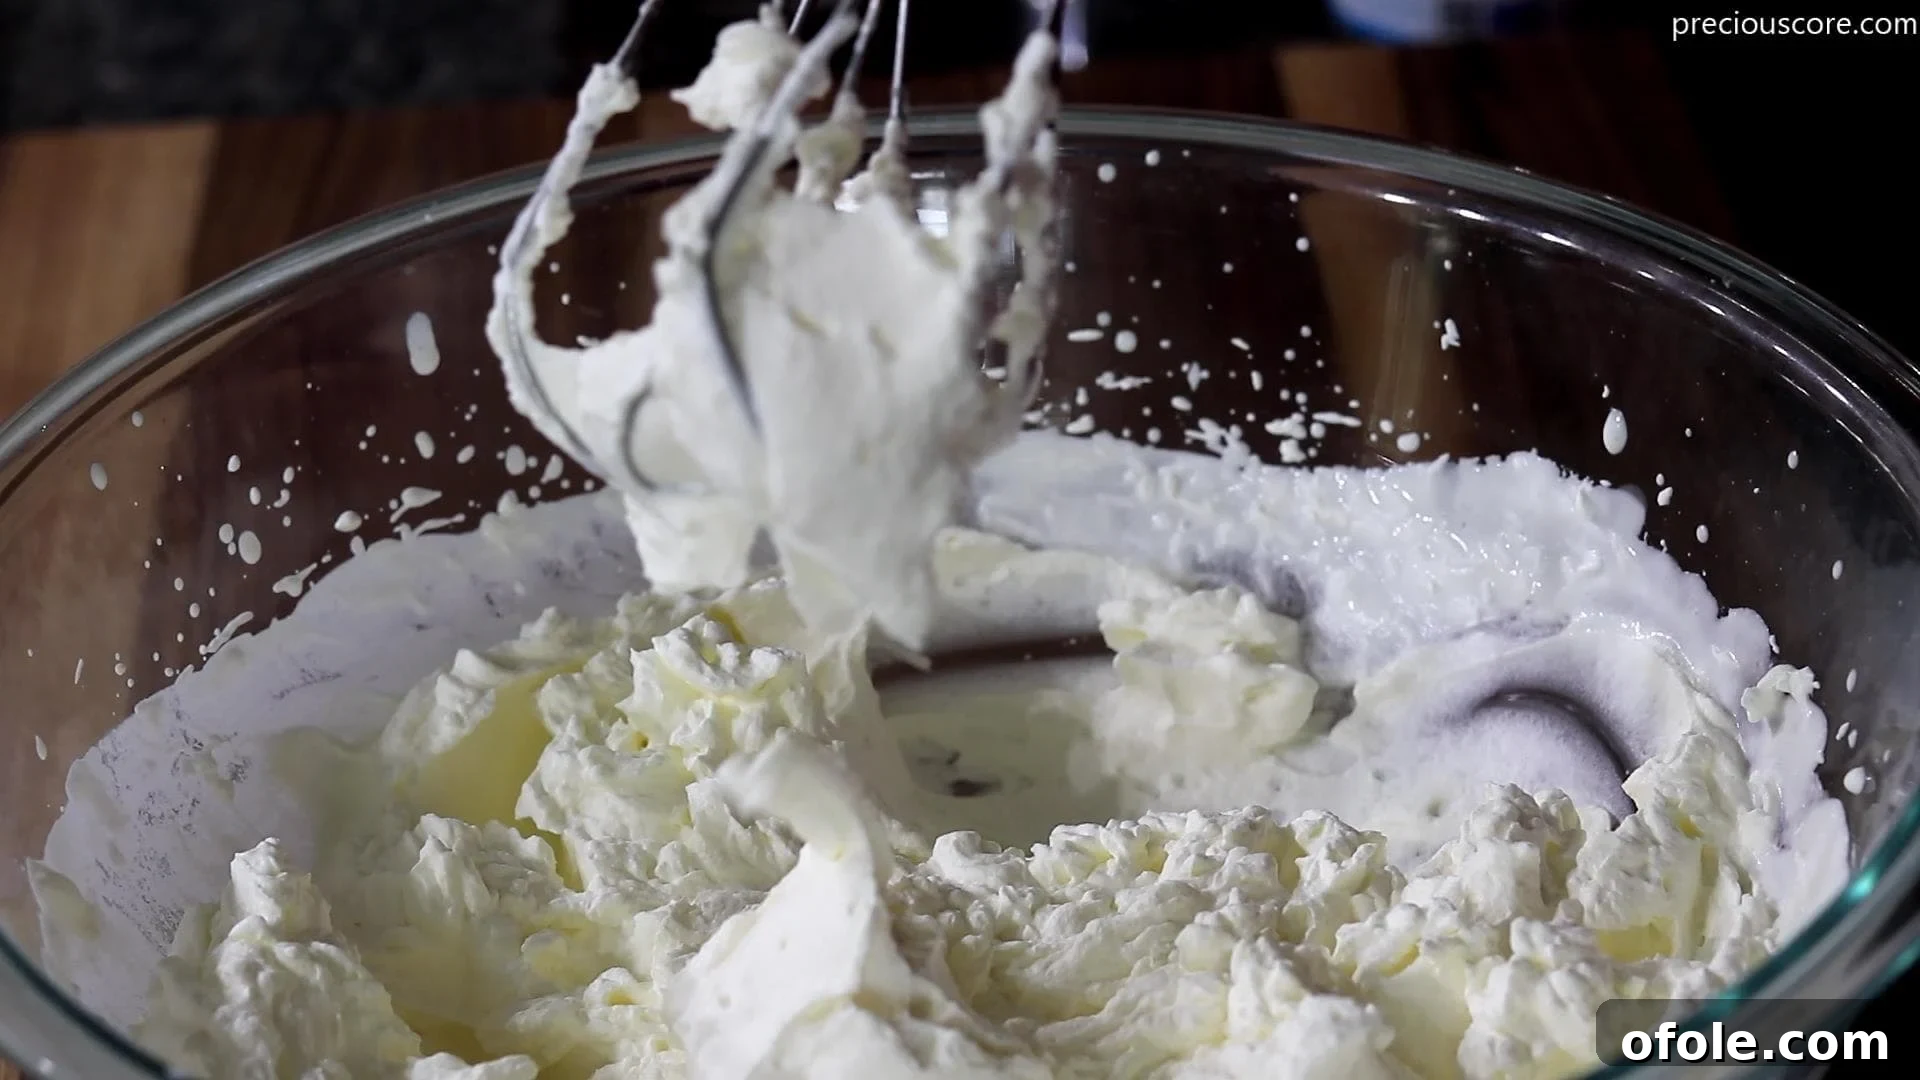
2. Whip the Heavy Cream: Pour the very cold heavy whipping cream into a large, chilled mixing bowl. Using an electric hand mixer (or a stand mixer with a whisk attachment), begin whipping the cream on medium speed. Continue beating until the cream transforms into beautiful, stiff peaks. This means that when you lift the beaters, the peaks of cream stand upright and hold their shape firmly. Be careful not to overbeat, as this can cause the cream to separate and turn into butter. Stop as soon as stiff peaks are achieved.
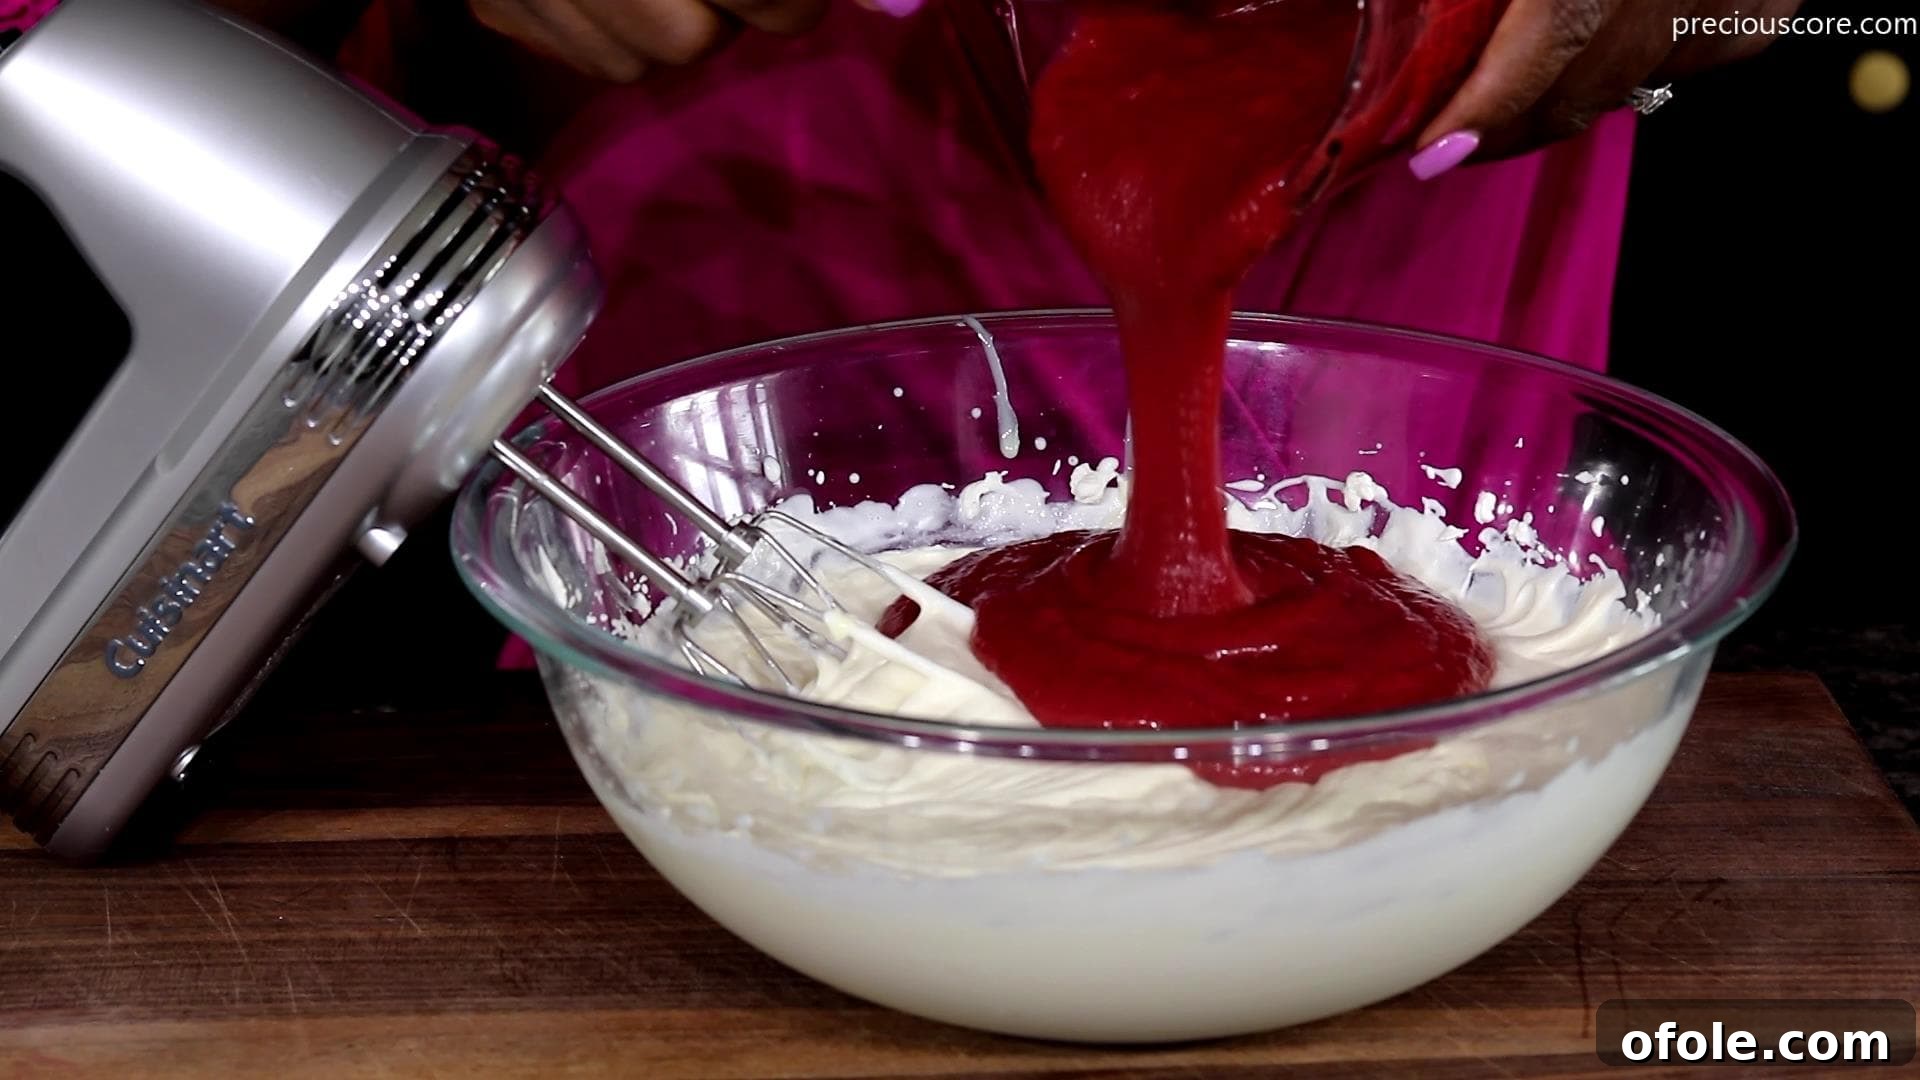
3. Combine the Base: Once your heavy cream is perfectly whipped, gently add the sweetened condensed milk and the thoroughly chilled strawberry puree to the bowl. Switch your electric hand mixer to a low speed, or use a spatula to fold the ingredients together. Mix just until everything is beautifully combined and streaks of condensed milk and puree are no longer visible. The mixture should remain light and airy. Avoid overmixing to maintain the fluffy texture of the whipped cream.
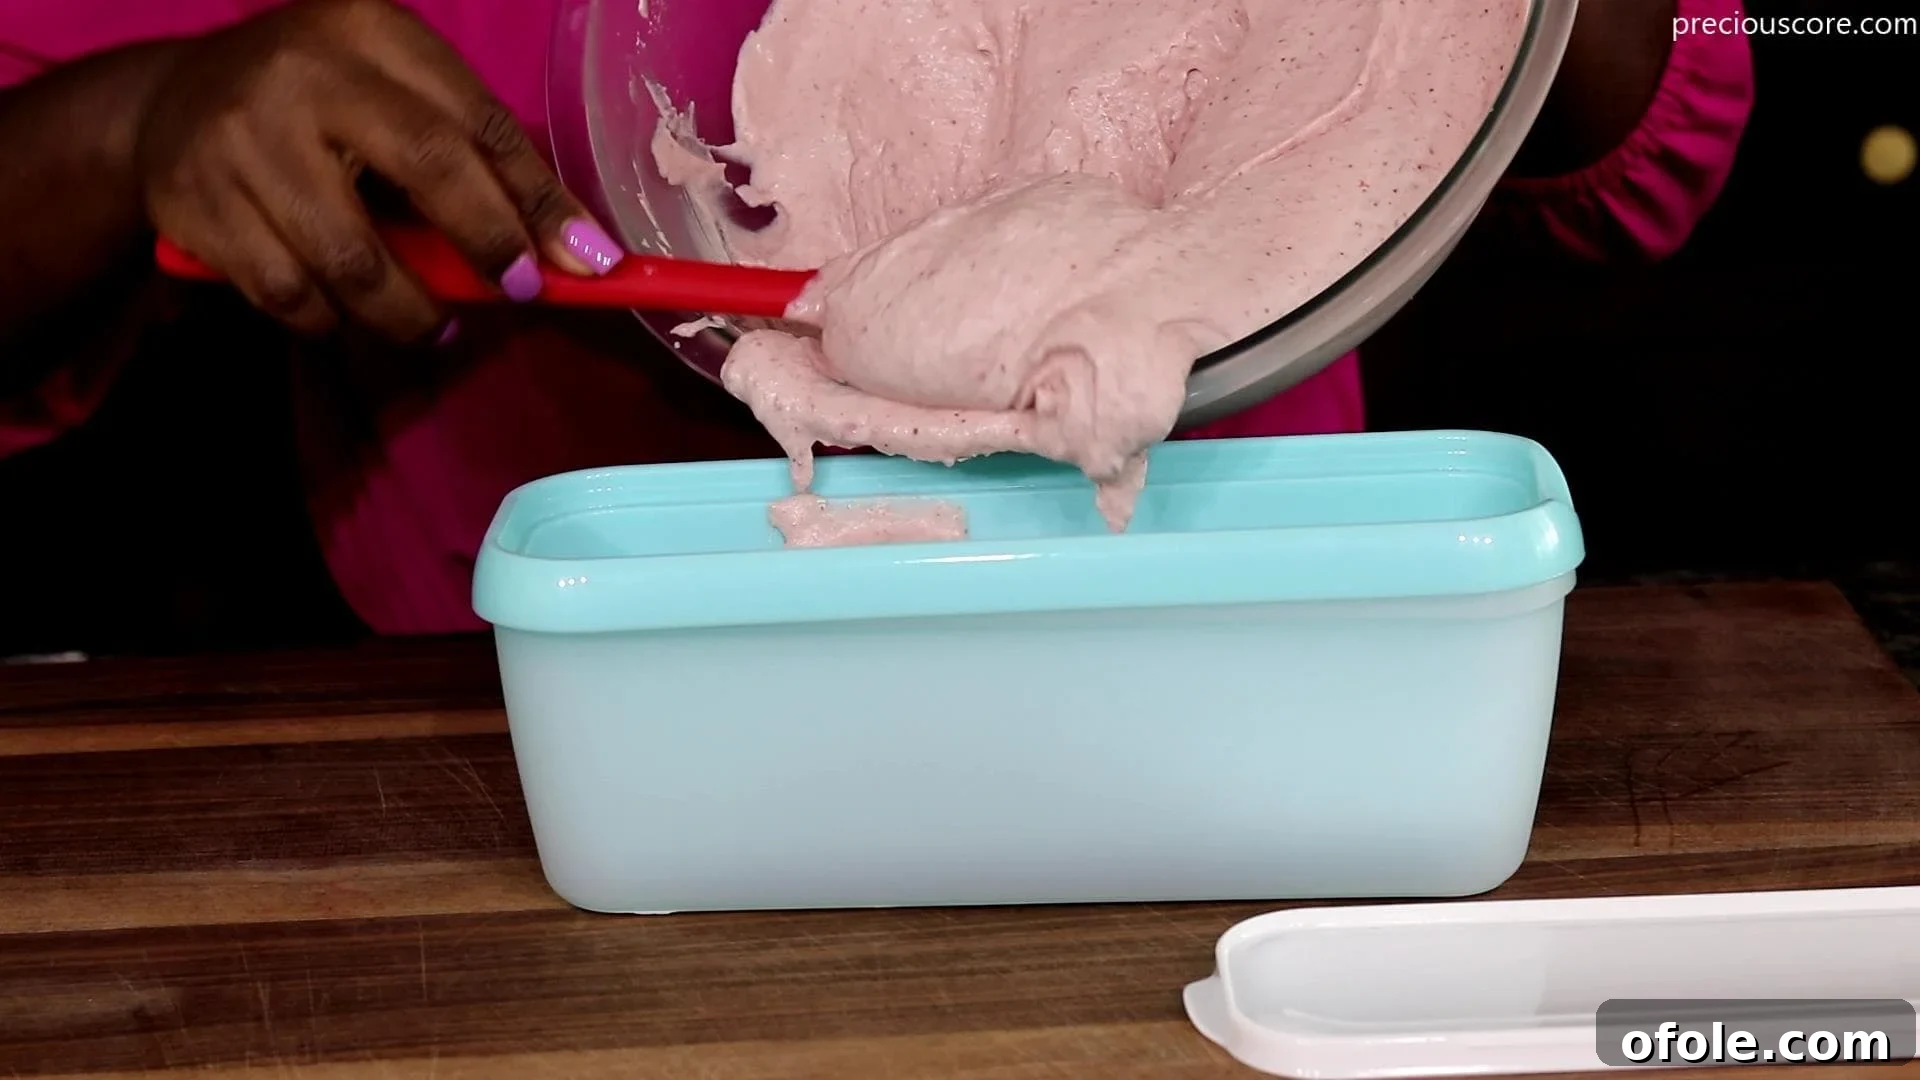
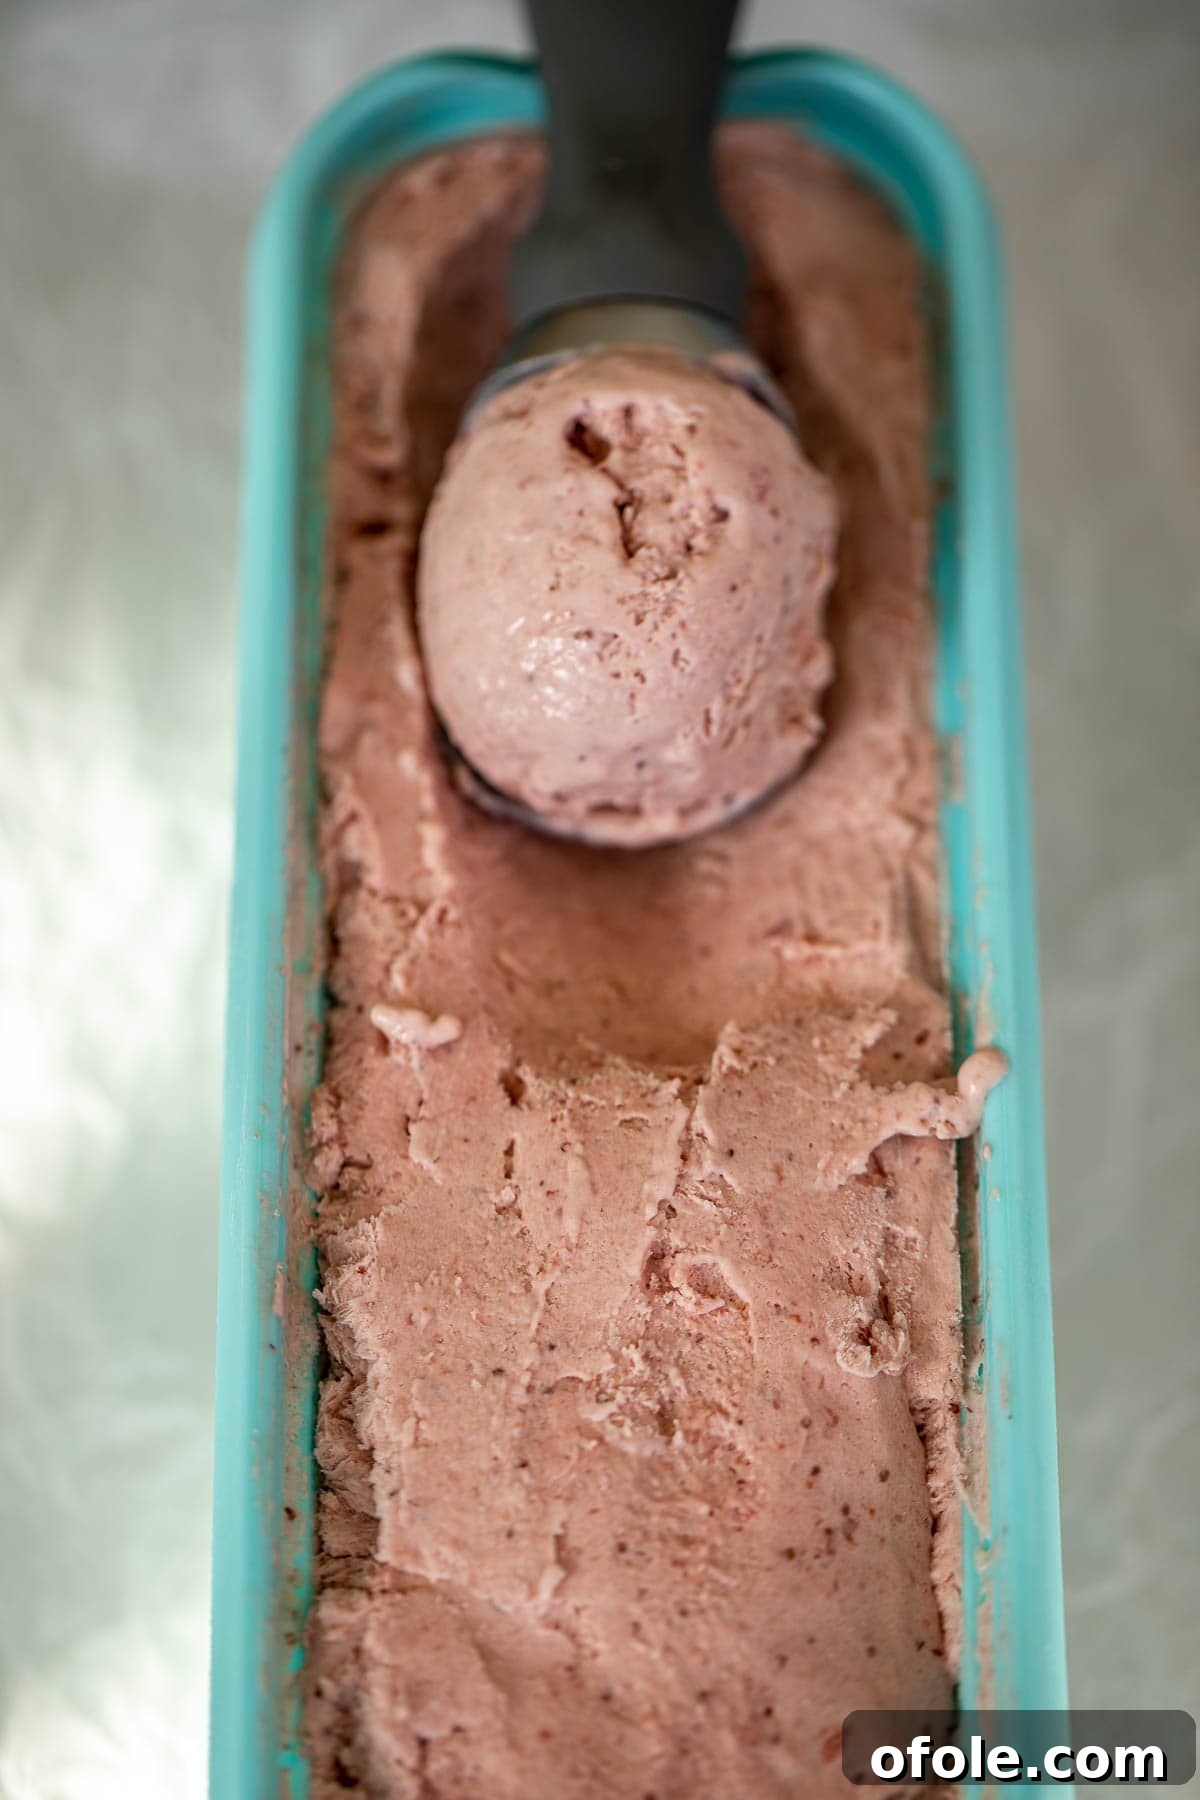
4. Freeze to Perfection: Carefully pour the entire strawberry ice cream mixture into a loaf pan or a freezer-safe plastic bowl with a tight-fitting lid. If using a loaf pan, ensure you cover the surface of the ice cream directly with plastic wrap. This “contact” layer of plastic wrap helps prevent ice crystals from forming on the surface, ensuring a smoother result. Transfer the pan or bowl to the freezer and allow it to freeze for a minimum of 8 hours, though overnight is often ideal for a perfectly solid and scoopable consistency. Patience is key for this final step!
Important Hint: The temperature of your strawberry puree is paramount. It is absolutely essential to let the strawberry puree chill completely before incorporating it into the whipped cream. Introducing hot or even warm strawberry puree to your delicate whipped cream will cause it to melt and lose its airy, fluffy texture, leading to a much icier and less desirable ice cream consistency. To ensure maximum chill, consider making the strawberry puree several hours in advance or even the day before, allowing it to cool down and chill thoroughly in the refrigerator overnight.
Expert Tips for Perfection
- **Chill Everything:** Beyond the strawberry puree, ensuring your heavy whipping cream and even your mixing bowl and beaters are very cold will significantly aid in achieving stiff peaks faster and more effectively. Pop your bowl and beaters in the freezer for 10-15 minutes before whipping.
- **Don’t Overmix:** Once the heavy cream reaches stiff peaks, stop whipping immediately. Overmixing can turn your cream into butter, ruining the texture for ice cream. Similarly, when combining the whipped cream with condensed milk and puree, mix just until combined.
- **Cover Properly:** When freezing, pressing plastic wrap directly onto the surface of the ice cream mix helps create a barrier against air, which is a common culprit for ice crystal formation. For best results, use an airtight container.
- **Allow Thawing Before Scooping:** If your ice cream is rock solid straight from the freezer, let it sit at room temperature for 10-15 minutes before attempting to scoop. This brief thaw will make it perfectly scoopable and enhance its creamy texture.
- **Taste and Adjust:** Before freezing, taste your combined ice cream base. If your strawberries were particularly tart, you might want to add a tiny bit more sugar to the puree. This is your chance to customize the sweetness!
Delicious Ice Cream Variations
While strawberry is a classic for a reason, the beauty of this no-churn base is its adaptability! Thinking of venturing beyond luscious strawberry ice cream? Here are some delightful variations to inspire your next frozen creation:
- Lemon Ice Cream: For a bright and zesty treat, substitute the strawberry puree with a homemade or good quality store-bought lemon curd. The tangy sweetness of lemon curd creates a wonderfully refreshing ice cream.
- Peach Ice Cream: Capture the essence of late summer by pureeing ripe peaches (peeled and pitted) and simmering them with a touch of sugar and lemon juice, just as you would the strawberries. The result is a wonderfully aromatic and sweet peach-flavored delight.
- Pineapple Ice Cream: Elevate your ice cream game with tropical flair. Instead of strawberry puree, fold in a rich, homemade Pineapple Jam. The caramelized sweetness of pineapple jam adds a unique depth and irresistible texture.
- Mixed Berry Swirl: Can’t pick just one berry? Blend a mix of strawberries, raspberries, and blueberries for your puree. You can even swirl in extra whole berries at the end for added texture and visual appeal.
- Chocolate Chip Strawberry: After combining all ingredients, fold in a cup of mini chocolate chips or finely chopped dark chocolate for a delightful textural contrast.
- Nutella Swirl: For chocolate-hazelnut lovers, gently swirl spoonfuls of Nutella into the ice cream base just before freezing. Don’t mix it completely for a beautiful marbled effect.
Kitchen Equipment You’ll Need
One of the many joys of this no-churn recipe is the minimal equipment required. You likely already have everything you need in your kitchen, making homemade ice cream accessible to everyone:
- Blender: Essential for transforming those fresh strawberries into a smooth, luscious puree. A food processor can also work if you don’t have a blender.
- Hand Mixer (or Stand Mixer): Crucial for whipping the heavy cream to stiff peaks. While you *could* do this by hand with a whisk, an electric mixer makes the process much faster and easier.
- Large Mixing Bowl: You’ll need a spacious bowl for whipping the cream and then combining all the ingredients. Opt for a metal or glass bowl for chilling purposes.
- Rubber Spatula: Perfect for gently folding ingredients together and scraping down the sides of the bowl to ensure everything is well incorporated without deflating the whipped cream.
- Medium-sized Pot: For simmering the strawberry puree. A non-stick or cast-iron pot is recommended to prevent sticking and ensure even reduction.
- Loaf Pan or Freezer-Safe Container: For freezing your ice cream. A standard 9×5 inch loaf pan is ideal, but any airtight freezer-safe container will work.
Proper Storage for Homemade Ice Cream
To keep your delicious homemade strawberry ice cream tasting its best, proper storage is key. Store it in an **airtight container** in the coldest part of your freezer. This helps prevent freezer burn and the formation of ice crystals. When stored correctly, your no-churn strawberry ice cream will maintain its creamy texture and vibrant flavor for up to **one month**. For optimal enjoyment, try to consume it within two to three weeks, as homemade ice cream generally doesn’t contain the stabilizers found in commercial varieties.
Top Tip for Perfectly Whipped Cream
Achieving perfectly whipped heavy cream is the cornerstone of any successful no-churn ice cream. The most crucial factor here is ensuring that your **heavy whipping cream is as cold as possible** before you begin whipping it. Warm cream simply will not whip properly, leading to a runny, disappointing base.
To maximize its coldness and guarantee optimal whipping results, follow these simple yet effective steps:
- **Keep it Chilled Until the Last Moment:** Only remove the heavy whipping cream from the refrigerator when you are absolutely ready to start whipping it. Don’t let it sit on the counter.
- **Chill Your Equipment:** Take your preparation a step further by placing the empty mixing bowl you intend to use for whipping the cream, along with your mixer beaters, into the freezer for about 10 to 15 minutes. This pre-chilling of your equipment will help maintain the cream’s cold temperature during the whipping process, making it whip faster and achieve those desirable stiff peaks with ease. Once chilled, take them out and proceed to whip your cream. This small step makes a significant difference in the final texture of your ice cream.
Watch The Recipe Video
Visual learners, rejoice! You can watch me making this delightful No-Churn Strawberry Ice Cream recipe in action on my YouTube channel. The video provides a clear, step-by-step guide to help you master every aspect of this easy recipe. If you enjoy seeing recipes come to life and want to stay updated with all my latest culinary adventures, be sure to SUBSCRIBE to my YouTube channel and click on the notification bell. That way, you’ll get notified every time I post a new and exciting video!
Serving Suggestions for Your Frozen Treat
This No-Churn Strawberry Ice Cream is a masterpiece on its own, offering a pure burst of berry goodness. However, it also makes a fantastic accompaniment to a variety of desserts, enhancing their flavors and adding a creamy, cool element. Here are some delectable ways to serve your homemade ice cream:
- With Warm Puddings: The contrast of cold, creamy ice cream against a warm, comforting dessert is simply heavenly. Try it with a rich Malva Pudding or a luscious Challah Bread Pudding.
- Alongside Fruit Pies: A scoop of strawberry ice cream is the perfect partner for a slice of warm Homemade Apple Pie. The tartness of the fruit pie complements the sweet berries beautifully.
- Topped on Cakes: Elevate a simple cake, like our Mango Upside Down Cake, with a generous scoop of this refreshing ice cream.
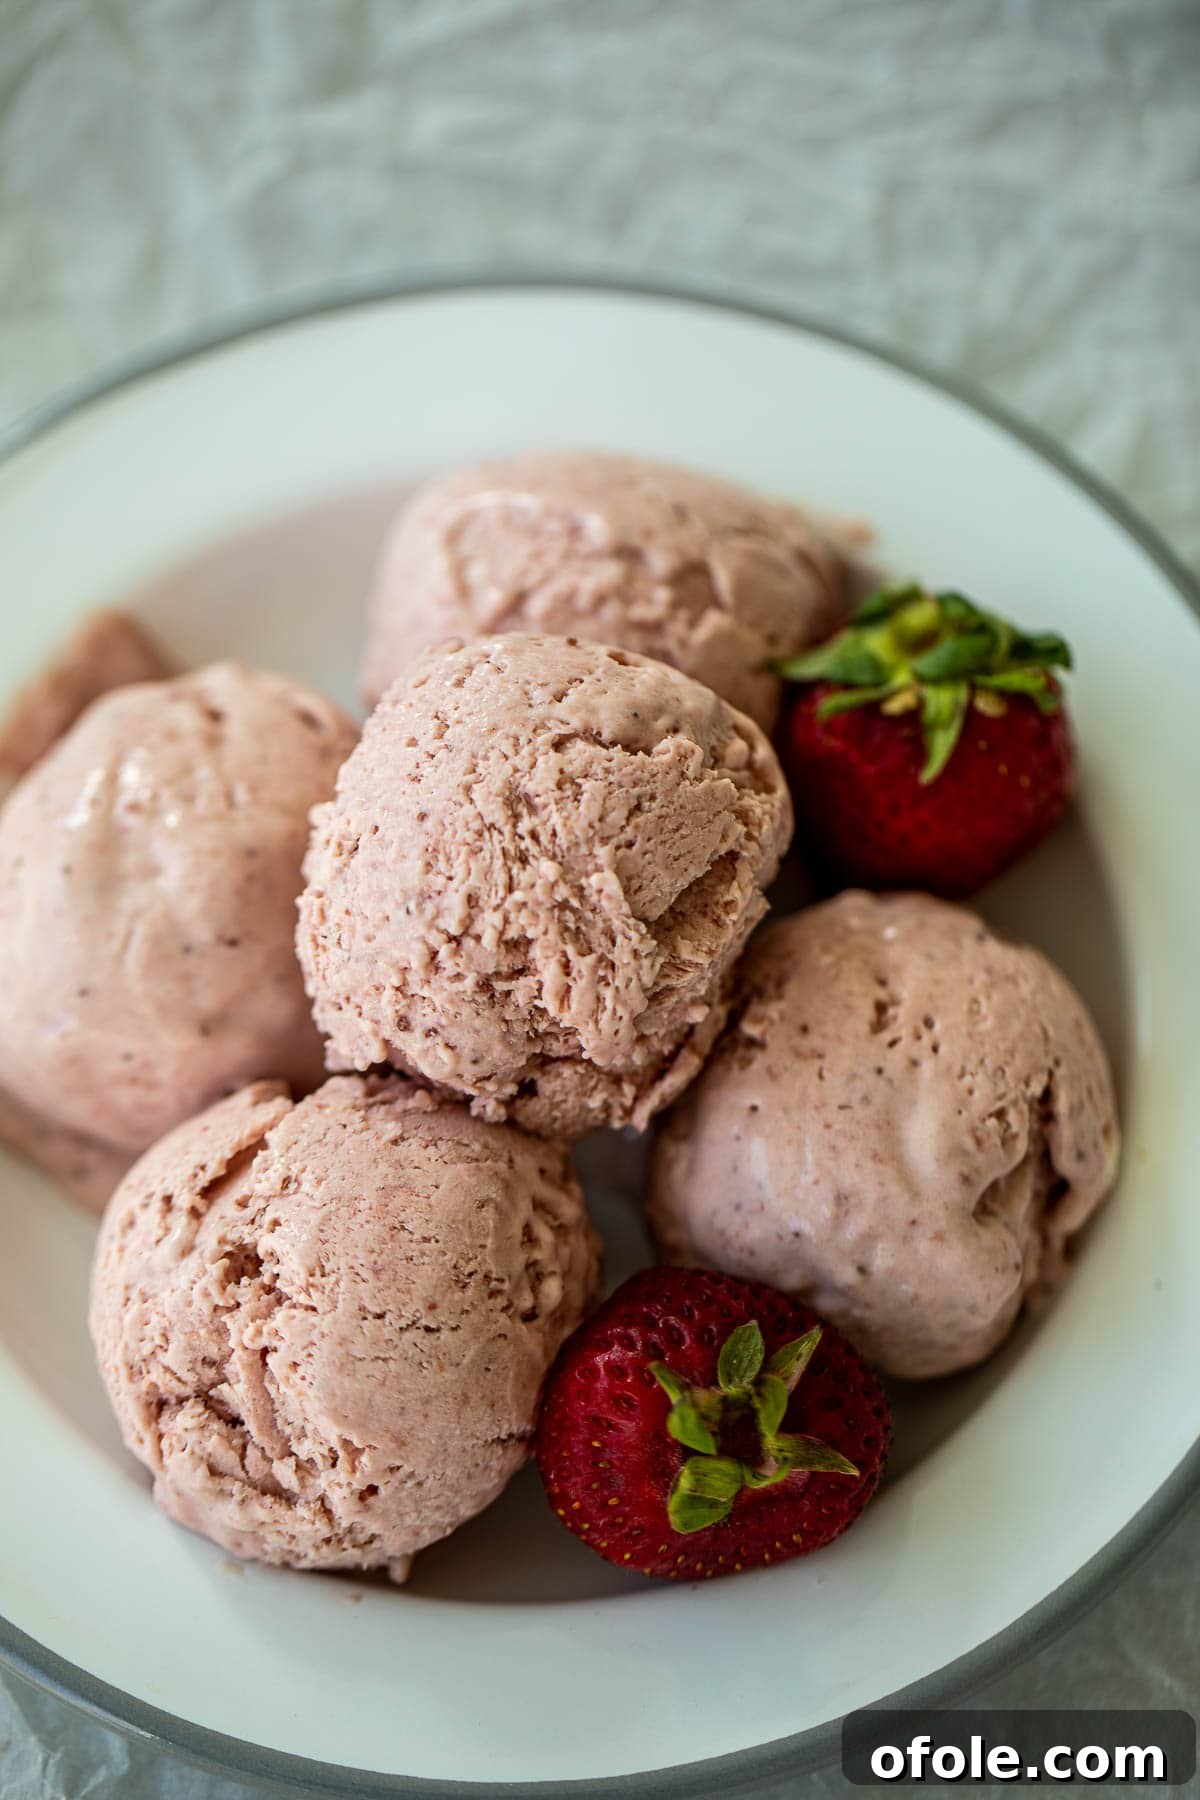
- **As a Sundae:** Create an epic sundae with fresh sliced strawberries, whipped cream, a drizzle of chocolate sauce, and a sprinkle of chopped nuts.
- **In a Milkshake:** Blend a few scoops with milk and a touch more fresh strawberries for a thick, delightful strawberry milkshake.
- **With Waffles or Pancakes:** For a decadent breakfast or brunch, serve warm waffles or pancakes topped with strawberry ice cream and a dollop of fresh whipped cream.
More Irresistible Ice Cream Recipes
If you’ve fallen in love with the ease and deliciousness of homemade ice cream, you’re in luck! We have a delightful collection of other ice cream recipes, many of which are also no-churn, allowing you to explore a spectrum of flavors without specialized equipment:
- Homemade Vanilla Ice Cream (VIDEO)
- Homemade Chocolate Ice Cream
- Mango Ice Cream
- No Churn Coconut Ice Cream
- Watermelon Ice Cream
More Delightful Strawberry Recipes
Strawberry Cinnamon Rolls
Healthy Strawberry Jam
Easy Chocolate Covered Strawberries
Other Sweet Desserts to Explore
Plain Cake Recipe
How To Make Shortbread Cookies
Homemade Vanilla Ice Cream (VIDEO)
Yogurt Cake
Coconut Sweet – Toasted Coconut Flakes
Classic Chocolate Cake
If you make this incredible No-Churn Strawberry Ice Cream recipe, we would absolutely love to hear from you! Please consider leaving a star rating and a comment below to share your experience. Your feedback helps us and other home cooks discover new favorites!
No Churn Strawberry Ice Cream
30 minutes
6 hours
6 hours
30 minutes
6
servings
Print Recipe
Equipment
-
Hand Mixer
-
Blender
-
Large Mixing Bowl
-
Medium Pot
-
Rubber Spatula
-
Loaf Pan or Freezer-Safe Container
Ingredients
- 2 pounds fresh strawberries, hulled and cut into quarters or frozen strawberries (defrosted)
- 2-3 tablespoons freshly squeezed lemon juice
- 2 tablespoons granulated sugar
- 2 cups heavy whipping cream (about 500ml), very cold
- 14 oz can sweetened condensed milk
Instructions
-
1. Make the Strawberry Puree. Place the hulled and quartered strawberries into a blender and blend until completely smooth. Pour the puree into a medium-sized pot (preferably a heavy-bottomed or non-stick pot). Add the lemon juice and sugar. Bring the mixture to a simmer over high heat, then reduce the heat to medium-low and simmer for 10-15 minutes, stirring occasionally, until the puree thickens and reduces by about half.
-
2. Chill the Puree. Remove the pot from heat and let the strawberry puree cool completely to room temperature. Then, transfer it to the fridge and chill thoroughly until it is very cold (at least 2-3 hours or overnight).
-
3. Beat the Cream. Pour the very cold heavy whipping cream into a large, chilled mixing bowl. Using an electric hand mixer, whip the cream on medium-high speed until stiff peaks form. The cream should hold its shape firmly when the beaters are lifted. Be careful not to overbeat.
-
4. Combine Ingredients. Add the sweetened condensed milk and the thoroughly chilled strawberry puree to the bowl with the whipped cream. Using the hand mixer on low speed, or a spatula, gently fold and beat until all ingredients are just combined and no streaks remain. Do not overmix.
-
5. Freeze the Ice Cream. Pour the mixture into a loaf pan or a freezer-safe plastic bowl with a tight-fitting lid. If using a loaf pan, cover the surface of the ice cream directly with plastic wrap, ensuring it touches the mixture to prevent ice crystals. Freeze for at least 8 hours, or preferably overnight, until firm.
-
6. Serve. Scoop and enjoy your creamy homemade strawberry ice cream! If it’s too hard straight from the freezer, let it thaw at room temperature for about 10-15 minutes until it reaches a scoopable consistency.
Video
Notes
2. Heavy Cream: Also known as heavy cream or whipping cream, heavy whipping cream forms the base of this no-churn strawberry ice cream. It must be very cold. You can find heavy whipping cream in the dairy and fridge section of supermarkets. Other names for heavy whipping cream are double cream (British) or Devonshire cream.
3. Plastic Wrap: Ensuring that the plastic wrap touches the surface of the ice cream mixture helps to prevent ice crystals from forming as it freezes, resulting in a much smoother, creamier texture.
4. Storage: Store homemade strawberry ice cream in an airtight container in the freezer for up to one month for best quality.
Nutrition
Calories: 551kcal
|
Carbohydrates: 55g
|
Protein: 9g
|
Fat: 35g
|
Saturated Fat: 22g
|
Polyunsaturated Fat: 2g
|
Monounsaturated Fat: 9g
|
Cholesterol: 112mg
|
Sodium: 111mg
|
Potassium: 567mg
|
Fiber: 3g
|
Sugar: 51g
|
Vitamin A: 1362IU
|
Vitamin C: 95mg
|
Calcium: 266mg
|
Iron: 1mg
Additional Info
Dessert
Western
551
Tried this recipe?
Mention @preciouscore or tag #PreciousCore!