
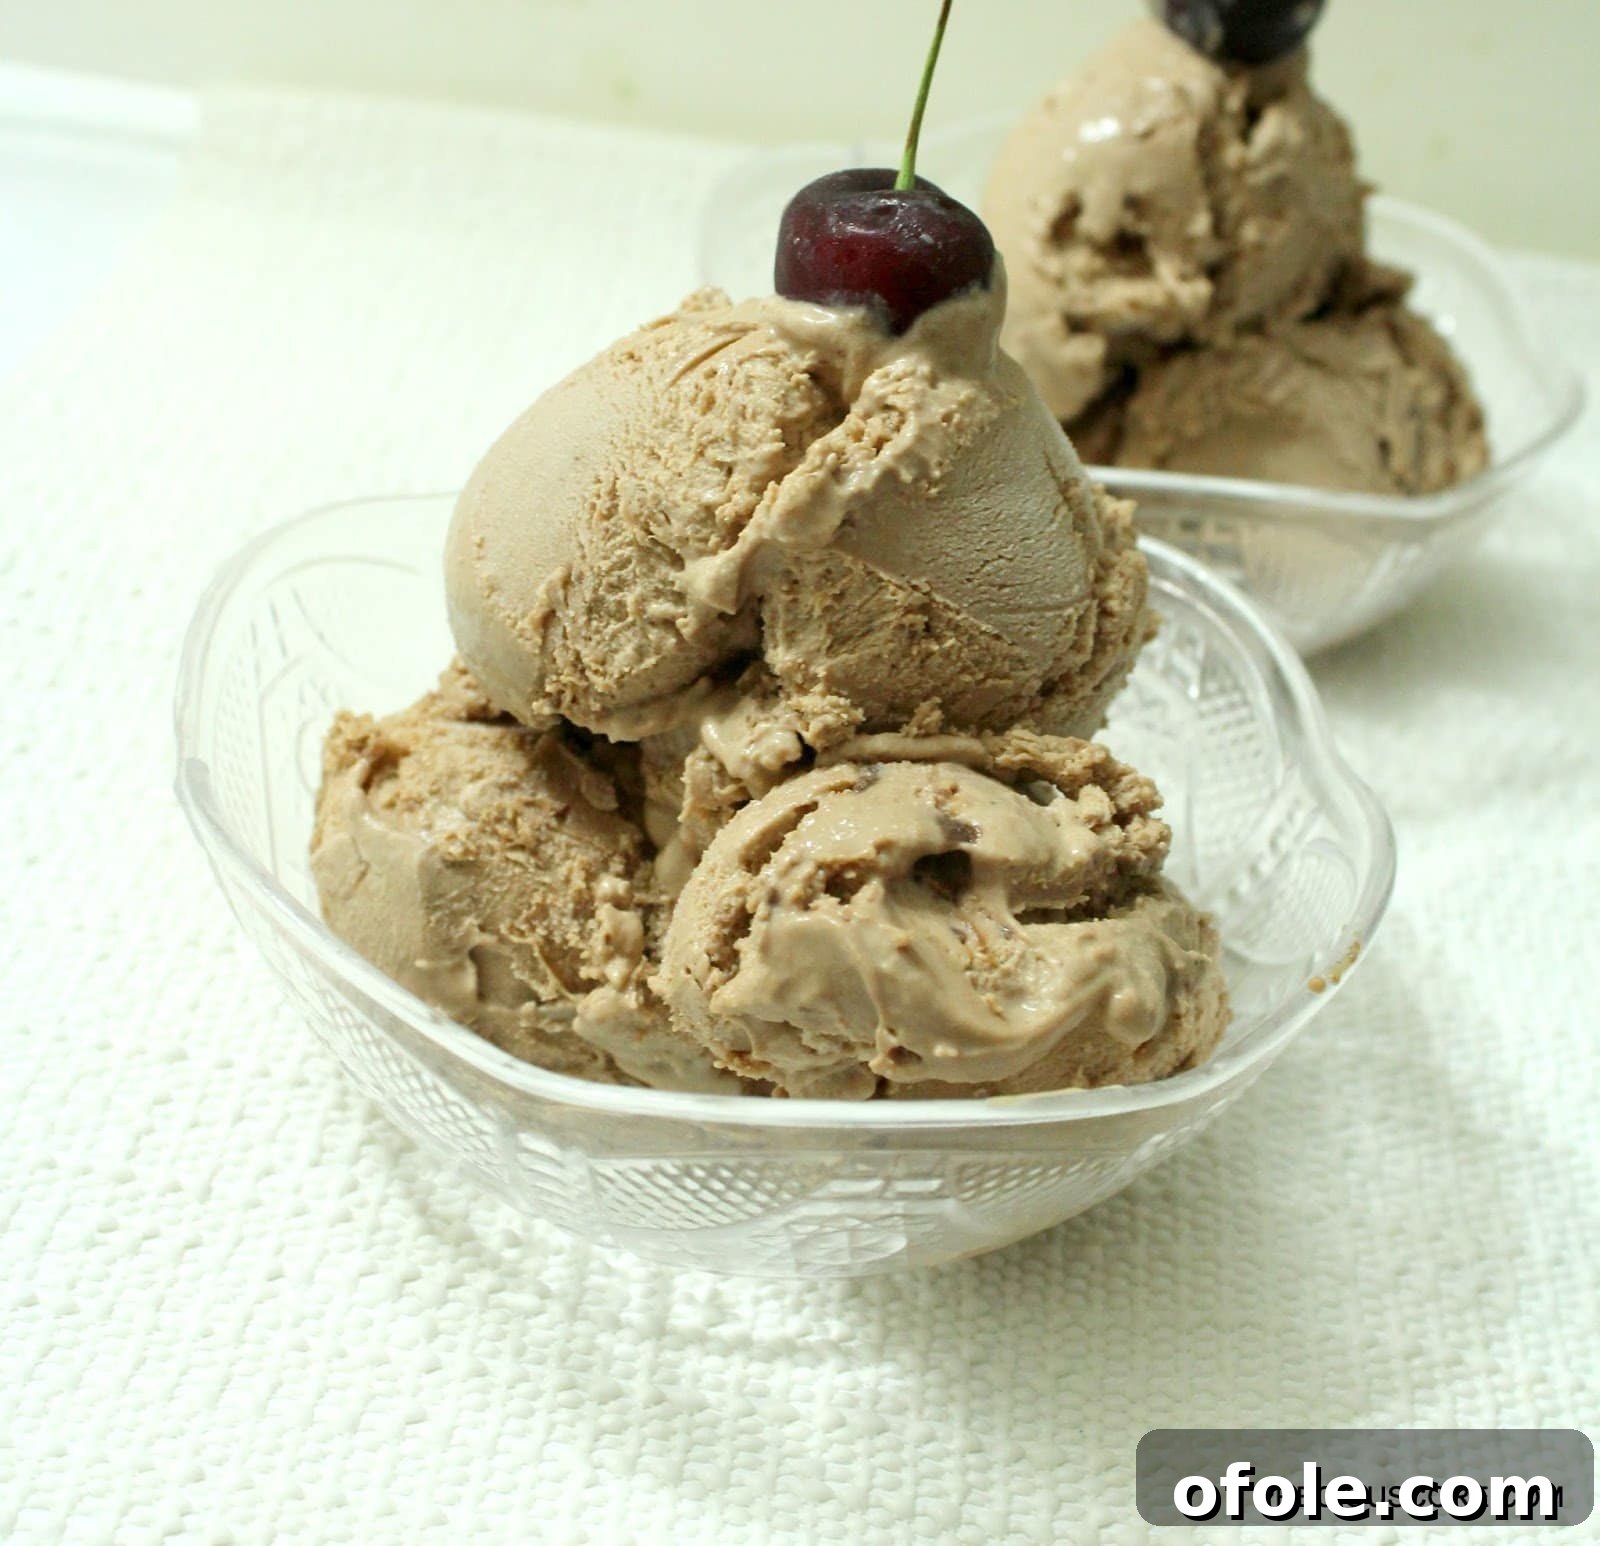
Indulge in Homemade Bliss: The Easiest 3-Ingredient No-Churn Chocolate Ice Cream Recipe
Imagine a world where luxurious, creamy chocolate ice cream is not just a dream but a delightful reality, made right in your kitchen with minimal effort and no fancy equipment. This isn’t a fantasy; it’s the promise of our incredibly simple no-churn chocolate ice cream recipe. Forget the cumbersome ice cream makers and long lists of ingredients. Today, we’re unveiling the secret to crafting rich, decadent chocolate ice cream using just three humble components.
Whether you’re a seasoned dessert enthusiast or a kitchen novice, this recipe is designed to impress with its simplicity and unbeatable results. Get ready to transform everyday ingredients into a frozen treat that tastes like it came straight from a gourmet parlor. This isn’t just an easy recipe; it’s a game-changer for anyone craving homemade ice cream without the hassle. Prepare to fall in love with the world’s easiest homemade chocolate ice cream!
The Magical Trio: Just Three Ingredients for Perfect Chocolate Ice Cream
The beauty of this recipe lies in its minimalist approach. With only three key ingredients, you can whip up a batch of velvety smooth chocolate ice cream that will leave everyone asking for more. Each ingredient plays a crucial role in achieving that coveted creamy texture and rich flavor without the need for churning.
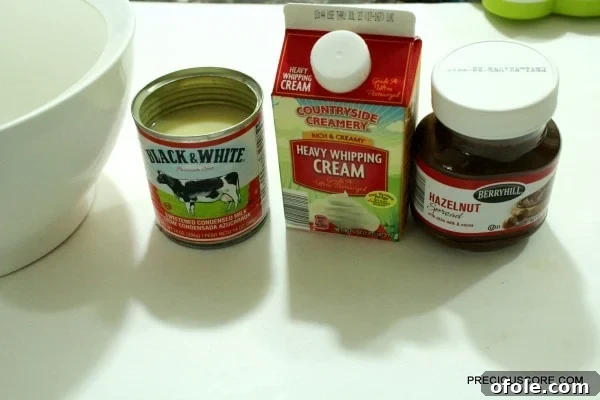
Meet Your Stars:
- Heavy Whipping Cream: This is the foundation of our no-churn magic. When whipped, heavy cream incorporates air, creating a light, airy base that expands beautifully. Its high-fat content is essential for a creamy, not icy, texture. Aim for a cream with at least 36% milk fat for optimal whipping results.
- Sweetened Condensed Milk: The sweet heart of this recipe. Sweetened condensed milk not only provides the perfect amount of sweetness but also contributes significantly to the ice cream’s smooth consistency. Its high sugar content helps prevent the formation of large ice crystals, ensuring a wonderfully scoopable and melt-in-your-mouth texture. It’s also a concentrated milk, adding richness without extra liquid.
- Chocolate Spread: This is where the rich chocolate flavor comes in! A good quality chocolate-hazelnut spread (like Nutella) or a plain chocolate spread will infuse your ice cream with deep, satisfying cocoa notes. The fats and sugars in the spread further contribute to the smooth texture, making it an ideal choice for this simple recipe.
Together, these three ingredients create a harmonious blend that sets firm in the freezer without becoming hard or icy. It’s truly a testament to culinary chemistry in its simplest, most delicious form.
Step-by-Step Guide: Crafting Your No-Churn Chocolate Dream
Making this easy 3-ingredient chocolate ice cream is as straightforward as it gets. Follow these simple steps to ensure perfect results every time. No complex techniques, no special equipment – just pure, unadulterated ice cream joy.
Step 1: Whip Up the Creamy Base
In a large mixing bowl, combine the cold heavy whipping cream and sweetened condensed milk. For best results, ensure both ingredients are thoroughly chilled. Using a hand-held electric mixer (or a stand mixer with a whisk attachment) on medium-high speed, beat the mixture vigorously. The goal is to incorporate air and create volume.
Continue beating until the mixture thickens significantly and forms soft peaks. This means when you lift the beaters, the mixture holds its shape briefly before gently flopping over. It should be light, airy, and fluffy, but not stiff like meringue. If you have strong arm muscles and a traditional egg whisk, you can achieve this manually, but an electric mixer makes the process much quicker and less strenuous.
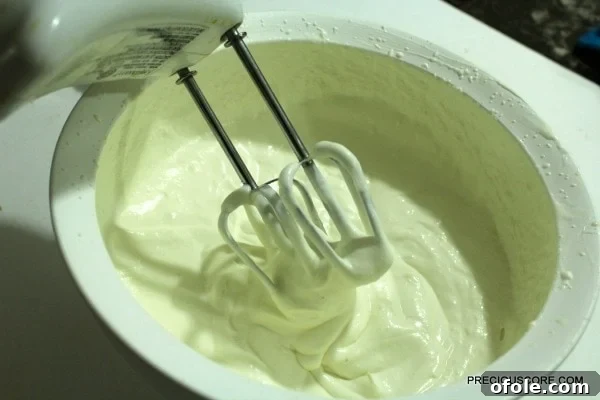
Pro Tip: For even faster whipping, chill your mixing bowl and beater attachments in the freezer for 10-15 minutes before you begin. Cold equipment helps the cream whip more efficiently and achieve better volume. Avoid over-beating, which can turn the mixture grainy.
Step 2: Fold in the Chocolatey Goodness
Once your creamy base has reached the soft peak stage, it’s time to introduce the star flavor: your chocolate spread. Gently pour in approximately one cup of your chosen chocolate spread into the whipped mixture. The key here is to maintain the airy texture you’ve just created.
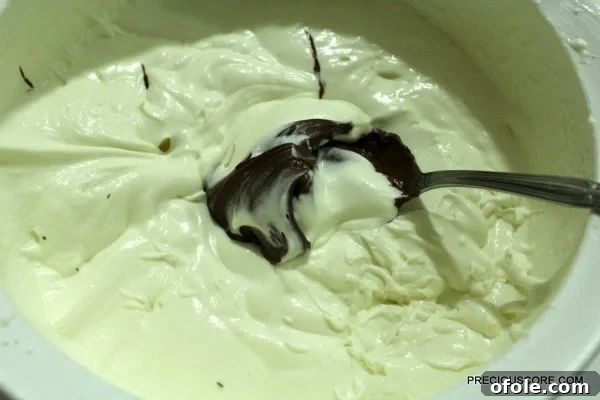
Using a spatula, gently fold the chocolate spread into the cream mixture. Use an over-and-under motion, bringing the mixture from the bottom to the top, turning the bowl as you go. Continue folding until the chocolate spread is fully incorporated and the mixture boasts a uniform, beautiful chocolate hue. Be careful not to deflate the mixture too much, as the air trapped within is crucial for the light texture of your finished ice cream.
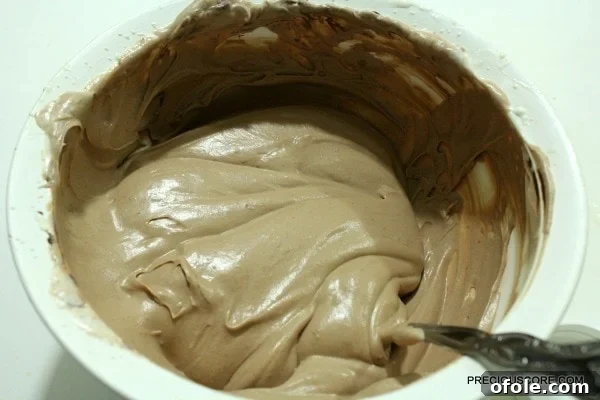
Pro Tip: If your chocolate spread is very thick, you can microwave it for 10-15 seconds to make it slightly more fluid and easier to fold in, but be sure it’s not hot.
Step 3: Prepare for Freezing
Now that your chocolate ice cream mixture is perfectly combined, it’s time to prepare it for its transformation into a frozen delight. Carefully pour the entire mixture into a loaf pan (a standard 9×5 inch loaf pan works wonderfully) or any other freezer-safe container. Ensure the mixture is spread evenly.
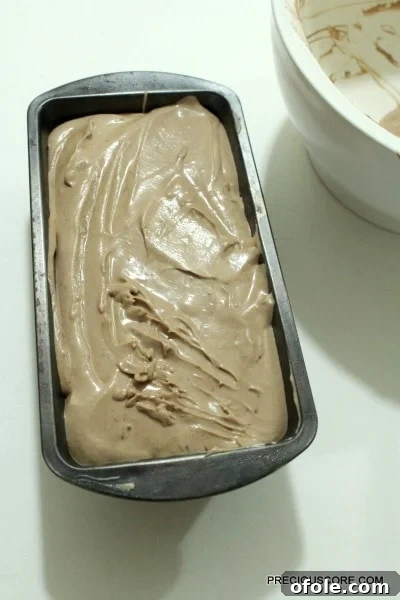
Cover the loaf pan tightly with plastic wrap or parchment paper, pressing it directly onto the surface of the ice cream mixture. This step is vital to prevent ice crystals from forming on the surface and to protect your delicious creation from absorbing any freezer odors. Place the covered pan in your freezer.
Step 4: The Waiting Game (and the Reward!)
Allow your homemade no-churn chocolate ice cream to freeze for a minimum of 6 hours. For the best, firmest consistency, it’s often ideal to leave it overnight. This extended freezing time ensures that the ice cream sets completely, developing its characteristic creamy texture.
The anticipation is part of the fun! You can prepare this in the evening and wake up to a glorious dessert, ready to be enjoyed. At this point, dear friends, the moment you’ve been waiting for has arrived.
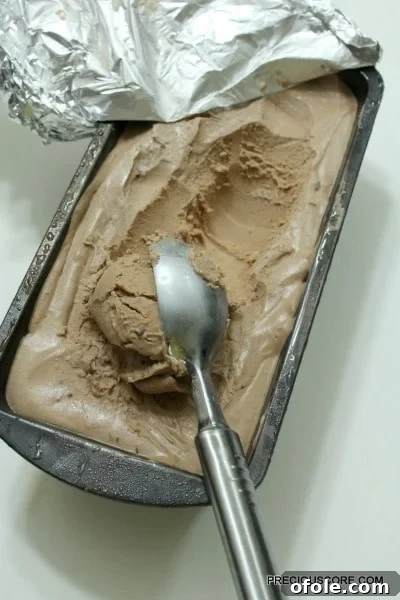
Congratulations! You have successfully crafted the world’s easiest, most delectable chocolate ice cream without an ice cream machine. Prepare to be amazed by its smooth texture and intense chocolate flavor. It’s a testament to how simple ingredients can yield extraordinary results.
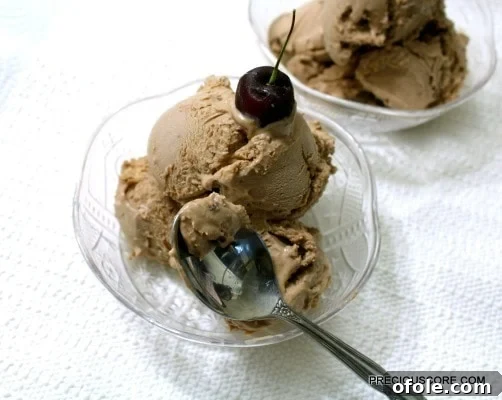
This simple chocolate ice cream recipe proves that culinary indulgence doesn’t have to be complicated. So go ahead, scoop yourself a generous serving, and savor every spoonful of your homemade masterpiece. Chocolate ice cream is no longer a mystery, but a delightful, accessible treat. Go make some, and share the joy!
Tips for the Best No-Churn Chocolate Ice Cream
- Quality Matters: While the recipe is simple, the quality of your ingredients will make a noticeable difference. Use good quality heavy cream and your favorite chocolate spread for the best flavor.
- Chill Everything: Keep your heavy cream very cold, and if possible, chill your mixing bowl and whisk attachment before whipping. This helps the cream whip faster and achieve maximum volume.
- Don’t Overmix: When whipping the cream and condensed milk, stop as soon as soft peaks form. Overmixing can cause the mixture to separate or become grainy. When folding in the chocolate, be gentle to retain air.
- Prevent Ice Crystals: Always cover your ice cream directly with plastic wrap before freezing. This prevents air from reaching the surface, which is the primary cause of ice crystal formation.
- Patience is Key: While 6 hours is the minimum, freezing overnight (8-12 hours) will yield a firmer, more scoopable ice cream.
Variations to Explore Your Creativity
This base recipe for easy no-churn chocolate ice cream is incredibly versatile. Once you’ve mastered the basic version, feel free to experiment with these exciting variations:
- Nutty Crunch: Fold in a handful of chopped toasted nuts (almonds, walnuts, pecans) along with the chocolate spread for added texture and flavor.
- Chocolate Chip Extravaganza: Stir in a cup of mini chocolate chips or chunks before freezing for extra chocolate bursts.
- Peppermint Swirl: Add a few drops of peppermint extract to the cream mixture before folding in the chocolate, or swirl in some crushed peppermint candies for a festive twist.
- Coffee Lover’s Dream: Dissolve 1-2 tablespoons of instant espresso powder in a tiny bit of hot water, cool it completely, then add it to the cream mixture with the chocolate spread for a mocha flavor.
- Cookie Dough Fun: Mix in small chunks of edible cookie dough (flour must be heat-treated) for a delightful cookie dough ice cream.
- Sea Salt Caramel Swirl: Drizzle in some store-bought or homemade salted caramel sauce when pouring into the pan, then gently swirl with a knife.
Frequently Asked Questions (FAQs)
- Q: Can I use light cream or half-and-half instead of heavy whipping cream?
- A: No. Heavy whipping cream (with at least 36% milk fat) is essential for the no-churn method. Lower fat creams will not whip up properly and will result in an icy, rather than creamy, texture.
- Q: What if I don’t have chocolate spread? Can I use cocoa powder or melted chocolate?
- A: While chocolate spread works best due to its texture and sweetness, you can adapt. For cocoa powder, you’d need about 1/2 to 3/4 cup unsweetened cocoa powder sifted into the cream mixture, plus an additional 1/2 cup of powdered sugar or adjust the condensed milk slightly to maintain sweetness. For melted chocolate, melt about 8-10 ounces of good quality chocolate, let it cool to room temperature, then gently fold it in. Be aware that melted chocolate might harden a bit more in the cold mixture, so work quickly.
- Q: My ice cream turned out a bit icy. What went wrong?
- A: Icy ice cream usually results from insufficient fat or air, or improper freezing. Ensure you used heavy whipping cream, whipped it to soft peaks, and gently folded the chocolate. Also, make sure your container was tightly covered with plastic wrap pressed directly onto the surface to prevent ice crystal formation.
- Q: How long does homemade no-churn ice cream last in the freezer?
- A: When stored properly in an airtight container, your homemade no-churn chocolate ice cream can last for up to 2-3 weeks in the freezer. Beyond that, its texture and flavor might start to degrade.
- Q: Can I make this dairy-free or vegan?
- A: Yes, with substitutions! You would need to use full-fat canned coconut cream (chilled overnight, only the thick cream scooped off the top), vegan sweetened condensed milk, and a dairy-free chocolate spread. The texture might vary slightly but can still be delicious.
Conclusion: Your New Favorite Dessert Awaits!
This easy no-churn chocolate ice cream recipe is more than just a dessert; it’s an invitation to effortlessly create joy in your kitchen. With just three simple ingredients and a few easy steps, you can produce a batch of rich, creamy, and utterly delightful homemade chocolate ice cream that rivals any store-bought variety. It’s perfect for a quick treat, a satisfying dessert after dinner, or impressing guests with minimal fuss.
Say goodbye to complicated recipes and hello to simple, frozen perfection. Embrace the magic of no-churn and discover just how rewarding homemade desserts can be. So, gather your ingredients, follow our guide, and prepare to scoop into the blissful world of your very own 3-ingredient chocolate ice cream. Happy freezing!
print recipe
No-Churn Chocolate Ice Cream
by Precious Nkeih (www.preciouscore.com) July-30-2016
This is the easiest chocolate ice cream recipe. Ever. Perfect for any occasion and requires no ice cream machine.
Ingredients
- 1 cup heavy whipping cream
- 1 can (14 oz) sweetened condensed milk
- 1 cup chocolate-hazelnut spread (or other chocolate spread)
Instructions
- In a large bowl, combine heavy whipping cream and sweetened condensed milk. Beat with an electric mixer on medium-high speed until the mixture forms soft peaks.
- Add the chocolate spread into the whipped mixture. Gently fold it in with a spatula until everything is fully incorporated and the mixture is uniformly chocolate-colored. Be careful not to deflate the mixture.
- Pour the mixture into a loaf pan or other freezer-safe container. Cover the surface directly with plastic wrap or parchment paper, ensuring no air touches the ice cream.
- Freeze for at least 6 hours, or preferably overnight, until firm.
- Scoop and serve your delicious homemade no-churn chocolate ice cream.
Details
Prep time:
Cook time:
Total time: (includes minimum freeze time)
Yield: 6 servings