
Mastering the Art of Accra Beans: A Culinary Journey from Oven Frustration to Frying Perfection
Every home cook knows the frustration of kitchen mishaps. There are days when even the most reliable appliances seem to conspire against your culinary ambitions. Just recently, I faced such a challenge, where my oven, usually a trusted companion, decided to stage a rebellion. What began with the promise of a phenomenal milky cake mixture quickly turned into a burnt offering, leaving me utterly livid.
Undeterred, yet perhaps a tad too optimistic, I recalibrated my approach, assuming the initial failure was due to excessive heat. I set the oven to its lowest temperature, hoping to coax a delicate batch of Koki Beans into existence. Alas, the “wicked oven,” as I now affectionately call it, once again delivered a charred disappointment. My culinary spirit was, to put it mildly, enraged.
In those moments of simmering indignation, a profound realization dawned upon me: some dishes are simply not meant for the oven. Some culinary treasures demand a different, more traditional approach. My thoughts immediately drifted to the beloved Accra Beans. This glorious West African street food delight, also widely known as Akara or Black Eyed Peas Fritters, consistently emerges victorious, delivering unparalleled flavor and texture every single time. It’s a dish that embodies simplicity, reliability, and sheer deliciousness.
Discovering the Magic of Accra Beans (Akara): A Culinary Staple
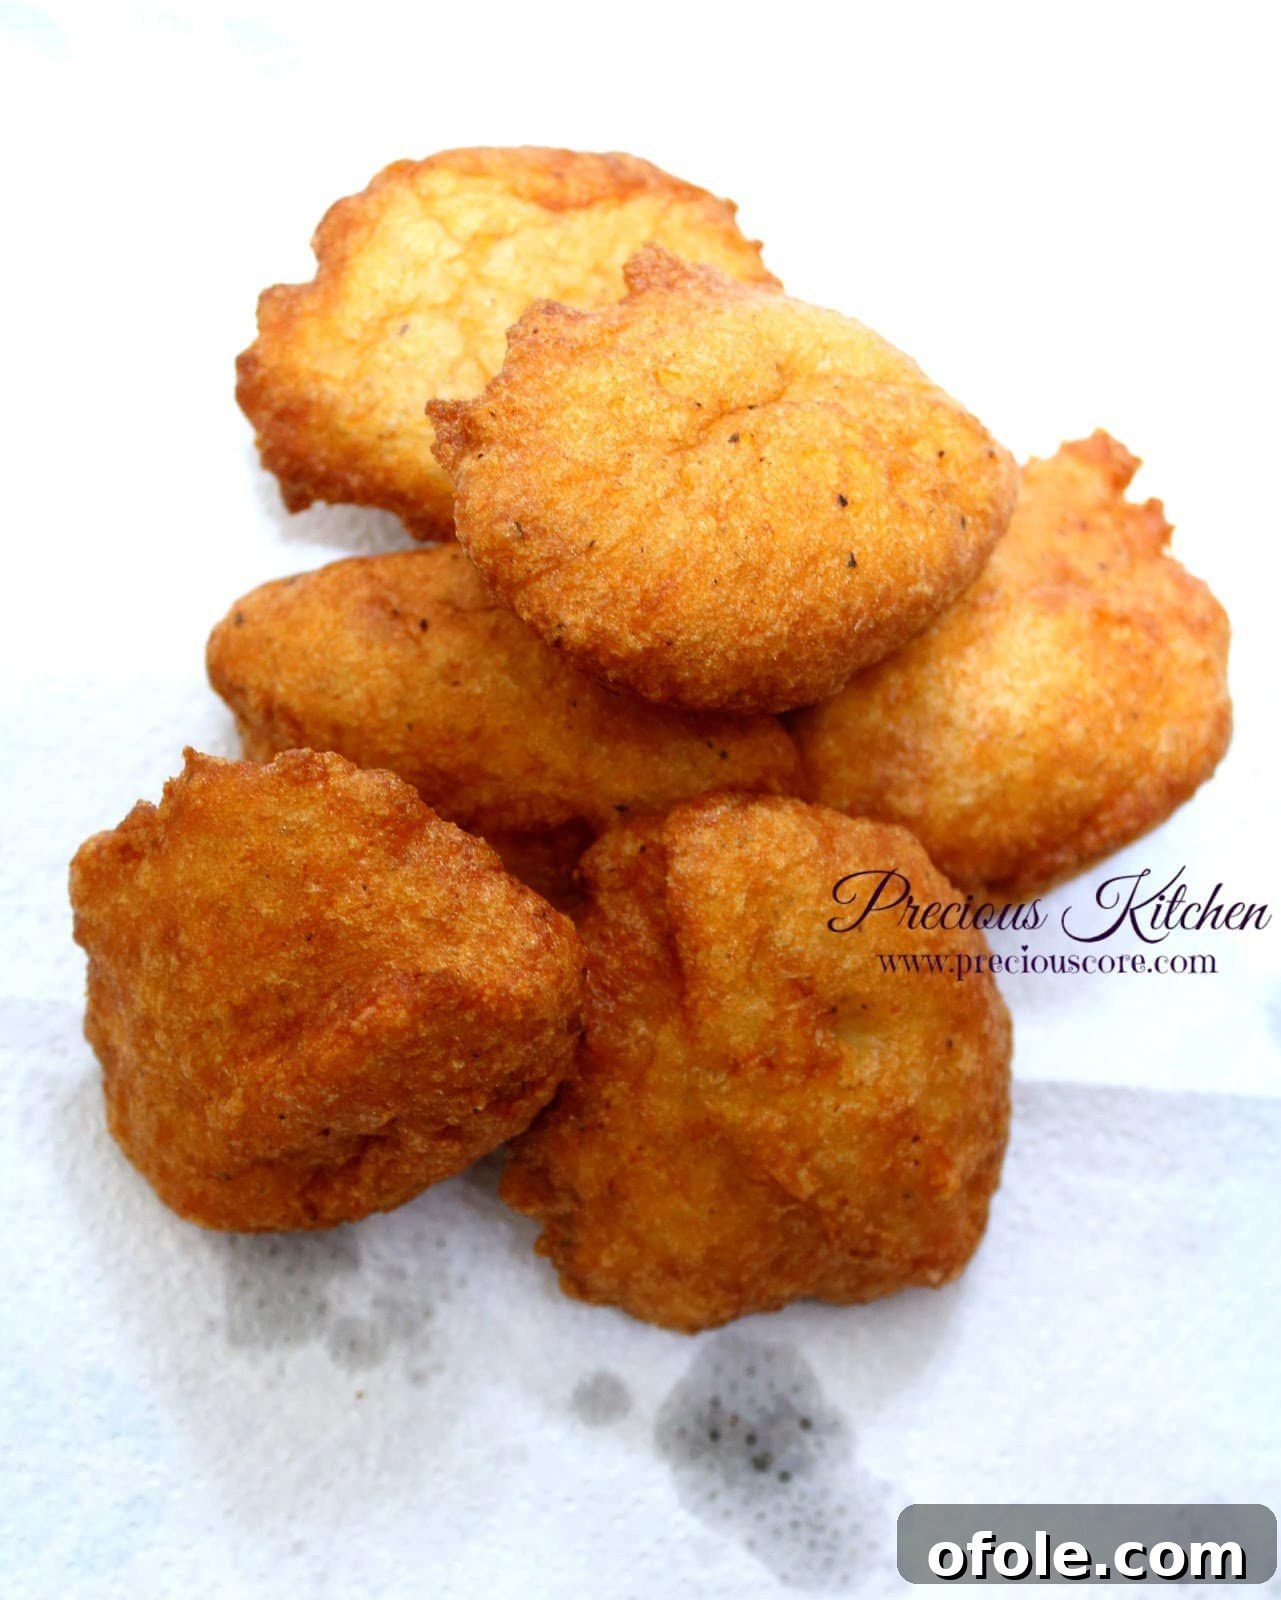
Accra Beans, or Akara as it’s known in many parts of West Africa, is more than just a dish; it’s a cultural icon. These delightful black eyed pea fritters are a staple in countries like Cameroon, Nigeria, Ghana (where they are called Koose), Benin, and Togo, and their influence even stretches across the Atlantic to the Caribbean and Brazil, evolving into the famous Acarajé. Imagine a golden-brown exterior, perfectly crispy, giving way to a soft, fluffy interior bursting with savory flavors. This is the magic of Akara, a protein-packed, gluten-free, and incredibly satisfying treat that can be enjoyed at any time of the day.
The beauty of Akara lies in its straightforward preparation and the incredible satisfaction it brings. Made primarily from peeled black eyed peas, blended with onions, peppers, and a touch of seasoning, then deep-fried until golden, these fritters are a testament to how simple ingredients can create extraordinary taste. Their versatility makes them a beloved breakfast item, a quick and fulfilling snack, or a delightful accompaniment to various meals.
Why Deep Frying Reigns Supreme for Akara: A Texture Story
My recent oven debacle served as a stark reminder that while ovens are indispensable for many baking tasks, they are not always the answer for every type of food. The unique texture of Accra Beans – that desirable combination of a crisp shell and a light, airy crumb – is meticulously achieved through the art of deep frying. Baking, while a healthier alternative for some dishes, often results in a drier, denser product that lacks the characteristic melt-in-your-mouth quality that defines a truly great Akara.
When you immerse the well-aerated black eyed pea batter into hot oil, a rapid chemical reaction occurs. The high heat instantly seals the exterior, creating that irresistible crunch, while the steam trapped within the batter works its magic, puffing up the fritter from the inside to create an incredibly light and fluffy texture. This dynamic process is simply not replicable in an oven, which applies heat more gradually and from all sides, leading to a different moisture profile and a less dramatic textural contrast. For Akara, deep frying isn’t just a cooking method; it’s an essential ingredient for achieving its signature perfection.
A Glimpse into the History and Cultural Significance
The story of Akara is deeply woven into the fabric of West African history and culinary tradition. Originating from indigenous communities, these fritters quickly became a staple, thanks to the abundance of black eyed peas and the simplicity of their preparation. They represent a connection to heritage, often prepared with love in homes and sold by vibrant street vendors, whose calls echo through bustling markets, inviting passersby to savor this warm, savory delight.
Across different regions, Akara takes on unique names and subtle variations. In Nigeria, it’s predominantly Akara; in Ghana, Koose; in Cameroon, Accra Beans. While the core ingredients remain similar – black eyed peas, onions, and peppers – regional nuances might include specific spices, a touch of crayfish, or even a different type of oil for frying. These variations only serve to highlight the dish’s adaptability and its deep integration into diverse local cuisines, making it a powerful symbol of culinary unity across a vast and rich cultural landscape.
Nutritional Powerhouse: The Health Benefits of Akara
Beyond its incredible taste and cultural significance, Accra Beans also boast a commendable nutritional profile. The primary ingredient, black eyed peas, are a nutritional powerhouse. They are an excellent source of plant-based protein, making Akara a fantastic option for vegetarians, vegans, and anyone looking to incorporate more protein into their diet. Protein is crucial for muscle repair, growth, and overall bodily functions, contributing to a feeling of fullness and sustained energy.
Furthermore, black eyed peas are rich in dietary fiber, which is vital for digestive health. Fiber aids in regular bowel movements, helps regulate blood sugar levels, and can contribute to lowering cholesterol. Akara also provides essential micronutrients such as iron, folate, and B vitamins, which are crucial for energy metabolism, red blood cell formation, and overall well-being. While deep-fried, the nutritional benefits of the core ingredient make Akara a more wholesome snack compared to many processed alternatives, especially when prepared with fresh, quality ingredients and mindful frying techniques to minimize oil absorption.
Crafting Perfect Accra Beans: Your Step-by-Step Guide
Making Accra Beans at home is a rewarding experience, and with a few simple steps, you can recreate this street food favorite in your own kitchen. Forget the oven frustrations; embrace the reliable satisfaction of a perfectly fried Akara.
1. Soaking and Peeling the Black Eyed Peas: The Foundation
The journey to perfect Akara begins with the black eyed peas. Start by soaking dried black eyed peas in plenty of water for at least 4-6 hours, or preferably overnight. This step softens the peas, making them easier to blend and digest. Once soaked, the crucial step for traditional, fluffy Akara is peeling. Gently rub the soaked peas between your hands under running water to loosen their skins. The skins will float to the surface, allowing you to easily drain them off. Repeat this process until most of the peas are peeled. While some modern recipes skip peeling for convenience, peeling is essential for achieving that characteristic light texture and smooth consistency.
2. Blending the Batter: Achieving the Right Consistency
Once peeled, rinse the peas thoroughly. Now, it’s time to blend. Combine the peeled black eyed peas with roughly chopped onions and, if you desire a kick, a Scotch bonnet or habanero pepper (adjust to your spice preference). A small amount of bell pepper can also add a subtle sweetness and vibrant color. The key here is to use as little water as possible during blending to create a thick, smooth, yet airy batter. A food processor or a high-speed blender will work wonders. Blend in batches, scraping down the sides as needed, until you achieve a consistency akin to a thick pancake batter – smooth but not runny. Over-blending can make the batter too thin, impacting the final texture.
3. Flavoring and Aerating: The Secret to Fluffy Akara
Transfer the blended batter to a large bowl. This is where the magic happens. Season the batter generously with salt to taste. Some recipes also incorporate a touch of seasoning powder or even finely ground crayfish for an added depth of umami flavor. The most critical step for achieving fluffy Akara is aeration. Using a hand mixer, a whisk, or even a wooden spoon, vigorously beat the batter for 5-10 minutes. You’ll notice the batter becoming lighter in color, increasing slightly in volume, and developing a noticeably airy texture. This incorporates air, which helps the fritters puff up beautifully when fried, preventing them from becoming dense. Don’t skip this step!
4. Frying to Golden Perfection: The Final Act
Heat a sufficient amount of vegetable oil in a deep pot or frying pan over medium-high heat. The oil should be hot enough (around 350-375°F or 175-190°C) to fry the Akara quickly without soaking them in oil. You can test the oil by dropping a tiny amount of batter; it should sizzle immediately and float to the surface. Carefully spoon dollops of the aerated batter into the hot oil. Avoid overcrowding the pan, as this will drop the oil temperature and lead to greasy Akara. Fry in batches, turning the fritters occasionally, until they are golden brown and cooked through on all sides, usually taking about 3-5 minutes per batch.
5. Draining and Serving: Enjoy Your Creation
Once golden and crispy, remove the Akara from the oil using a slotted spoon and transfer them to a plate lined with paper towels to drain any excess oil. Serve your homemade Accra Beans hot and fresh. They are truly irresistible straight out of the fryer!
Serving Suggestions: The Perfect Companions for Akara
One of the many charms of Accra Beans is their incredible versatility. They can be enjoyed in numerous ways, making them a fantastic addition to any meal plan.
- With Pap (Ogi/Akamu): This is arguably the most traditional pairing in Nigeria and other West African countries. Pap is a fermented corn pudding, light and tangy, offering a perfect contrast to the savory Akara. It’s a classic breakfast combination that is both filling and deeply satisfying.
- With Bread: A simple yet utterly delicious pairing. Slice open a soft bread roll or baguette, tuck in a few warm Akara, and perhaps add a spread of butter or a dash of hot sauce for a quick and hearty sandwich.
- With Hot Sauce or Pepper Sauce: For those who love a bit of heat, a side of homemade hot sauce or a fiery pepper sauce elevates the Akara experience, adding an extra layer of flavor.
- As a Snack: On its own, Akara makes for a fantastic and wholesome snack. It’s perfect for warding off hunger pangs between meals.
- With Stew or Gravy: Serve Akara alongside a light vegetable stew or a savory gravy for a more substantial meal.
- With Roasted Plantains or Yam: The sweetness of roasted plantains or the earthiness of boiled yam can create a wonderful balance with the savory notes of the fritters.
Troubleshooting Your Akara: Tips for Success
While making Akara is generally straightforward, a few common issues can arise. Here’s how to troubleshoot them:
- Akara is not fluffy: The most common reason is insufficient aeration of the batter. Make sure to beat the batter vigorously for at least 5-10 minutes. Also, ensure your batter isn’t too thin; excess water can make it dense.
- Akara is too oily: This usually happens if the oil isn’t hot enough. When the oil is too cool, the fritters absorb it rather than cooking quickly. Ensure your oil reaches the correct temperature (350-375°F) before frying. Overcrowding the pan can also drop the oil temperature significantly.
- Akara burns quickly on the outside, raw inside: The oil is too hot. Reduce the heat slightly to allow the fritters to cook evenly throughout without burning the exterior.
- Batter is too runny: This means too much water was added during blending. You can try adding a tablespoon of rice flour or a small amount of finely ground oats to thicken it slightly, but avoid adding too much, as it can alter the taste and texture.
I genuinely enjoy sharing these culinary insights and recipes through videos, and I’m dedicated to producing much more content to guide you on your cooking adventures. If you found this guide helpful and inspiring, I warmly invite you to take a moment to subscribe to my growing YouTube channel. By doing so, you’ll be among the first to catch new video releases, ensuring you never miss a delicious update. For a detailed written recipe accompanied by step-by-step photos, be sure to visit this comprehensive post.
Watch the Magic Unfold: Accra Beans Video Tutorial
To truly grasp the simplicity and joy of making Accra Beans, there’s nothing quite like seeing the process in action. I’ve created a comprehensive video tutorial to walk you through each step, from preparing the black eyed peas to frying those perfect golden fritters. This visual guide will help clarify any questions and boost your confidence in the kitchen. Enjoy the video, and get ready to make some truly exceptional Accra Beans!
With these tips and the detailed video, you’re well on your way to mastering the art of Accra Beans. Bid farewell to kitchen frustrations and say hello to the consistent, satisfying delight of this incredible West African delicacy. Happy cooking!