
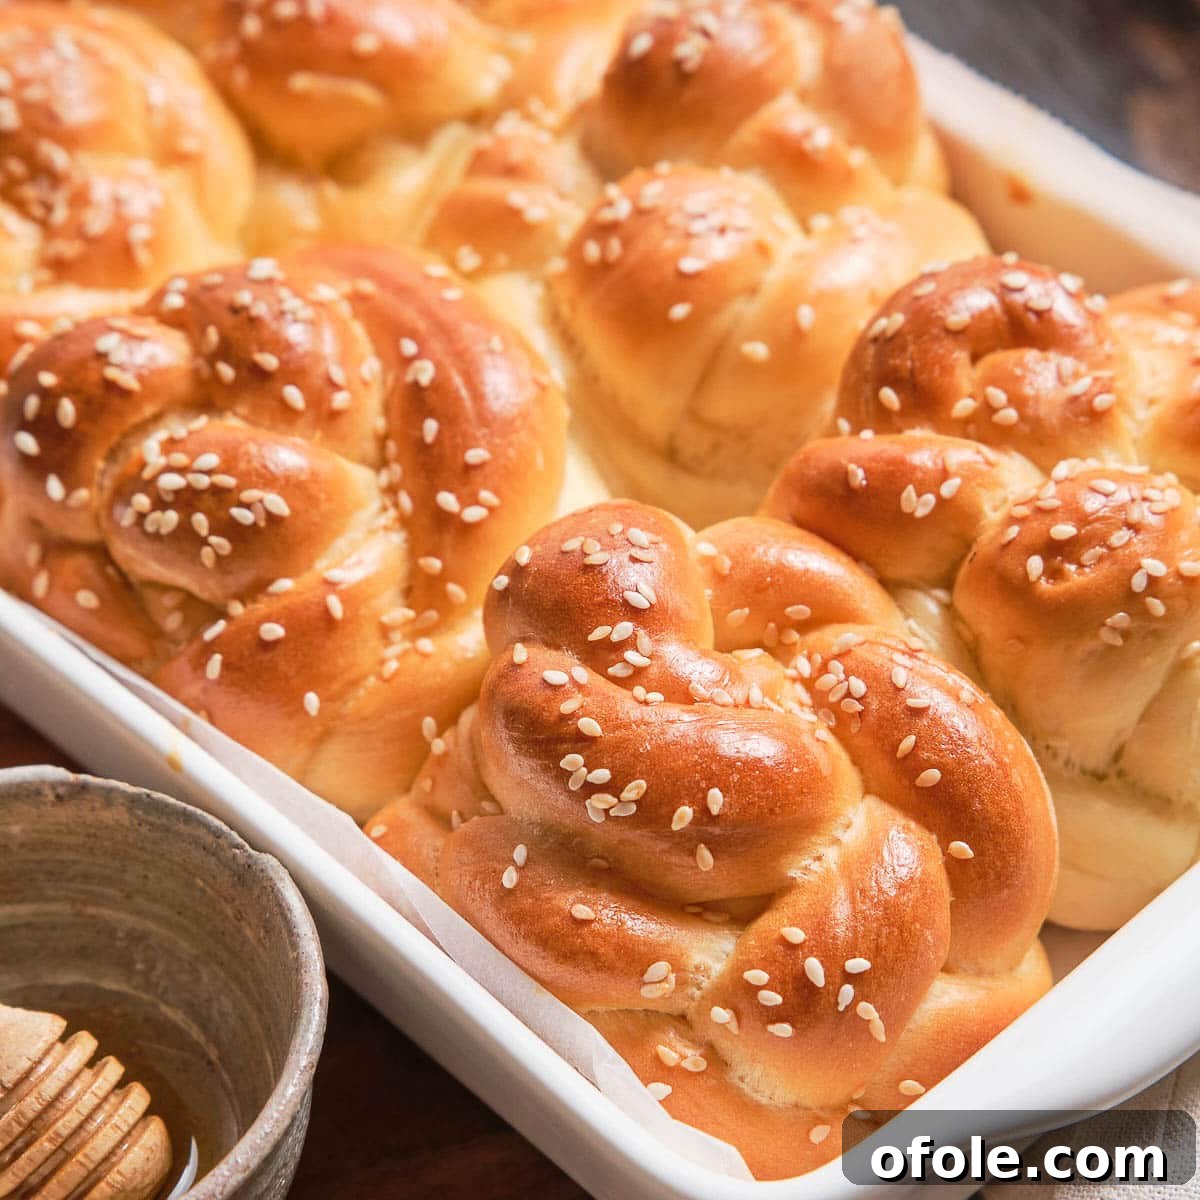
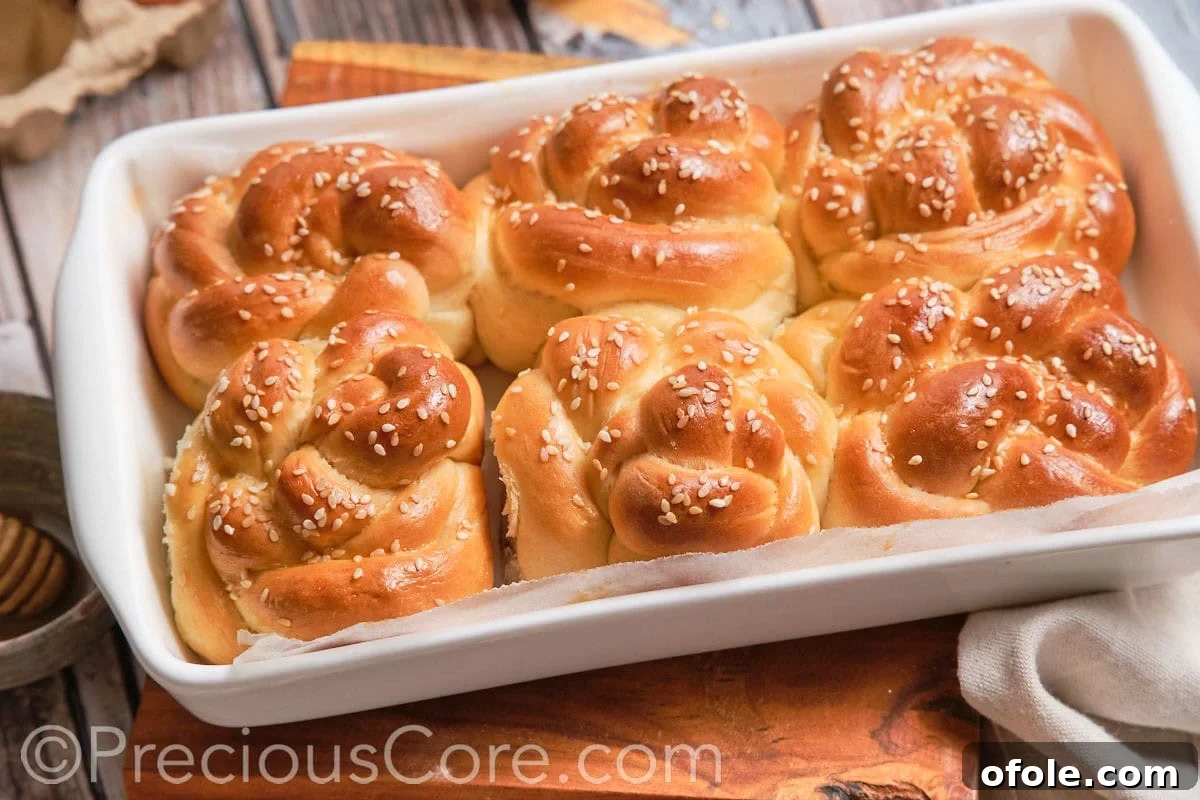
Indulge in the sweet, fluffy goodness of **Challah Dinner Rolls**, a delightful twist on traditional challah bread. These rolls are more than just a side dish; they are a culinary experience, offering a pillowy-soft interior encased in a beautifully golden-brown crust. Perfectly balanced with a hint of sweetness, they elevate any meal, from a casual family dinner to a festive holiday spread. Imagine tearing into one of these warm rolls, slathering it with butter, and letting its comforting aroma fill your home. It’s pure bliss!
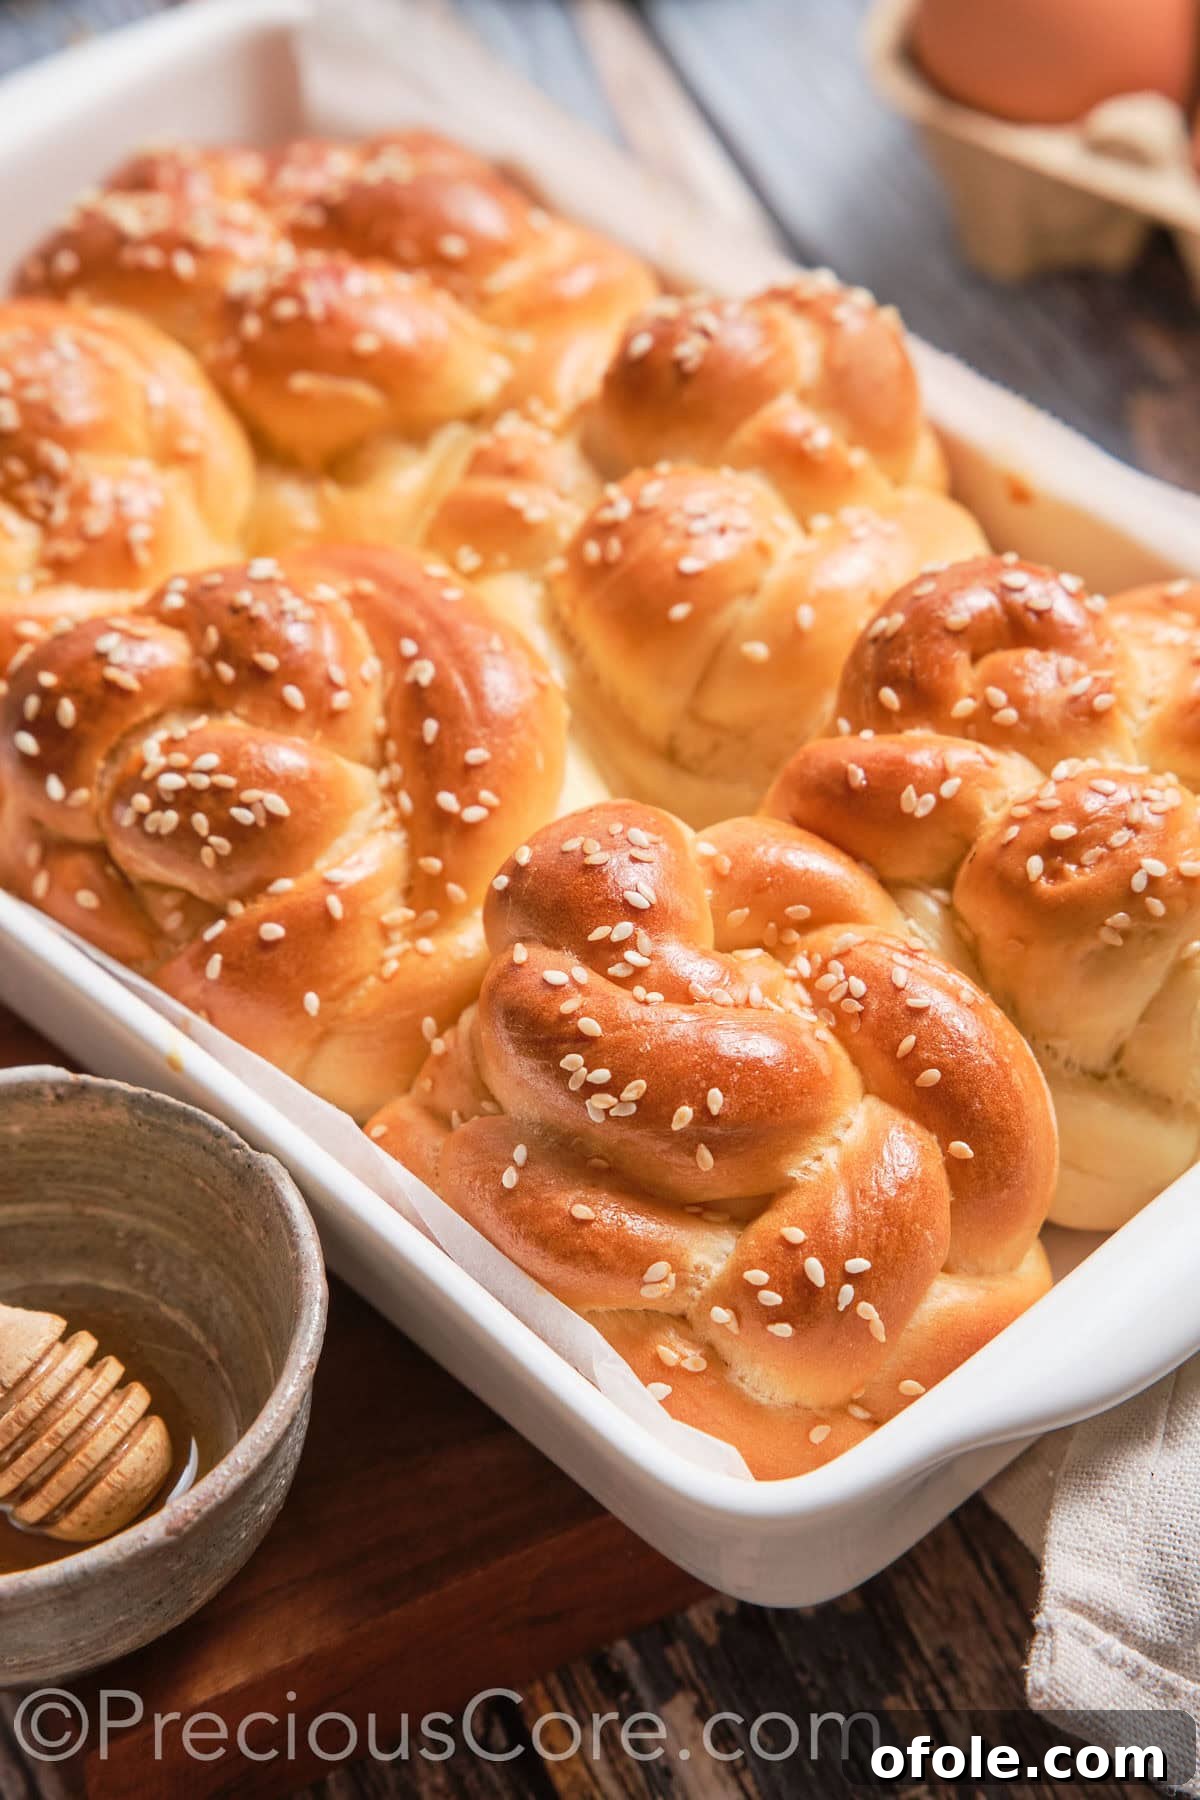
These individual mini challah rolls are the ultimate companion for any dinner table. Whether you’re planning a cozy family meal or orchestrating an elaborate feast for Thanksgiving or Christmas, their elegant braided appearance and rich flavor profile make them an unforgettable addition. Adapted from a beloved challah bread recipe perfected over years, these challah knots are surprisingly easy to create, promising an impressive result that will have your kitchen smelling like a gourmet bakery.
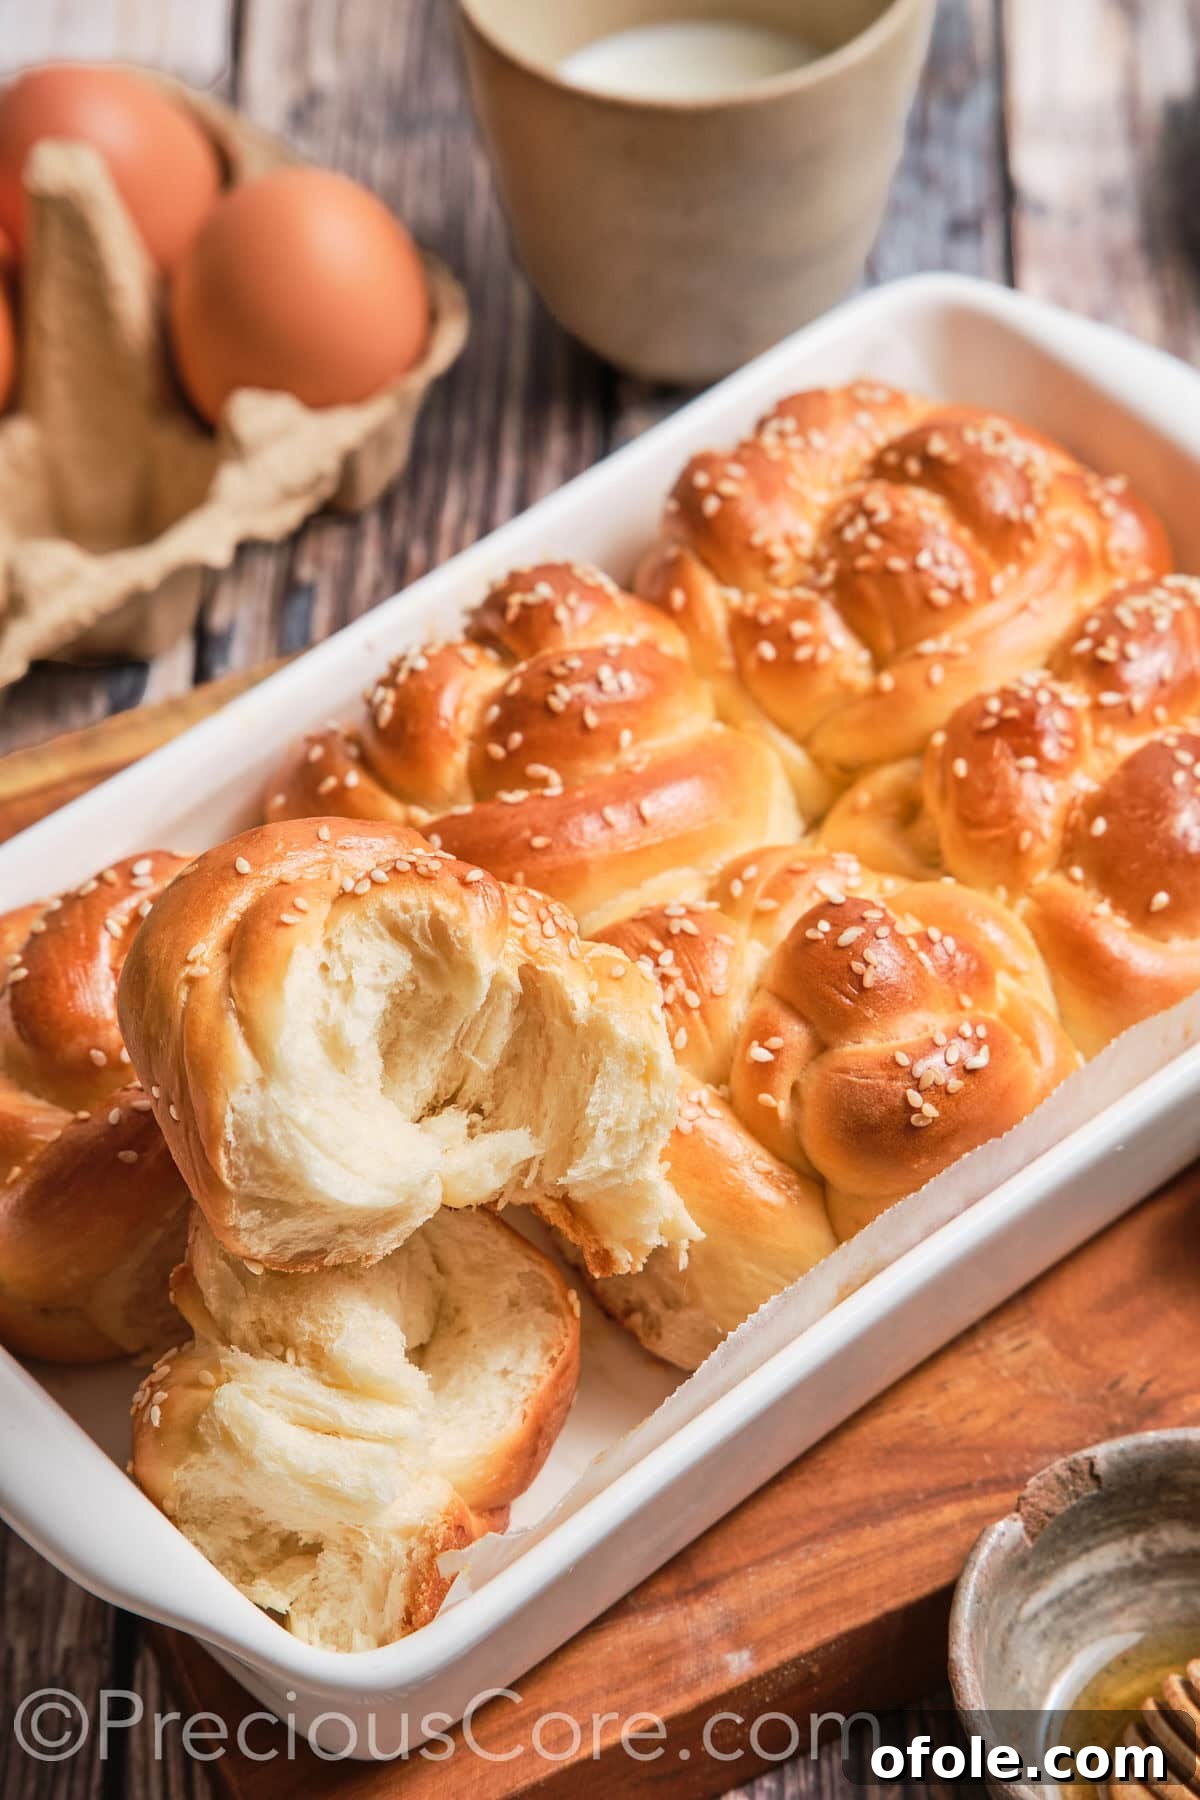
If you’re passionate about the art of homemade bread, these challah dinner rolls are a must-try. They offer a unique sweetness and a gratifying texture that stands apart. For those eager to explore more baking adventures, be sure to also try my Easy Homemade French Bread, Milk Bread, and Sweet Dinner Rolls recipes. Each offers a distinct flavor and texture, but all share the joy of fresh, homemade bread.
Why You’ll Love Making Challah Dinner Rolls
There are countless reasons to fall in love with baking these delightful challah rolls. Beyond their mouth-watering taste, they offer an accessible and rewarding baking experience:
- Effortlessly Simple: Despite their sophisticated appearance, these rolls are incredibly easy to make. The step-by-step photos provided will guide you through each stage, ensuring a successful bake even for novice bakers.
- Wholesome Ingredients: You’ll only need a handful of common pantry staples to bring these rolls to life. No exotic ingredients are required, making this recipe practical and budget-friendly.
- No Special Equipment: Forget about fancy gadgets or elaborate machinery. This recipe relies on basic kitchen tools, proving that exceptional bread can be made with simplicity and care.
- Incredibly Versatile: These homemade rolls are wonderfully adaptable. Enjoy them warm with a spread of Healthy Strawberry Jam or a generous pat of good-quality butter. They also make fantastic miniature sandwiches or can be transformed into a delectable French toast for a luxurious breakfast. The possibilities are endless!
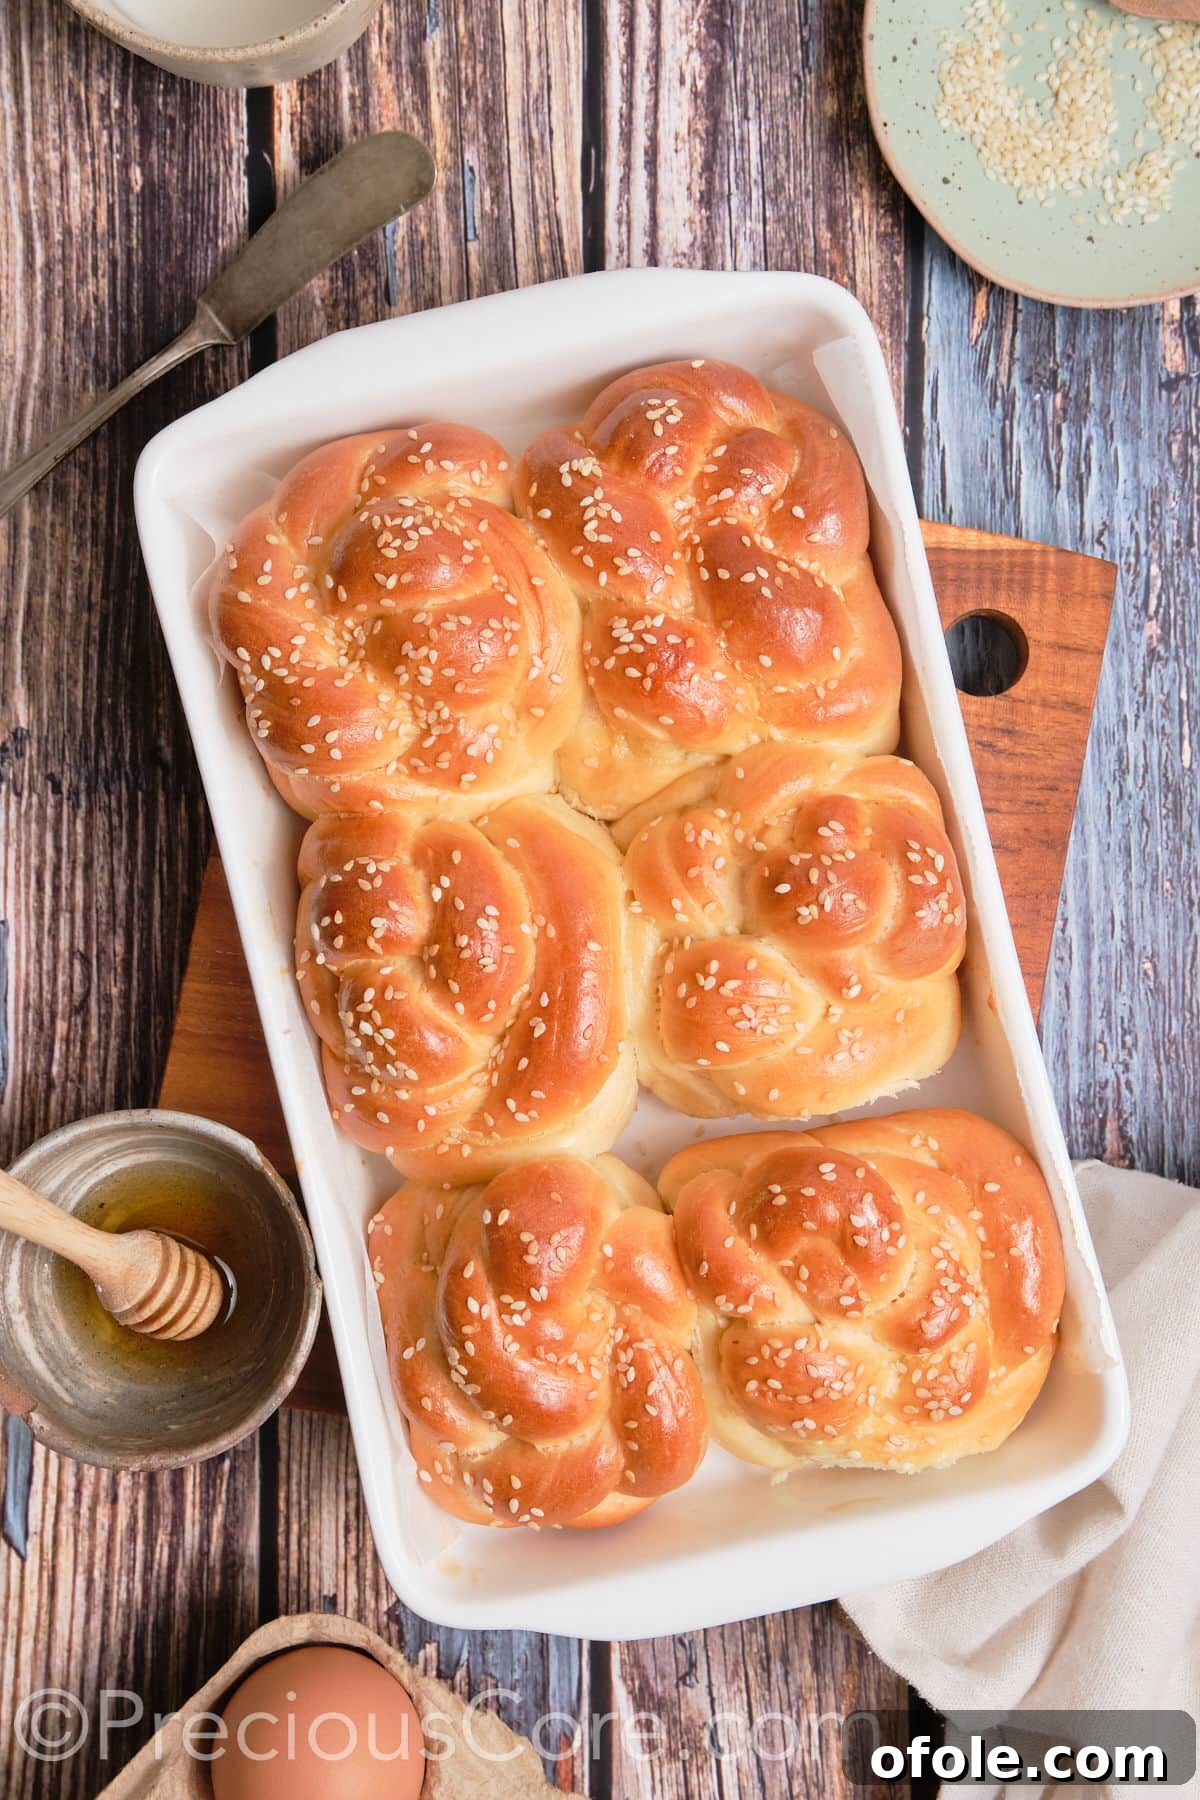
The Allure of Braided Challah Buns
Challah bread holds a special place in culinary traditions, especially around holidays like Thanksgiving. Its signature braided design and rich, slightly sweet flavor inherently convey a sense of celebration and abundance. This is precisely why it’s a beloved staple in many Jewish holiday meals, symbolizing beauty and blessing.
These mini challah rolls offer a charming and convenient version of the classic challah bread, a type of yeast bread celebrated for its tender crumb and slightly eggy richness. Imagine a basket filled with these adorable individual challah knots on your Thanksgiving table – everyone gets their own miniature masterpiece! The best part? Any delightful leftovers can be easily transformed into scrumptious sandwiches the following day, extending the joy of your baking.
Crafting challah knot rolls begins with a traditional challah dough, which is then skillfully shaped into small, round braided buns. While the intricate braiding might initially appear daunting, the process is surprisingly straightforward with a little planning and patience. Each roll is a testament to the baker’s care, promising a delightful texture and a visually appealing presentation that will impress your guests.
Whether you’re meticulously planning an extravagant holiday dinner or simply aiming to add an impressive yet comforting element to a weeknight meal, this challah dinner rolls recipe is one you’ll undoubtedly revisit. It’s not just delicious and visually stunning; its versatility ensures it can be adapted to various occasions and preferences, making it a true kitchen keeper.
Essential Ingredients for Perfect Challah Dinner Rolls
Like all truly exceptional breads, challah dinner rolls derive their irresistible flavor and texture from a careful combination of fundamental ingredients. Each component plays a crucial role in creating a dough that rises beautifully and bakes into golden perfection. Here’s a detailed look at what you’ll need to gather:
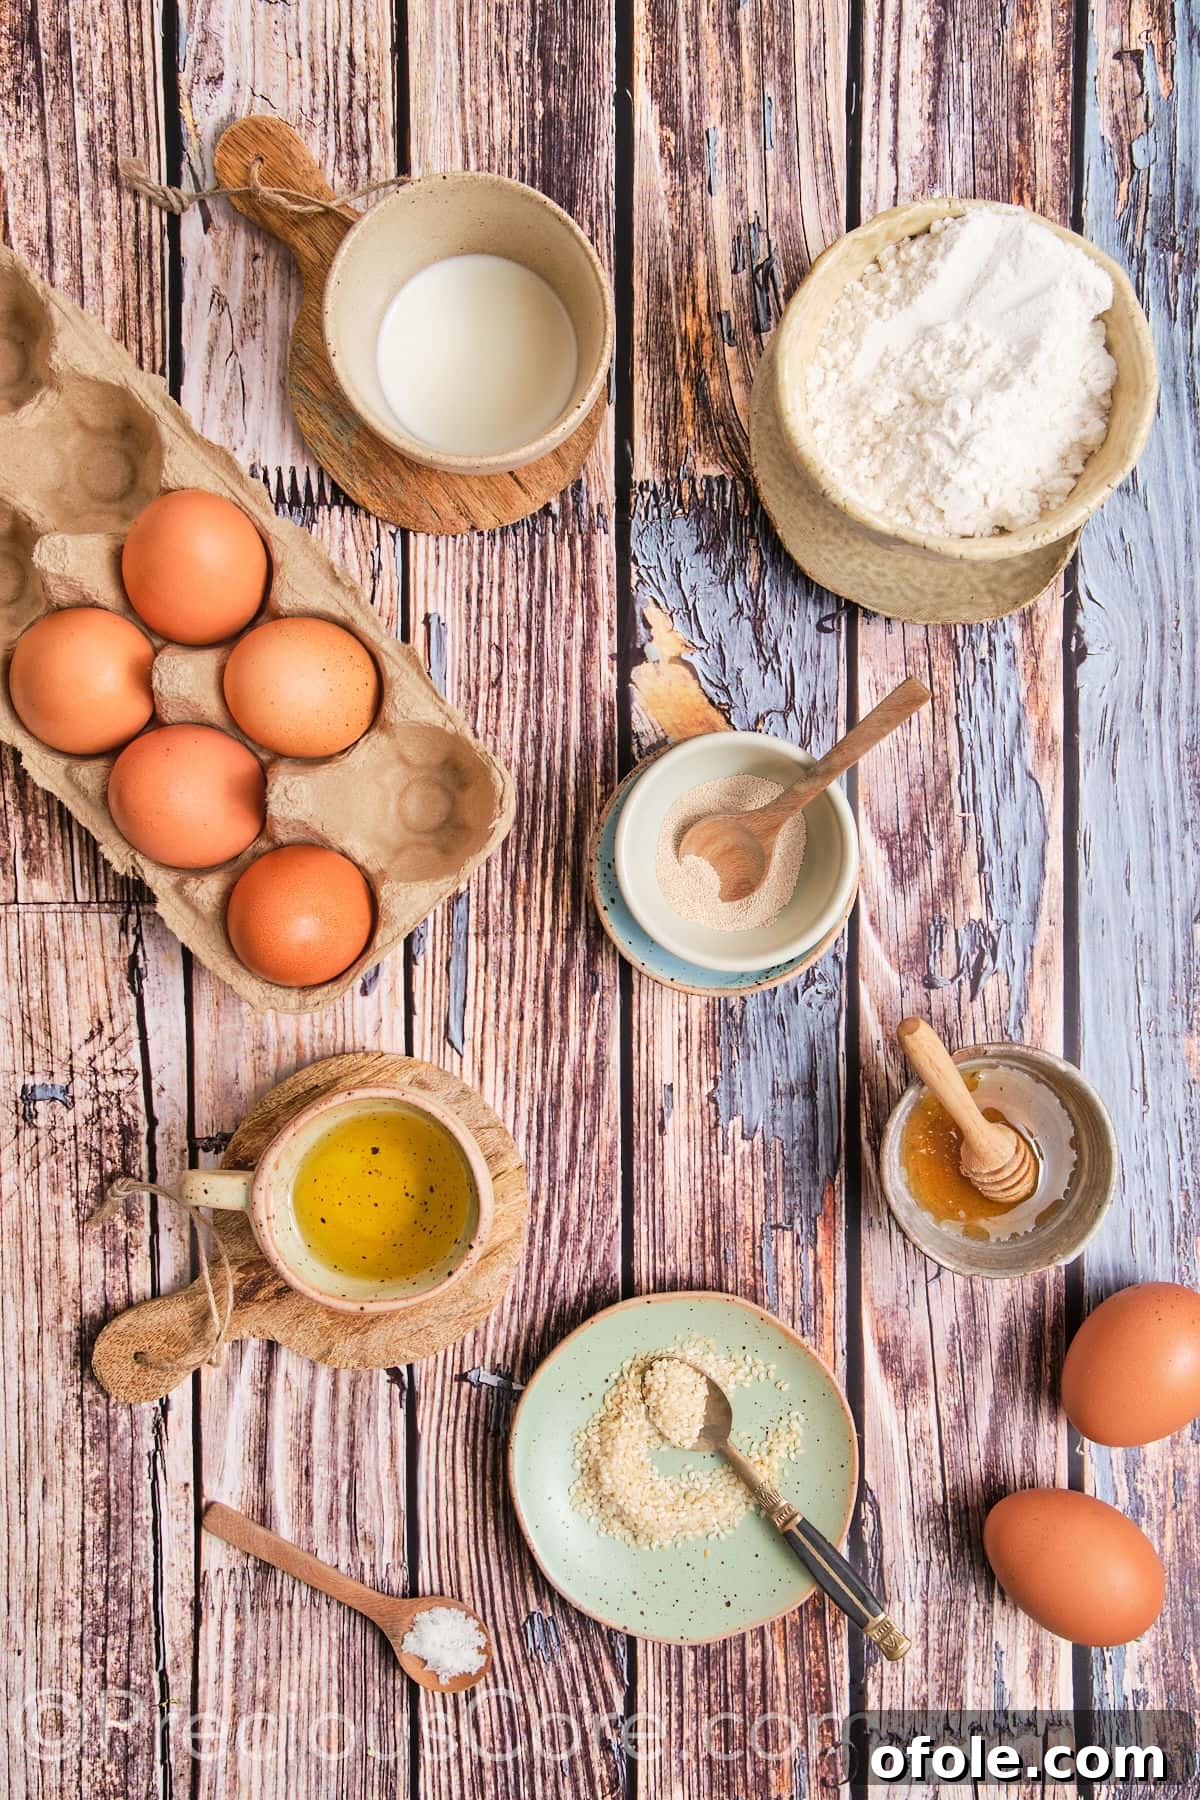
- All-Purpose Flour: This is the foundation of our rolls. I typically use unbleached all-purpose flour for its consistent results. For a slightly chewier texture, you can also opt for bread flour, which has a higher protein content.
- Active Dry Yeast: The leavening agent that gives our rolls their incredible lift and airy texture. It’s paramount to check the expiry date on your yeast; fresh, active yeast is the secret to a perfectly risen challah dough. Always proof your yeast to ensure it’s alive and ready to work its magic.
- Eggs: Eggs contribute to the rich color, tender crumb, and distinct flavor of challah. Ensure your eggs are at room temperature, as this helps them incorporate more smoothly into the dough and contributes to a better rise. This recipe calls for two large eggs.
- Vegetable Oil: A neutral oil like vegetable oil adds moisture and richness to the dough without imparting a strong flavor. Canola oil or light olive oil are excellent alternatives if vegetable oil isn’t on hand.
- Honey: The traditional sweetener for challah bread, honey not only adds a delicate sweetness but also helps keep the rolls moist and contributes to their beautiful golden-brown crust. If you prefer, brown sugar can be used as a substitute for a different depth of flavor.
- Salt: A pinch of salt is crucial for balancing the sweetness and enhancing the overall flavor profile of the rolls. Don’t skip it, as it also plays a role in controlling yeast activity and strengthening the gluten.
- Milk: For the most tender and flavorful rolls, whole milk is highly recommended due to its fat content. Alternatively, warm evaporated milk has also yielded fantastic results in this recipe, offering a similar richness.
For the complete list of ingredients with precise measurements, please refer to the detailed recipe card at the bottom of this article.
Exciting Challah Dinner Rolls Recipe Variations
While the classic challah roll is a masterpiece on its own, don’t hesitate to get creative! Here are some delightful variations to customize your challah experience:
- Sweet Indulgence: For an even sweeter, spiced treat, knead in one tablespoon of ground cinnamon and a generous handful of plump raisins into the challah dough during the mixing stage. This creates a wonderful breakfast or dessert roll.
- Savory Delights: Transform your challah rolls into a savory accompaniment by incorporating dried herbs like rosemary or thyme, a touch of garlic powder, or even grated cheese (such as Parmesan or cheddar) into the dough before the first rise.
- Aromatic Cardamom Rolls: For a unique and fragrant twist, add about half a teaspoon of ground cardamom to the dry ingredients. Cardamom imparts a warm, slightly citrusy flavor that pairs beautifully with the richness of challah.
- Poppy Seed Perfection: Instead of sesame seeds, consider topping your rolls with poppy seeds before baking. This offers a different visual appeal and a subtle nutty flavor.
Helpful Substitutions for Your Challah Rolls
Life happens, and sometimes you don’t have every ingredient on hand. Or perhaps you’re looking to adapt the recipe to dietary preferences. Here are some useful substitutions:
- Flour Alternatives: If you wish to incorporate whole-wheat flour, I recommend replacing no more than half of the all-purpose flour with whole-wheat flour. Using 100% whole-wheat flour can result in denser, less fluffy rolls. As mentioned, bread flour can also be used entirely for a slightly chewier texture, thanks to its higher gluten content.
- Oil Options: Beyond vegetable oil, canola oil, light olive oil, or even melted unsalted butter can be used interchangeably to achieve the desired richness and moisture in the dough.
- Sweetener Swaps: While honey is traditional, maple syrup or agave nectar can be used as direct substitutes if you’re looking for an alternative liquid sweetener.
P.S. Please note that the accompanying photos illustrate the creation of 6 rolls, rather than the 12 specified in the complete recipe. The images depict the process for half of the dough being divided and shaped. When you prepare the full recipe, you will naturally yield a greater number of these delicious rolls.
Step-by-Step Guide: Crafting Homemade Challah Rolls
Making these challah dinner rolls is a rewarding process that transforms simple ingredients into something truly special. Follow these detailed steps to achieve perfect, golden, and fluffy braided buns.
Step 1: Activate Your Yeast with Warm Milk
Begin by gently warming the milk. It should be just slightly warm to the touch, ideally around 110°F (43°C). Too hot, and it will kill the yeast; too cold, and the yeast won’t activate properly. Pour the warm milk into a large mixing bowl. Add the active dry yeast and a small pinch of sugar (this provides initial food for the yeast). Stir gently to combine everything, then let the mixture sit undisturbed for 5-10 minutes. You’ll know your yeast is active and ready when a foamy layer forms on the surface.
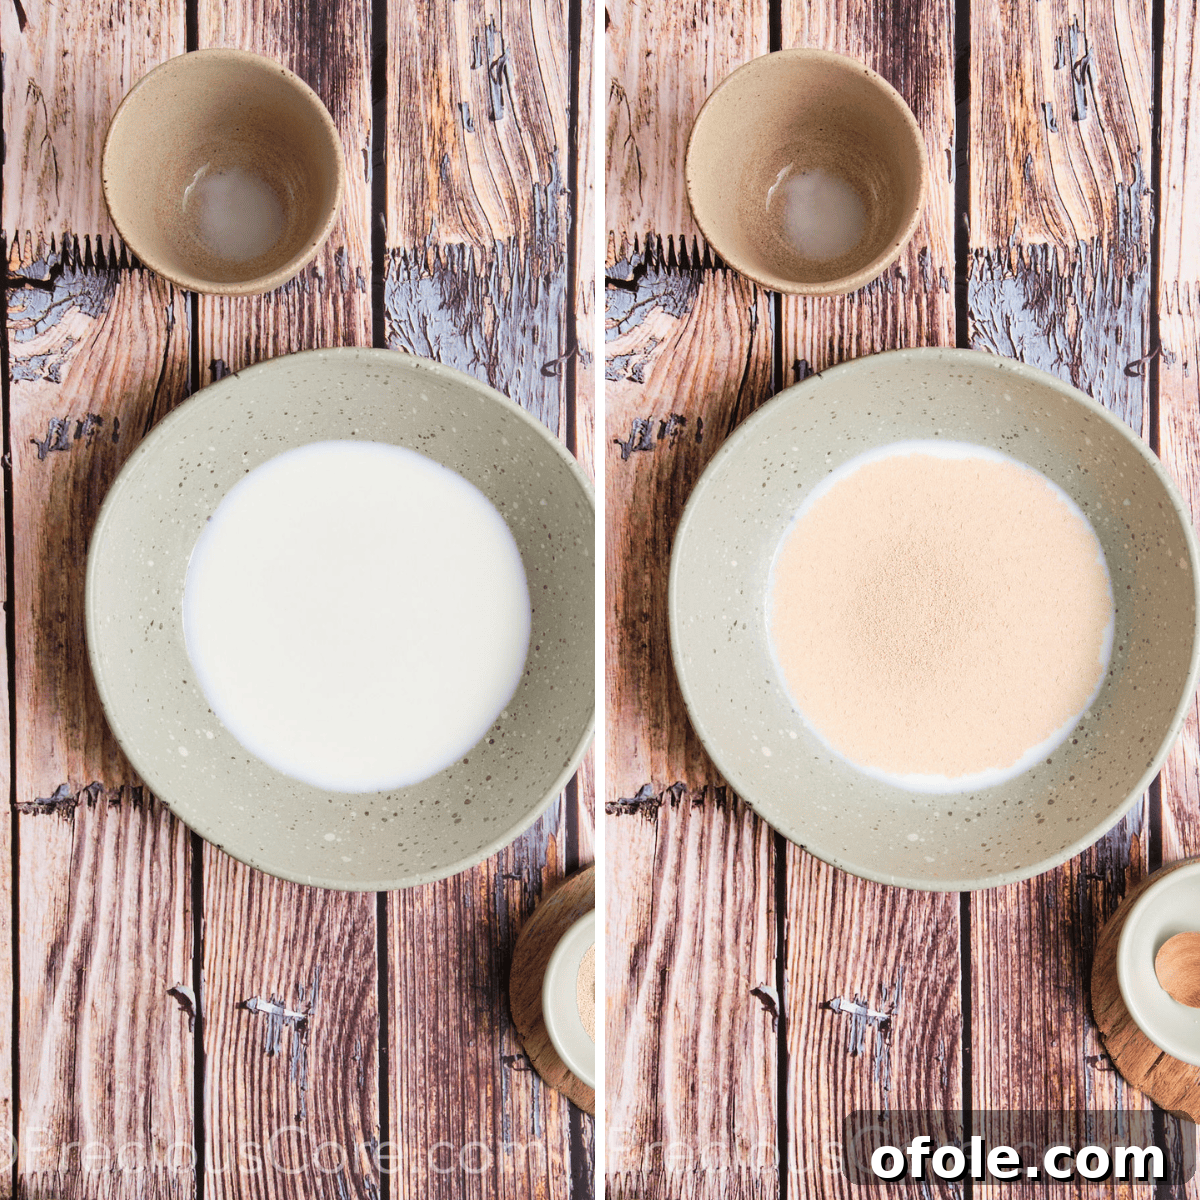
Top Tip: Confirming Yeast Activity! It’s crucial to use active yeast for a proper rise. To test if your yeast is still good, combine a teaspoon of dry yeast with ¼ cup of lukewarm water and a pinch of sugar. Stir and let it sit for about 10 minutes. If it becomes foamy and slightly puffy, your yeast is active. If there’s no activity, it’s likely expired and should be replaced to ensure your dough rises correctly.
Step 2: Incorporate the Remaining Wet Ingredients
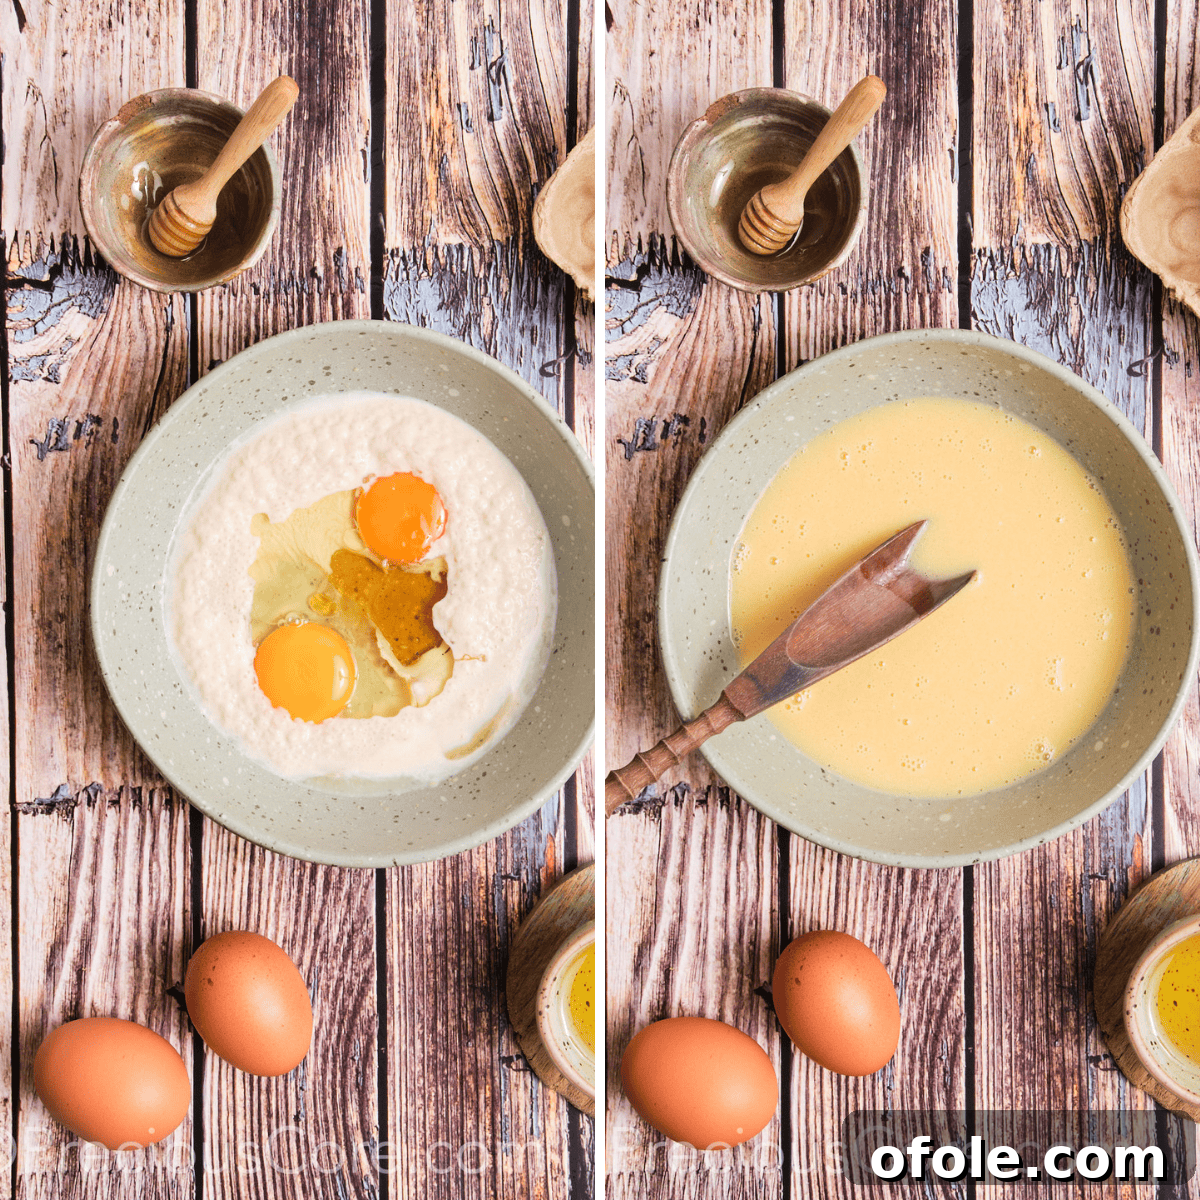
Once your yeast mixture is beautifully foamy, signaling its readiness, it’s time to add the enriching wet ingredients. Crack in the room-temperature eggs, pour in the vegetable oil, and drizzle in the honey. Use a whisk or a fork to mix everything thoroughly until all the wet ingredients are well combined and uniform. This creates a rich base for your challah dough.
Step 3: Combine Dry Ingredients and Knead the Dough
Gradually add the all-purpose flour and salt to the wet mixture. Start by mixing with a sturdy spoon or spatula. As the dough begins to come together, switch to using clean hands. Gently mix and knead until all the flour is incorporated and a rough dough ball forms. Continue to knead the dough on a lightly floured surface for about 8-10 minutes, or until it becomes smooth, elastic, and no longer sticky. A well-kneaded dough is essential for developing gluten, which gives challah its characteristic chewiness and structure.
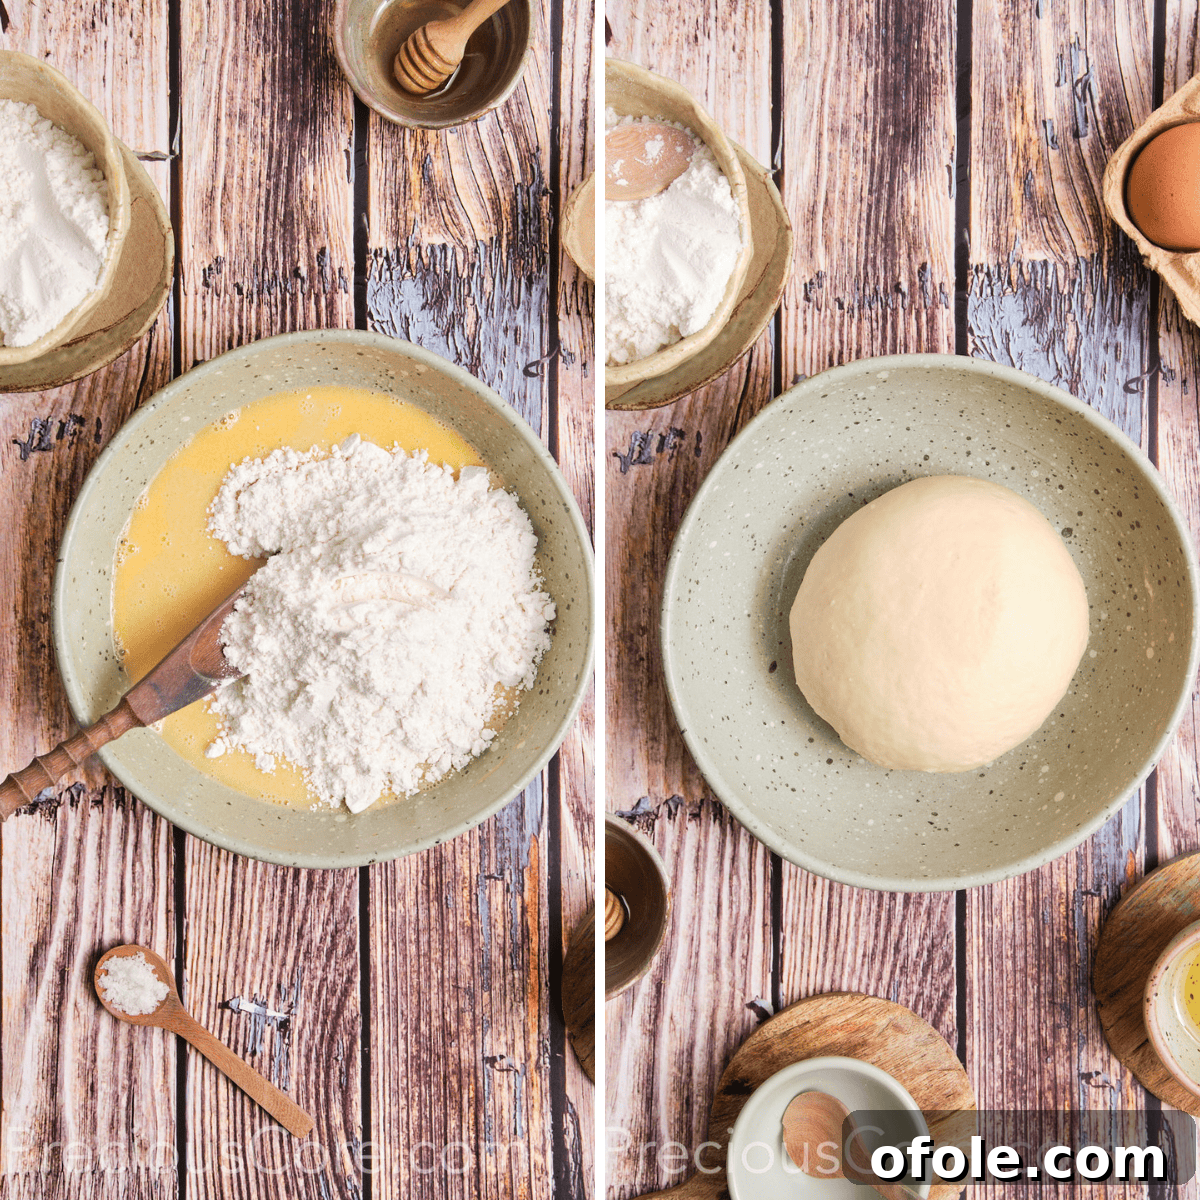
Step 4: The First Proofing (Bulk Fermentation)
Lightly grease the mixing bowl you used, then place the kneaded challah dough back into it. Turn the dough once to coat it lightly with oil. Cover the bowl securely with a clean kitchen towel or plastic wrap to prevent the dough from drying out. Transfer the covered bowl to a warm, draft-free place for its first rise. Allow it to rise for approximately 1.5 to 2 hours, or until the dough has visibly doubled in size. This crucial step develops flavor and ensures a light, airy texture.
Step 5: Divide and Prepare for Shaping
Once the dough has beautifully doubled in size, gently punch it down to deflate the air. Turn the dough out onto a lightly floured, clean work surface. Form the dough into a long, uniform log. Using a sharp knife or dough scraper, divide this log into 12 equal portions. For utmost precision and consistently sized rolls, I recommend using a kitchen scale to weigh the entire dough and then dividing that total weight by 12 to determine the weight of each individual piece.
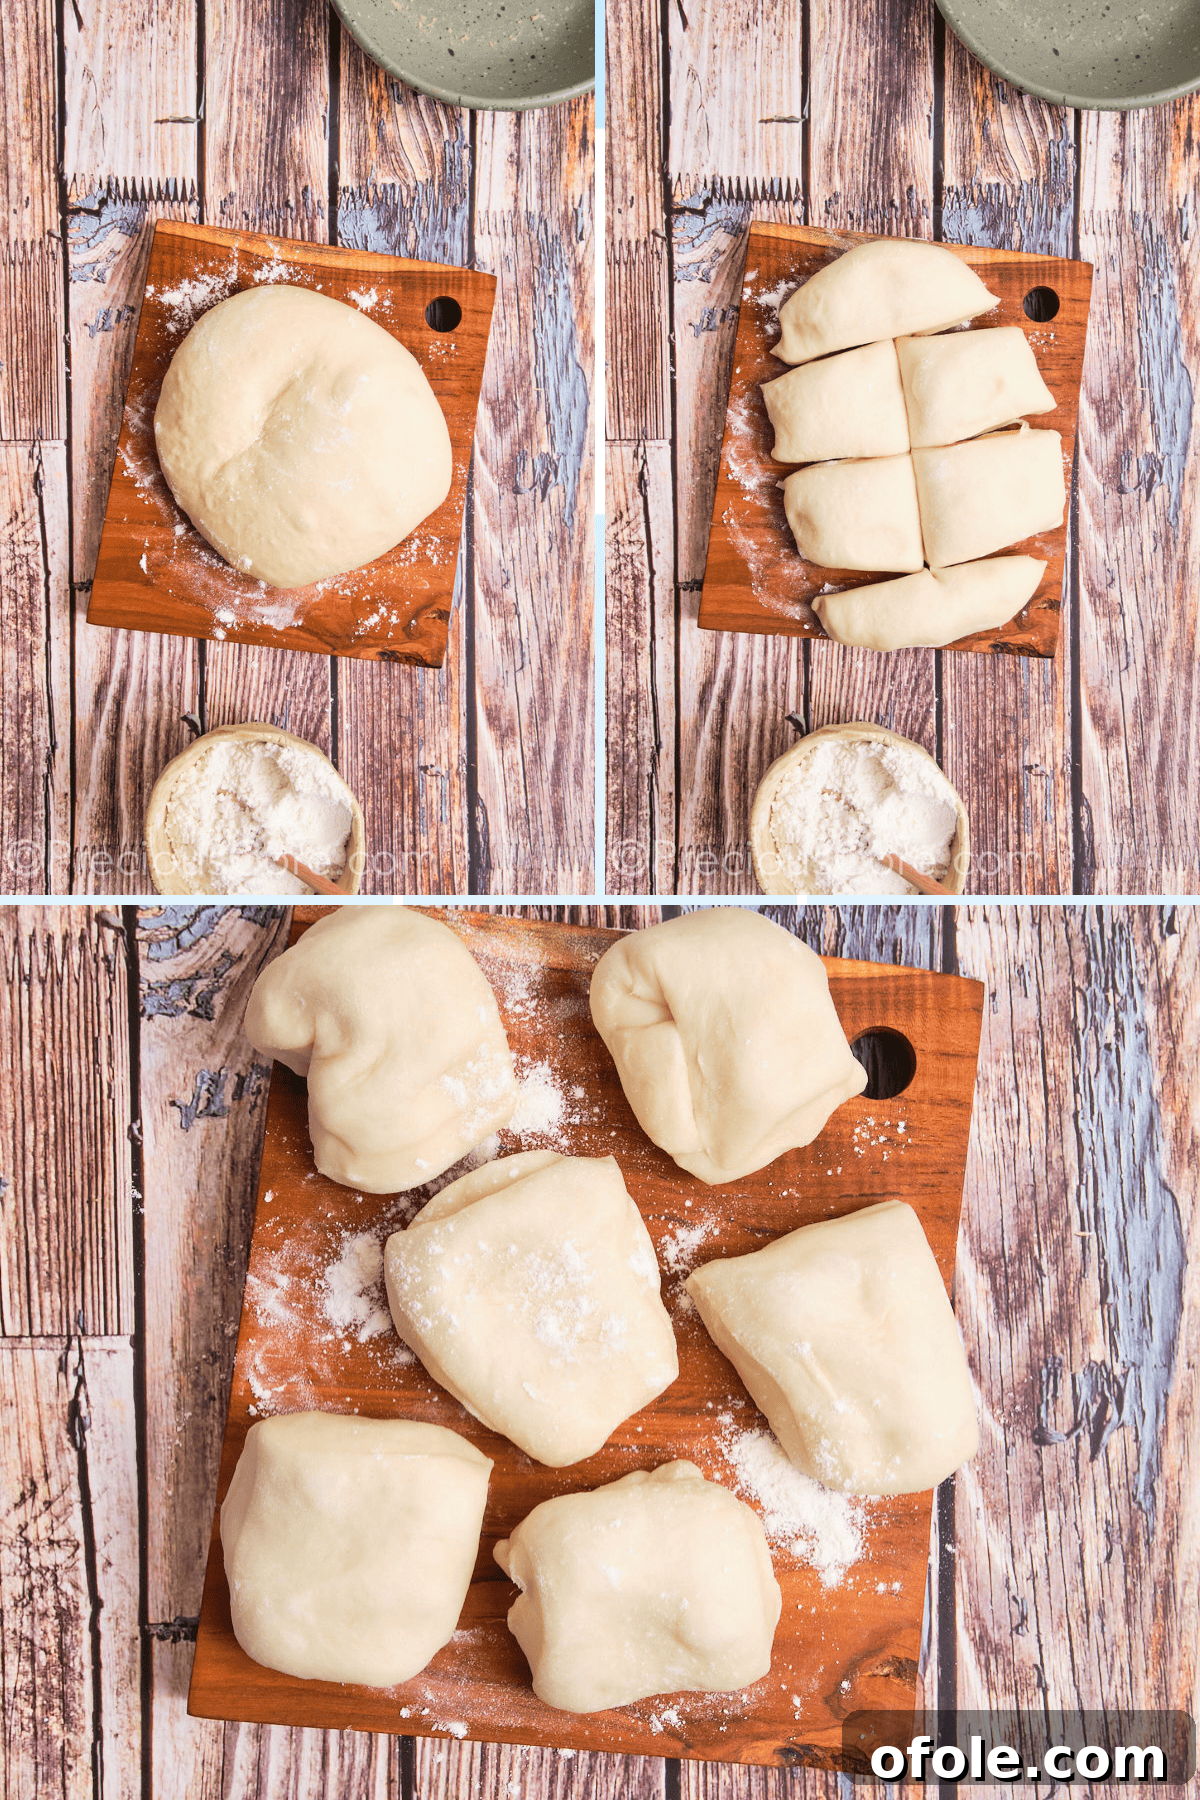
Step 6: Master the Art of Braiding Your Rolls
Take one of your 12 dough portions. Divide this small portion into three equally sized pieces. Roll each of these three smaller pieces into a long, thin rope, approximately 6-8 inches in length. Arrange the three ropes side by side, pinching them firmly together at one end to secure. Now, gently braid them like you would hair. Once braided, pinch the opposite end tightly to seal the braid. For a neat, rounded bun shape, tuck both pinched ends underneath the roll. Repeat this process for all 12 portions of dough. Arrange the beautifully braided challah rolls onto a baking sheet that has been lined with parchment paper, ensuring enough space between each roll for expansion.
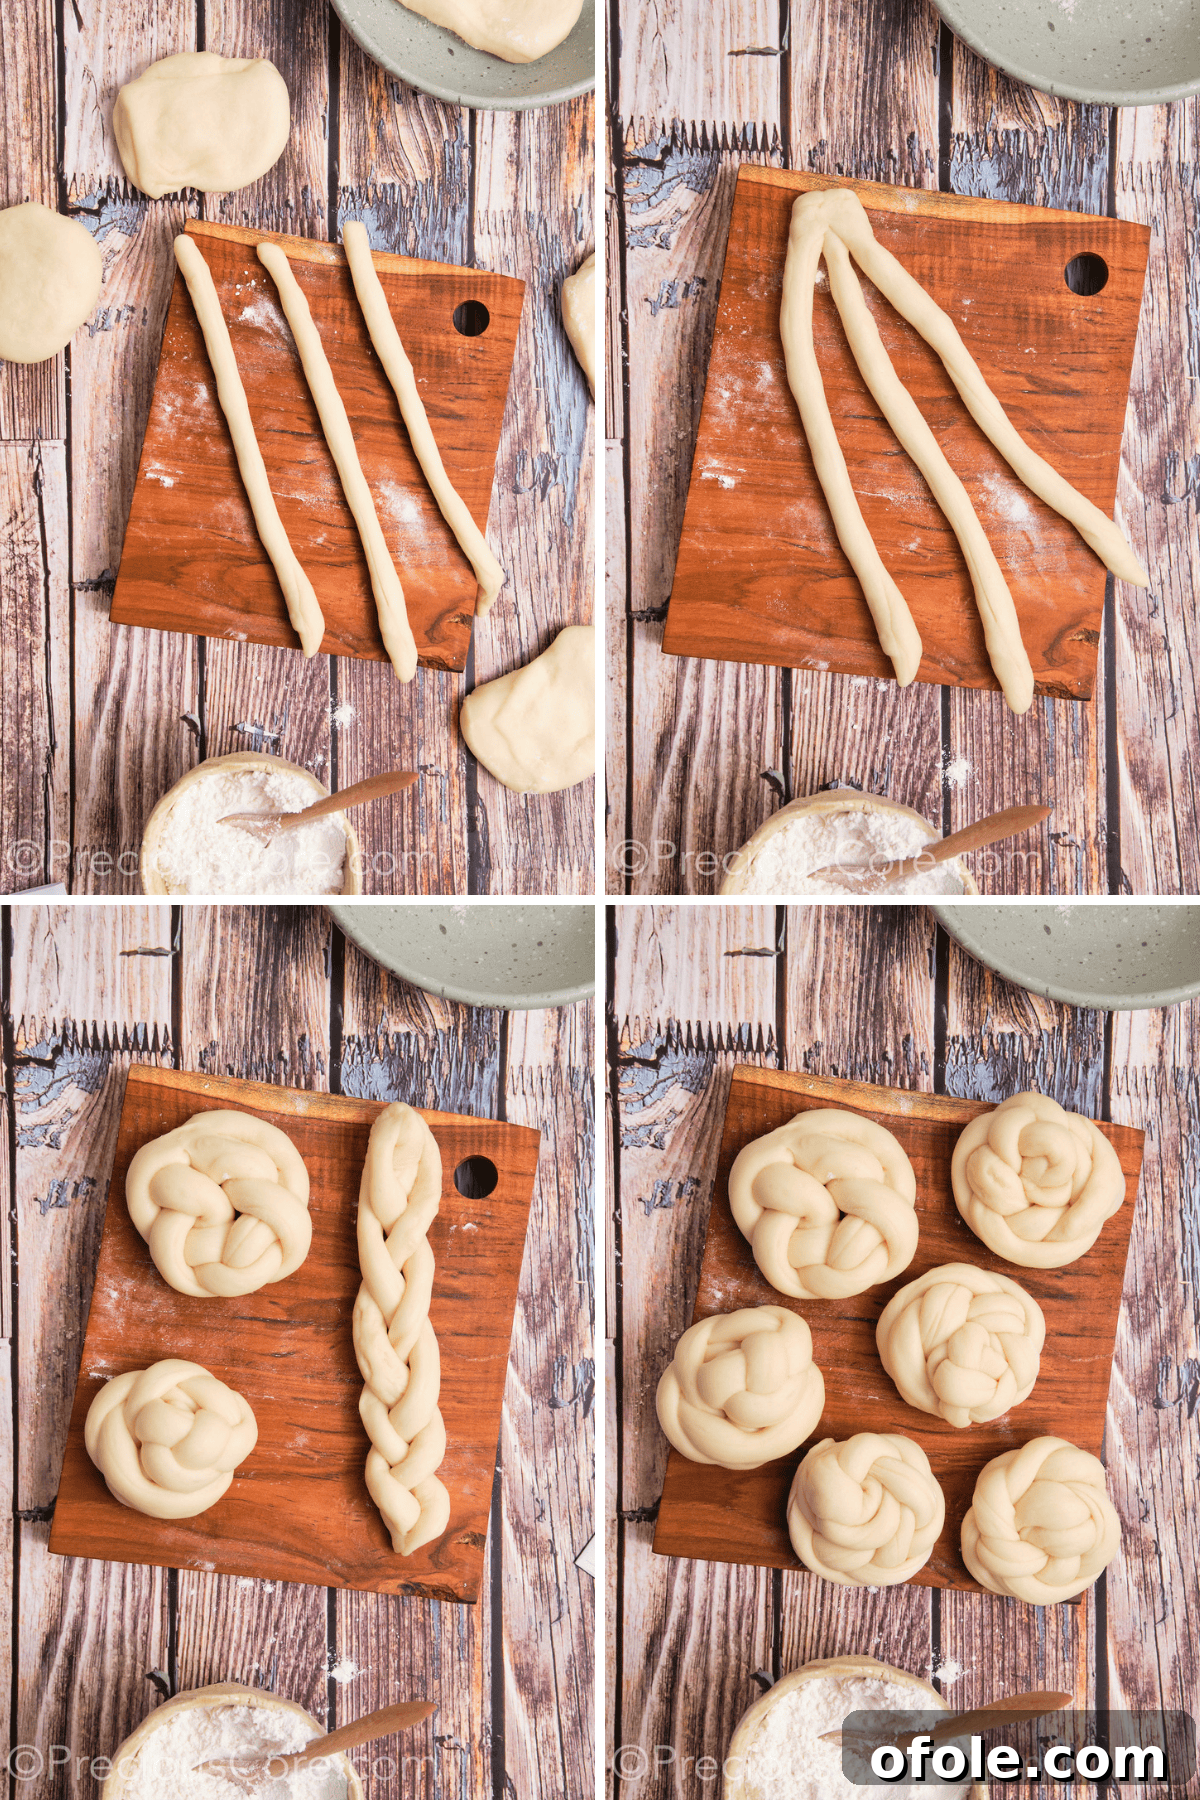
Step 7: The Second Rise (Proofing Shaped Rolls)
Once all your rolls are beautifully braided and arranged on the baking sheet, gently cover them with a clean kitchen towel. Allow them to rise in a warm, draft-free environment for at least 30 minutes, or until they have noticeably doubled in size. This second rise is crucial for achieving that characteristic light and airy texture in your finished rolls.
Step 8: Apply the Golden Egg Wash
Just before baking, prepare an egg wash. You can use a single beaten egg yolk for a very deep golden color or a whole beaten egg for a slightly lighter, glossy finish. Gently brush the tops of each risen challah roll with the egg wash using a pastry brush. This step is key to developing that stunning, golden-brown crust and adding a beautiful sheen. For an added touch, sprinkle with sesame seeds or poppy seeds.
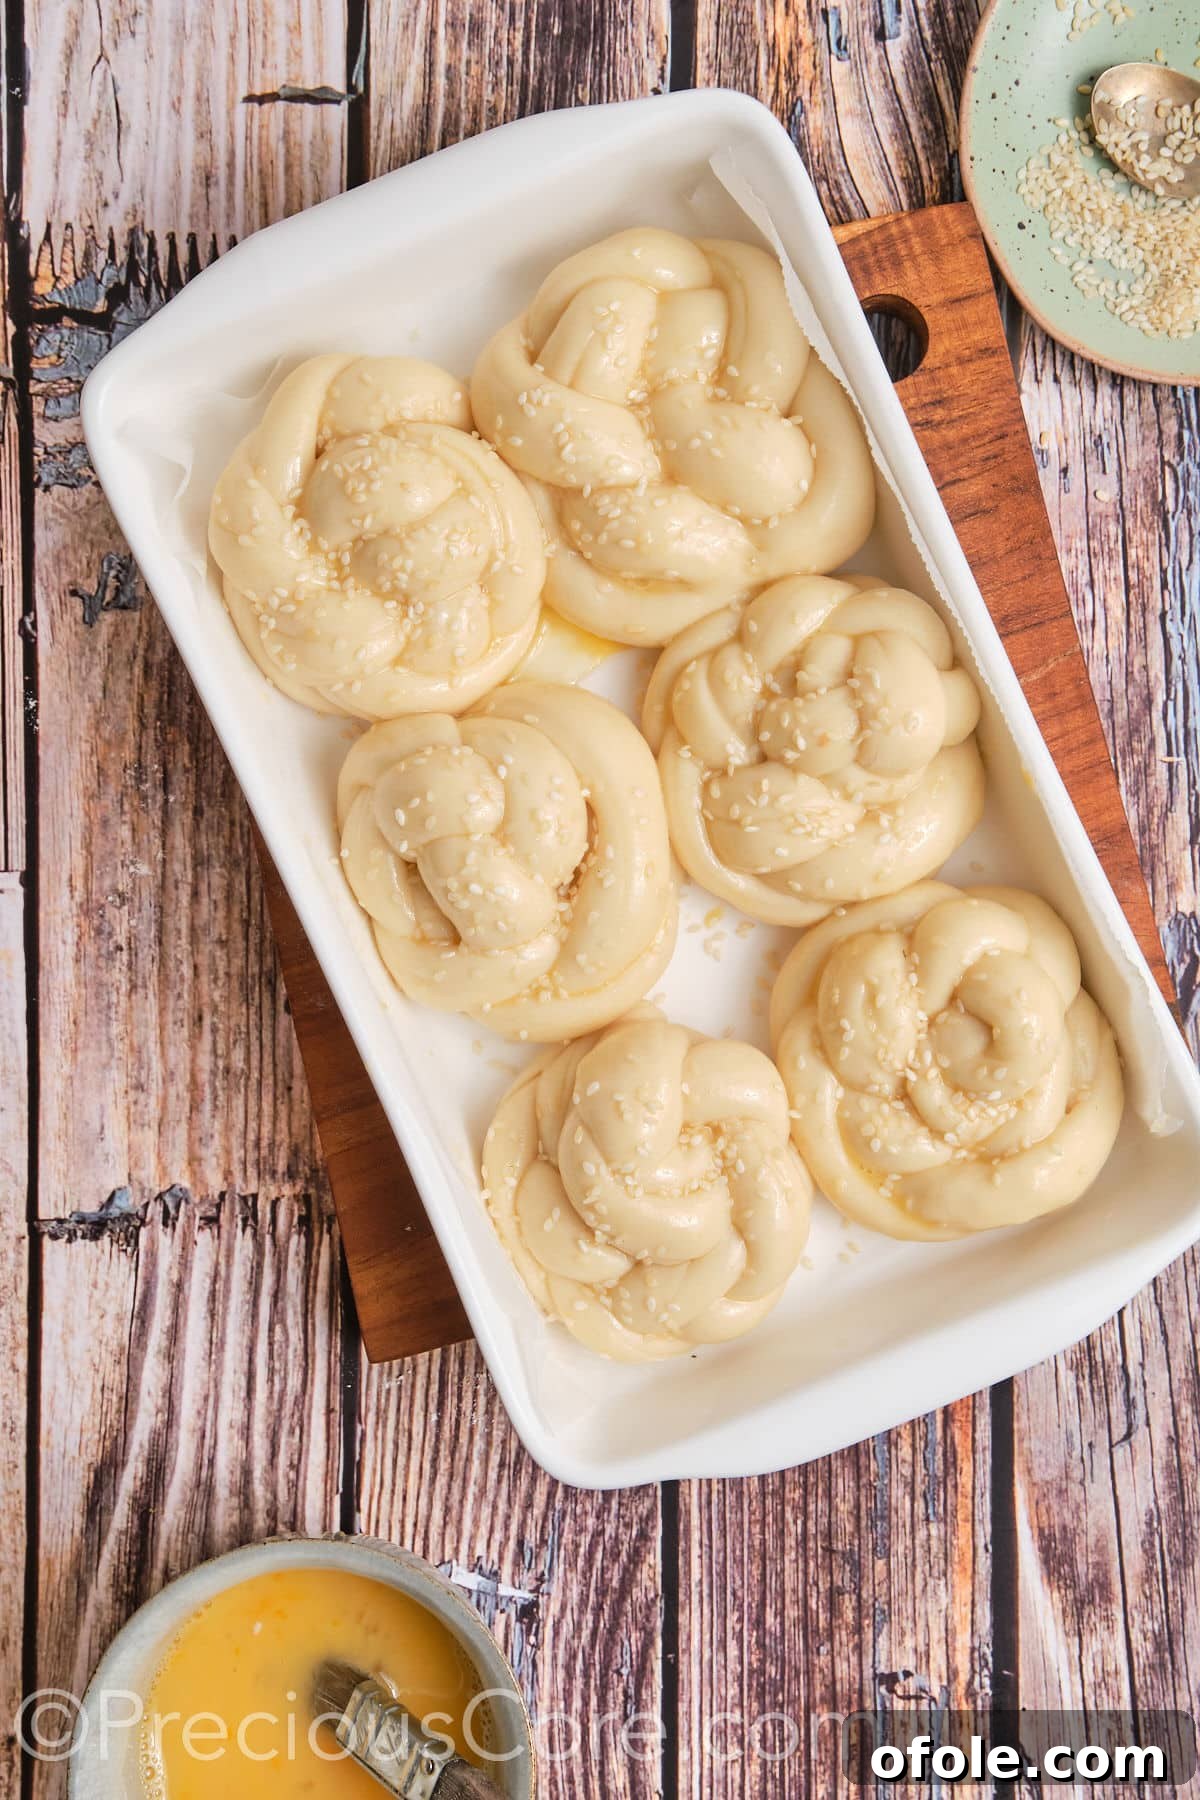
Step 9: Bake to Golden Perfection
Preheat your oven to 350°F (180°C). Carefully transfer the baking sheet with your prepared challah rolls into the preheated oven. Bake for approximately 20-25 minutes, or until the rolls achieve a magnificent golden-brown color on the outside. To confirm they are fully baked, gently tap the bottom of a roll; it should sound hollow. Once baked, remove them from the oven and let them cool slightly on the baking sheet before transferring them to a wire rack to cool completely, or serve them warm.
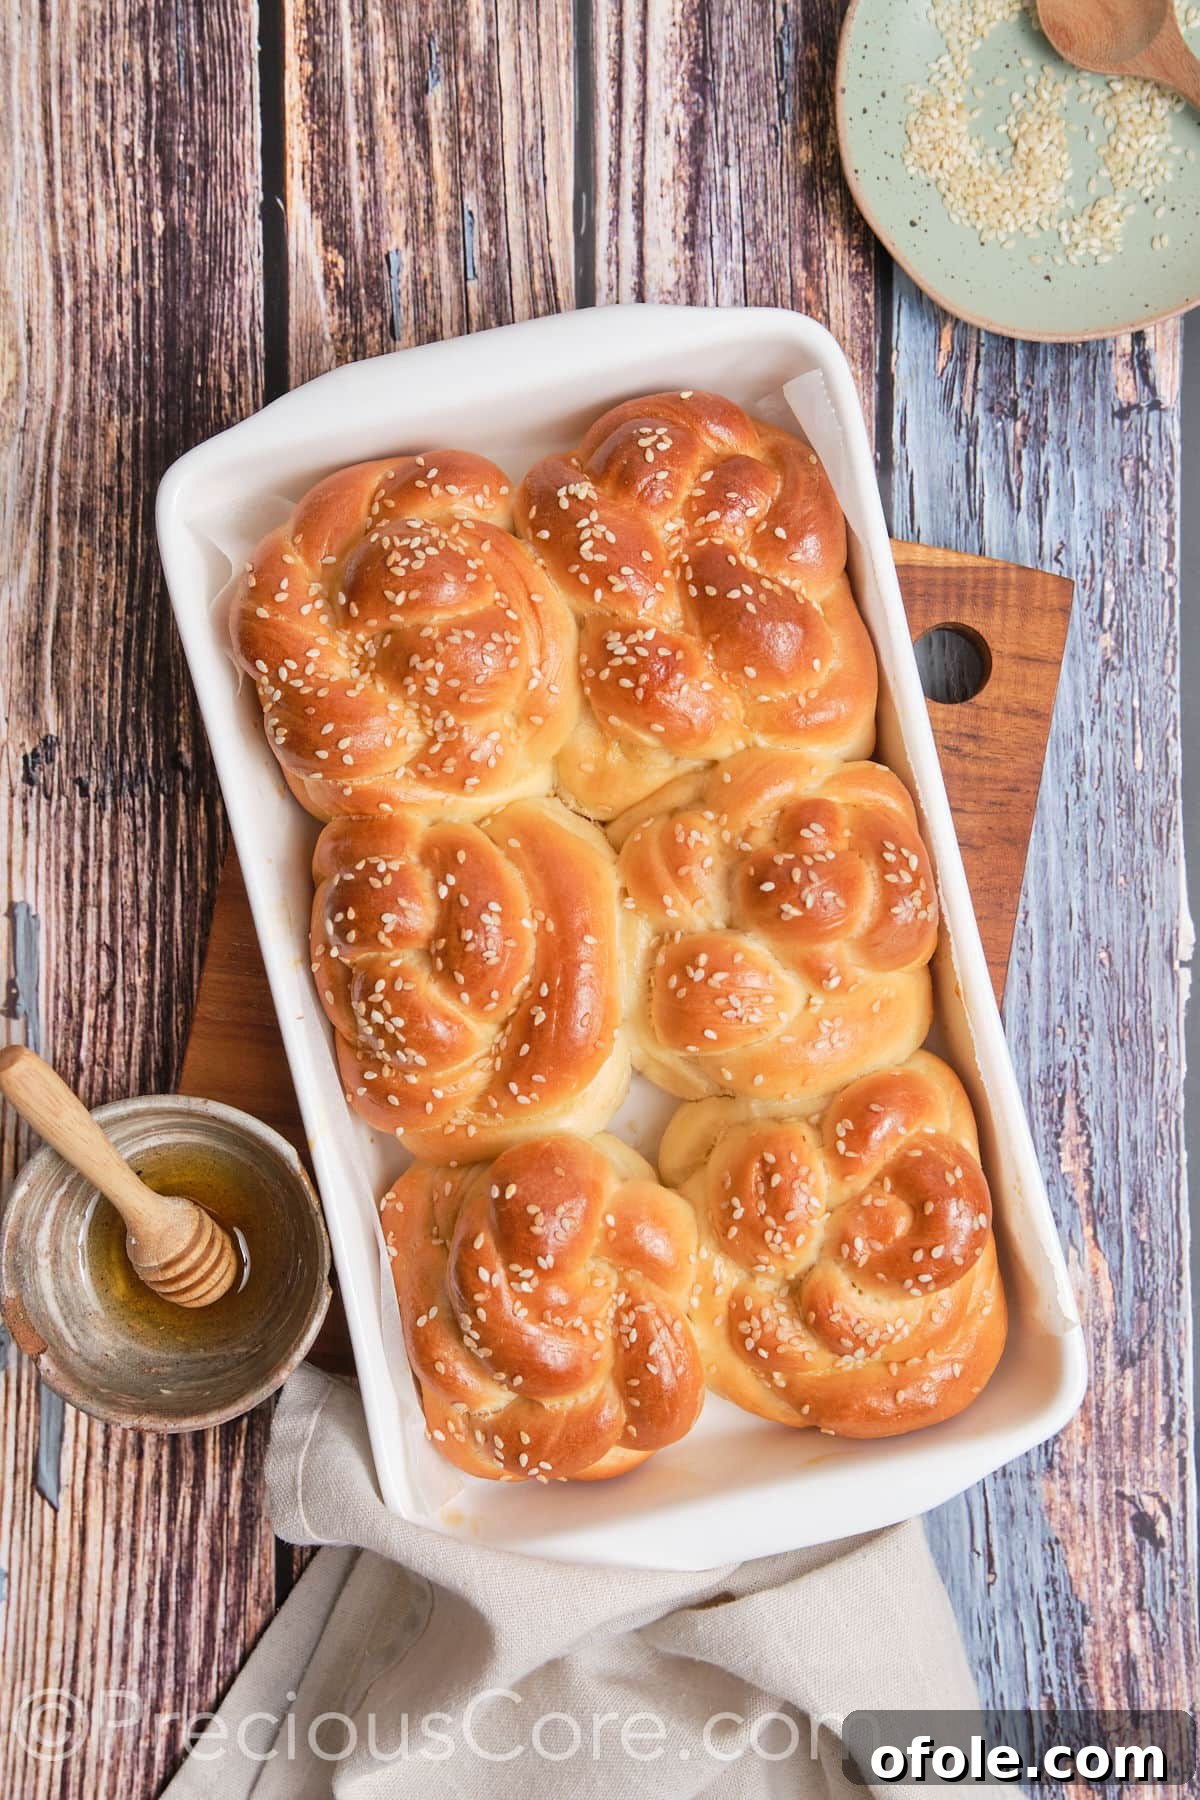
And there you have it – your very own batch of delicious, homemade challah rolls! These are perfect for any occasion and will undoubtedly be a crowd-pleaser. For those planning ahead for special occasions like Thanksgiving, you can prepare these rolls in advance. Simply shape the rolls as directed, then freeze them individually on a baking sheet until solid. Once frozen, transfer them to a freezer-safe ziploc bag and store for up to one month.
When ready to bake, transfer the frozen rolls to a parchment-paper-lined baking sheet and let them thaw overnight in the refrigerator. The next morning, allow them to come to room temperature and complete their second rise before brushing with egg wash using a pastry brush and baking as usual. This method ensures fresh, warm rolls without the morning rush!
If you’re a devoted fan of dinner rolls, don’t miss out on my equally amazing Garlic Butter Rolls for a savory alternative.
Top Tip: Patience for Perfection! The single most important factor for achieving the best texture in your challah rolls is allowing the dough ample time to rise. Be patient during both the first and second proofing stages. The dough should ideally double in size, indicating sufficient fermentation and resulting in an incredibly light, airy, and fluffy interior.
Expert Tips for Irresistible Challah Rolls
Achieving bakery-quality challah rolls at home is within reach with these expert tips:
- Choose the Right Flour: While all-purpose flour works wonderfully, consider using bread flour for your challah dough. Bread flour contains a higher percentage of protein, which translates to more gluten development. This elasticity makes the dough easier to handle, particularly when shaping those beautiful braids, and results in a chewier, more substantial roll.
- Mindful Flour Dusting: When shaping your rolls, a light dusting of flour on your work surface and hands is helpful to prevent sticking. However, be cautious not to add too much extra flour to the dough, as excessive flour can dry out the dough, leading to tough and less tender rolls.
- For Ultimate Decadence: To achieve truly super soft and rich challah rolls, consider adding two extra egg yolks to your dough along with the whole eggs. Egg yolks contribute extra fat and emulsifiers, resulting in an incredibly tender, moist, and luxurious crumb with a deeper golden hue.
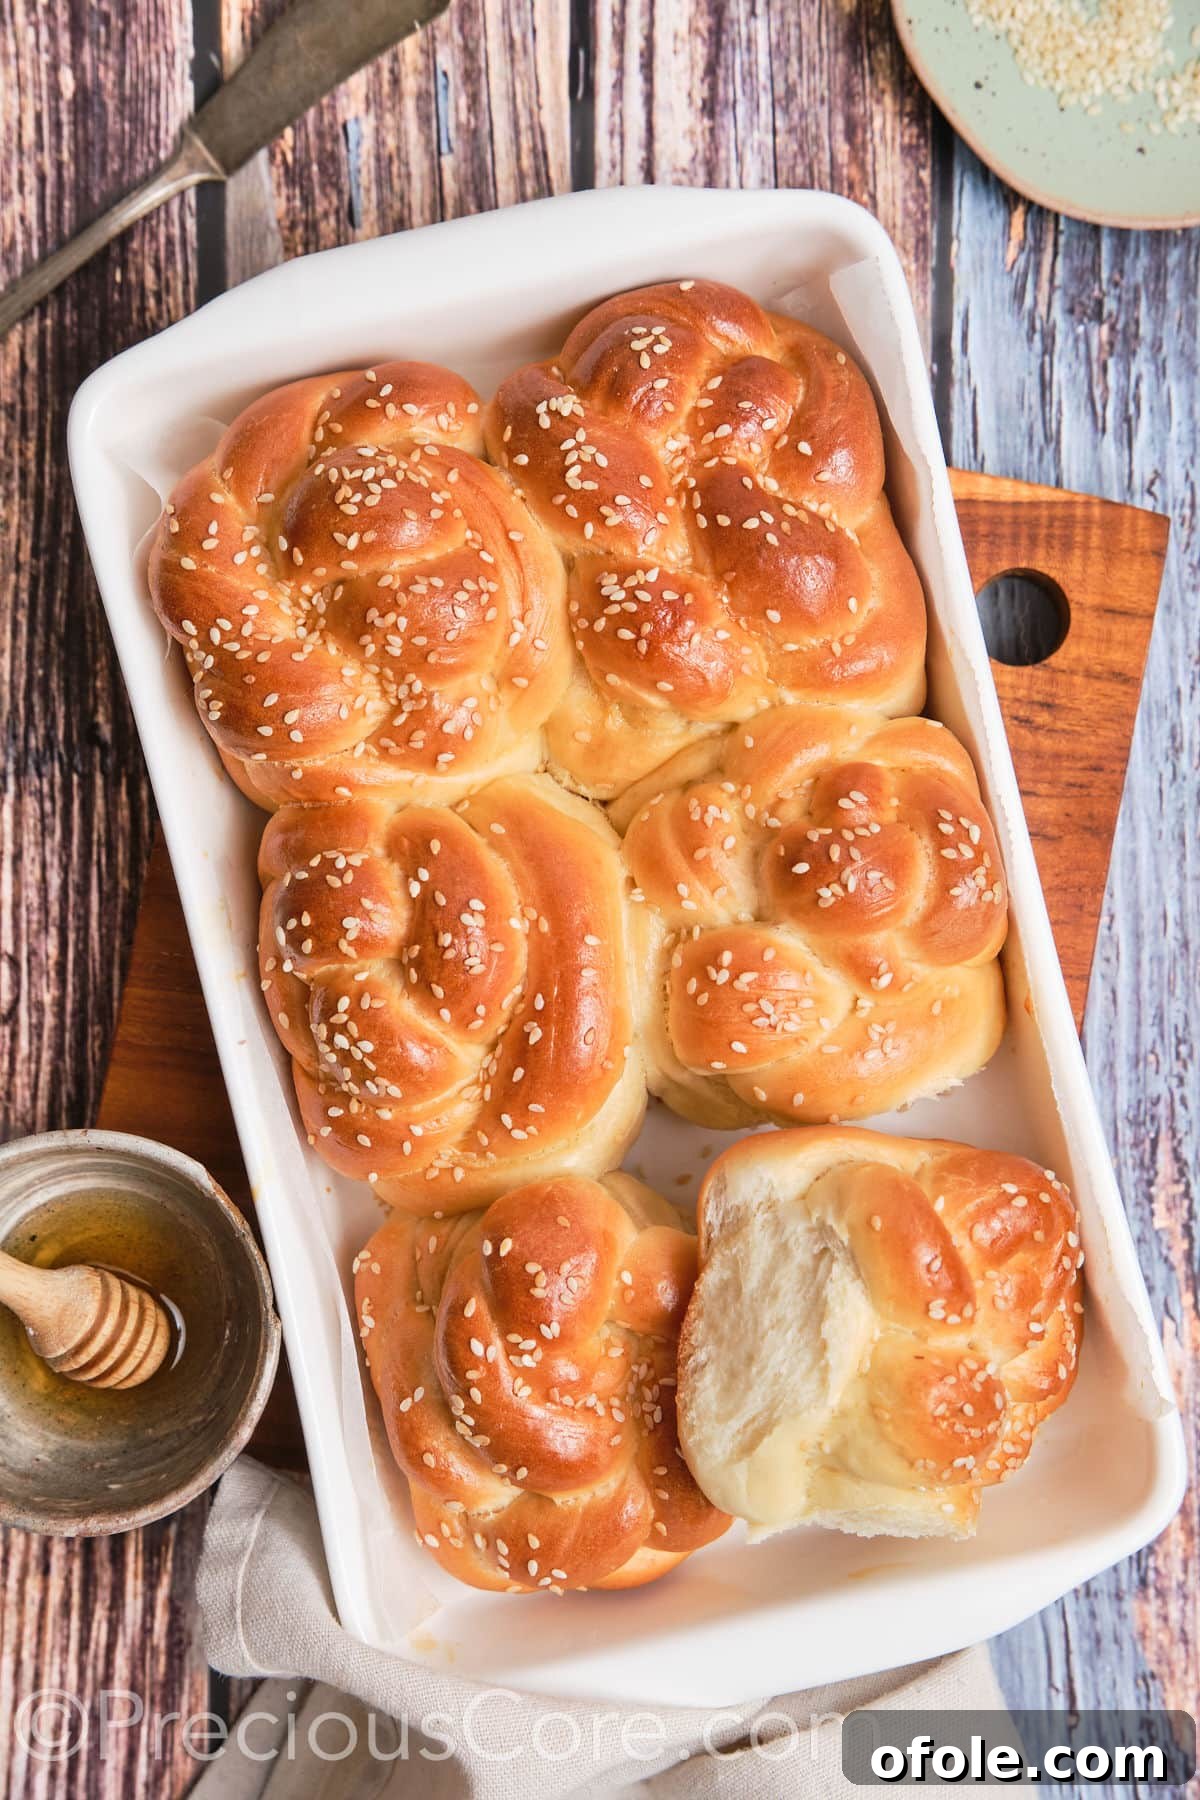
Serving Suggestions for Challah Dinner Rolls
These versatile Challah Dinner Rolls are an exquisite accompaniment to a wide variety of dishes, enhancing any meal with their sweet and savory notes. Here are some perfect pairings:
- Hearty Beef Stew Without Wine
- Tender Chicken Meatballs
- Nutritious Lentil Stew
- Comforting Quick Chicken Noodle Soup
- Serve simply with butter and your favorite jams for breakfast or brunch.
- Create gourmet sliders with your favorite fillings.
Storage and Freezing Tips for Leftover Challah Rolls
While these challah dinner rolls are undeniably best enjoyed fresh from the oven, you can certainly store leftovers to savor their deliciousness a little longer. For optimal softness and flavor, it’s recommended to serve them immediately on the day they are baked or within 24 hours. They will remain enjoyable for up to 3 days, though their characteristic softness may slightly diminish over time. Store them at room temperature in an airtight container to maintain freshness.
Challah rolls also freeze exceptionally well, making them perfect for meal prepping or ensuring you always have a homemade treat on hand. To freeze, first arrange the completely cooled rolls on a baking sheet lined with parchment paper and freeze until solid. Once frozen through, transfer the individual rolls to a freezer-safe container or a heavy-duty freezer bag. They can be stored in the freezer for up to one month. When you’re ready to enjoy them, simply defrost at room temperature or gently warm them in a toaster oven for that freshly baked feel.
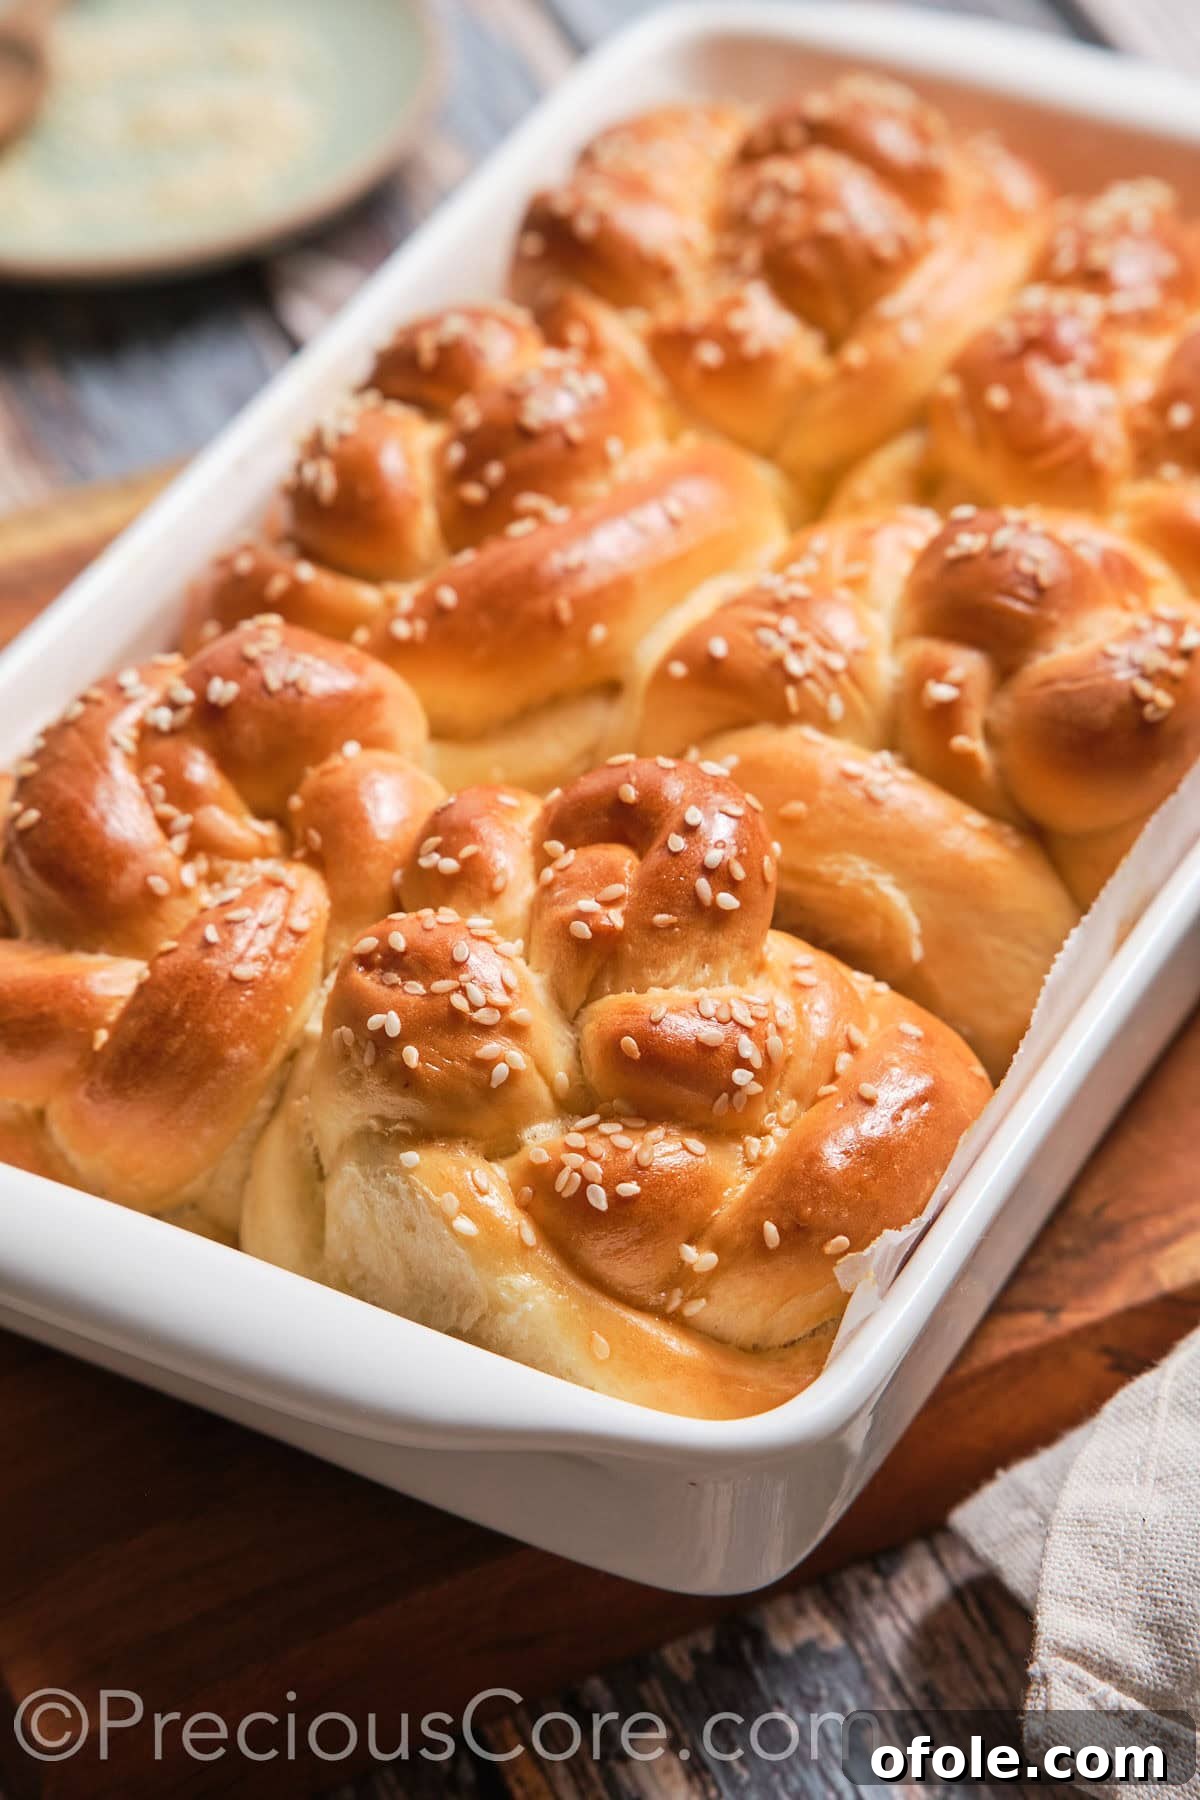
Thanksgiving Recipes to Serve Alongside These Rolls:
Elevate your holiday table with these spectacular Thanksgiving dishes that pair perfectly with our homemade Challah Dinner Rolls:
- Elegant Baked Brie and Preserves
- Classic Southern Deviled Eggs
- Flavorful Oven Baked Turkey Wings
- Succulent Baked Turkey Drumsticks
- Creamy 3 Cheese Mac and Cheese
- Zesty Street Corn Casserole
- Sweet Cinnamon Rolls With Apple Pie Filling
- Aromatic Rosemary Garlic Mashed Potatoes
More Delightful Dinner Roll Recipes
If you’ve enjoyed making these Challah Dinner Rolls, you’ll undoubtedly appreciate exploring these other fantastic dinner roll recipes:
Easy Dinner Rolls
Honey Whole Wheat Dinner Rolls
Sweet Dinner Rolls Recipe
Garlic Butter Rolls
If you make this recipe, please take a moment to leave a star rating below. Your feedback helps other home bakers discover and enjoy this recipe, and I always love hearing from you! Thank you!
Challah Dinner Rolls
20
40
3
12 rolls
Rate
Print Recipe
Ingredients
- ¾ cup warm milk about 110℉ warm, whole or 2% milk would work
- 2¼ teaspoon active dry yeast
- Pinch of sugar abt ¼ teaspoon
- 2 large eggs
- ½ cup vegetable oil
- ¼ cup honey
- 4 cups all-purpose flour
- ½ teaspoon salt
- 1 egg for egg wash
- 2 teaspoons Sesame seeds or poppy seeds to sprinkle on top
Instructions
-
Warm the milk until it’s just slightly warm (about 110°F). Pour into a large mixing bowl. Add the yeast and a pinch of sugar. Stir to combine. Let it sit for 5-10 minutes until foamy.¾ cup warm milk, 2¼ teaspoon active dry yeast, Pinch of sugar
-
When the yeast mixture is foamy, add the eggs, vegetable oil and honey and mix well to combine.2 large eggs, ½ cup vegetable oil, ¼ cup honey
-
Add the flour and salt and mix with clean hands until the dough comes together. Knead until the dough becomes smooth.4 cups all-purpose flour, ½ teaspoon salt
-
Cover the challah dough with a clean towel and leave it in a warm place to rise. Let it rise for 1.5-2 hours or until doubled in size.
-
Punch down the risen dough to deflate it, and turn it out on a lightly floured surface.
-
Shape the challah dough into a long log and cut it into 12 equal portions.
-
Divide each portion into three equal parts and roll each part into a small log.
-
Braid the three strands together, pinching the ends to seal. Tuck the ends under to form a round braided bun shape.
-
Arrange the challah rolls onto a baking sheet lined with parchment paper. Cover the rolls with a clean kitchen towel and allow them to rise until doubled in size, about half an hour. Brush the tops of the buns lightly with egg wash (one beaten egg) and sprinkle with sesame seeds.2 teaspoons Sesame seeds or poppy seeds, 1 egg for egg wash
-
Preheat oven to 350°F (180°C).
-
Bake in the preheated oven for 20-25 minutes until the rolls turn golden brown and sound hollow when tapped on the bottom.
-
Remove the braided buns from the oven and let them cool a bit before you enjoy them.
Notes
- Do not use expired yeast, as this will not allow the dough to rise well. You can confirm if it is expired or not by taking a teaspoon of dry yeast and adding ¼ cup of lukewarm water. If it is active, it will bubble for 10 minutes after stirring and become slightly puffy; this indicates that the yeast is active. If this is not the case, your yeast has probably expired.
- You can also proof the challah dough in the refrigerator overnight. This will give you more developed flavors.
- To ensure even sizes, use a kitchen scale. Weigh the whole dough first, then cut the challah dough into equal pieces of that calculated weight.
- Remember that all the ingredients should be fresh for the best results.
- The photographed rolls are only half of the recipe. This complete recipe will yield 12 rolls.
Nutrition
Additional Info
Tried this recipe?
Mention @preciouscore or tag #PreciousCore!