
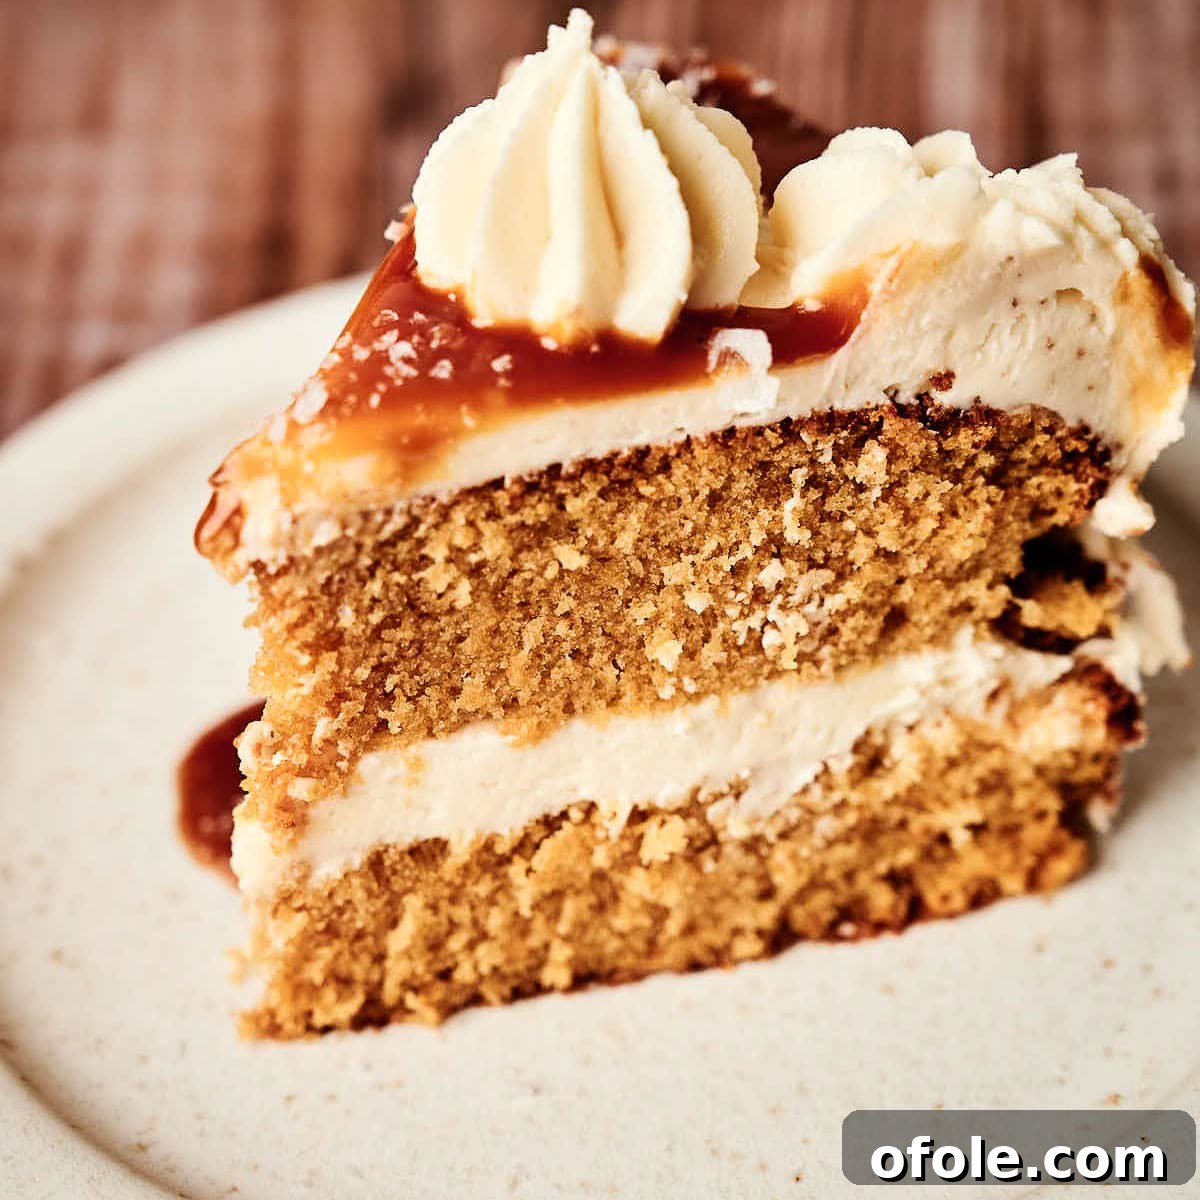
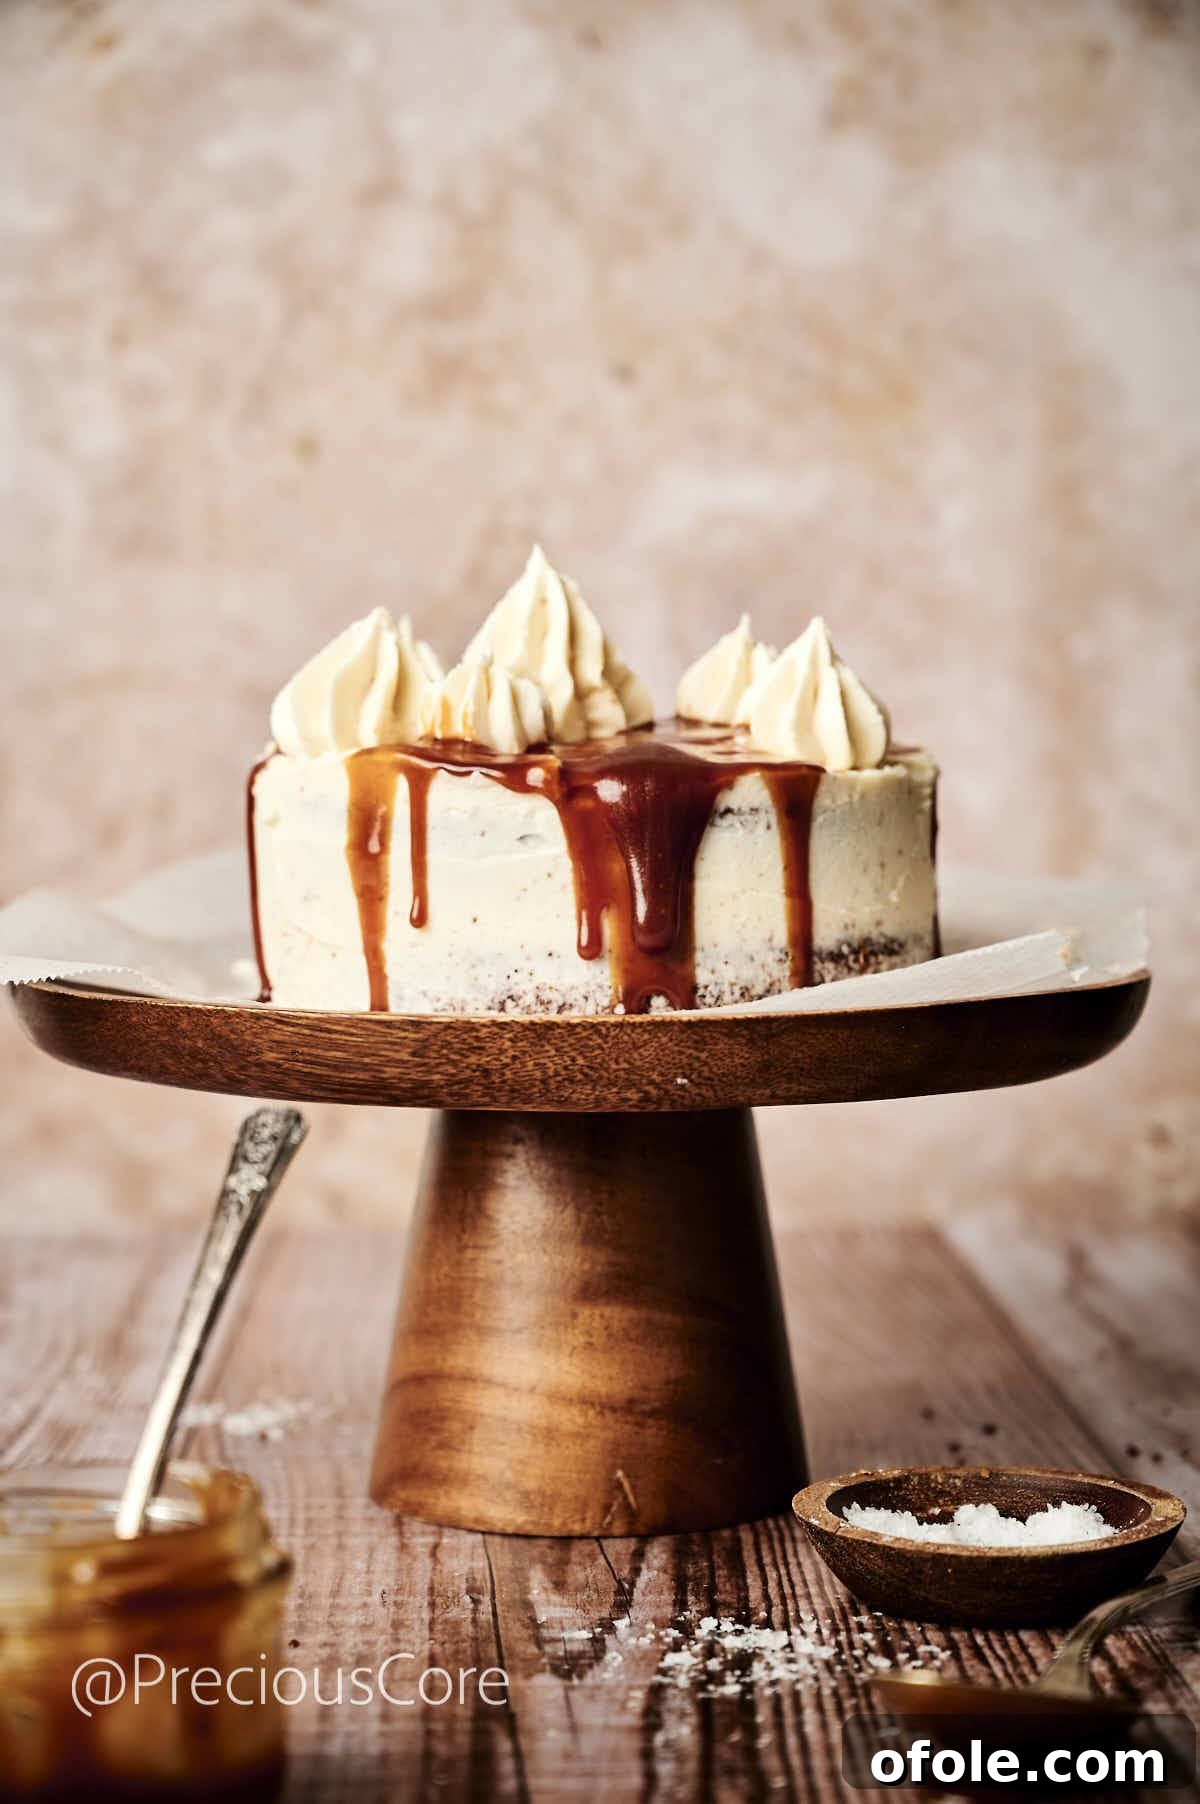
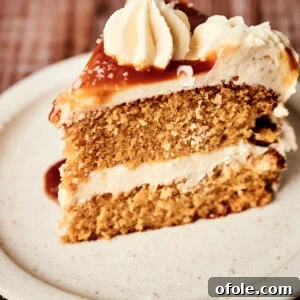
Prepare to impress with this show-stopping Salted Caramel Cake, a truly irresistible dessert perfect for special occasions. Each decadent bite offers a harmonious blend of sweet and salty, with rich caramel infused into both the tender cake layers and the silky-smooth buttercream frosting. Elevate your celebrations, from festive holidays like Thanksgiving and Christmas to joyful birthday parties and intimate gatherings, with this magnificent centerpiece.
To truly take this masterpiece to an unparalleled level of indulgence, generously drizzle extra homemade or store-bought caramel sauce over the top just before serving. Its glossy sheen and alluring aroma will captivate your guests, promising a dessert experience they won’t soon forget.
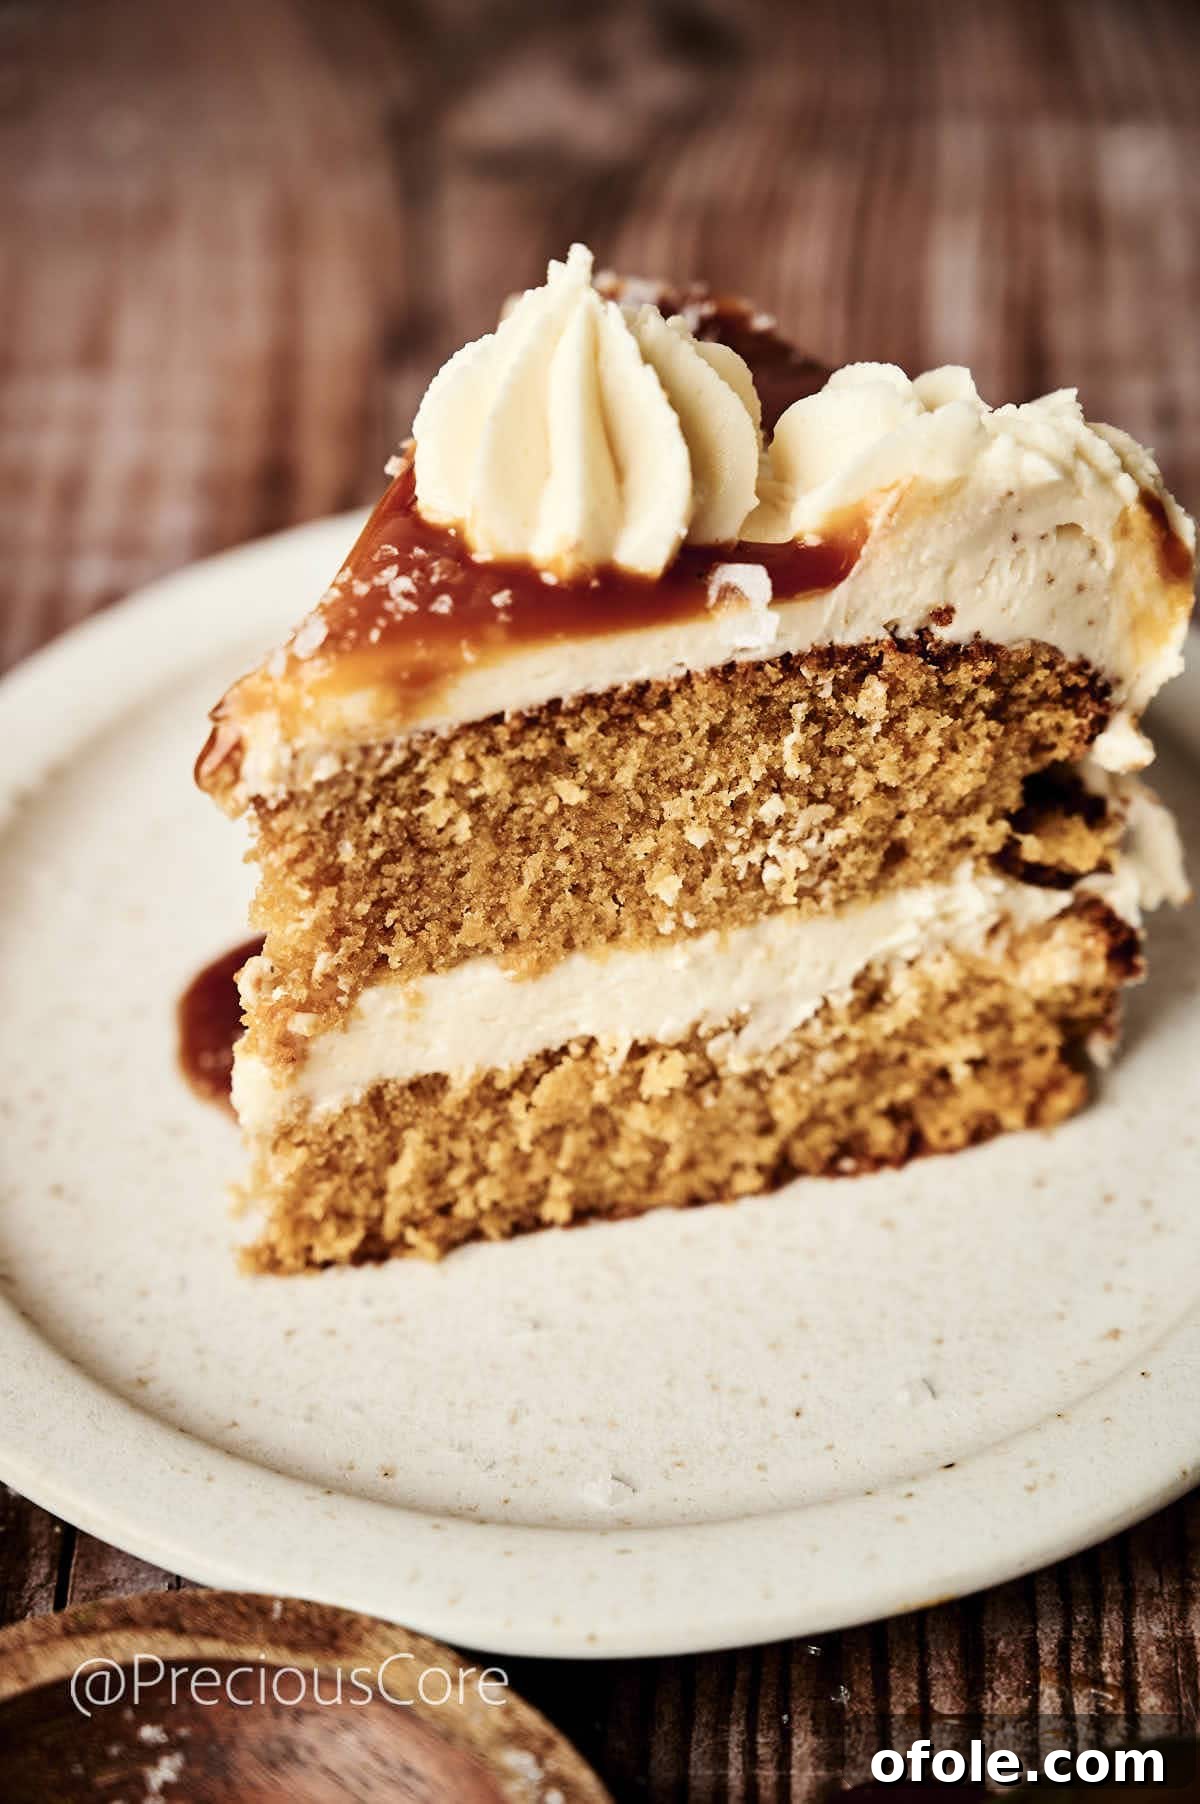
This isn’t just another cake; it’s a culinary journey you’ll want to embark on repeatedly. Be sure to save this recipe and delve into all the important tips provided throughout this guide to ensure your salted caramel cake turns out flawlessly every time!
Craving more delightful baked goods? Explore some of our other cherished cake creations: Old Fashioned Carrot Cake, Red Velvet Cake Recipe Without Buttermilk, and Pumpkin Cake With Cream Cheese Frosting. Each offers a unique flavor profile sure to satisfy any sweet tooth.
Table of Contents
- Mastering the Salted Caramel Cake
- Why This Salted Caramel Cake Recipe?
- Key Ingredients for Salted Caramel Cake
- Salted Caramel Cake Flavor Variations
- Ingredient Substitutions for Caramel Cake
- How to Bake the Perfect Salted Caramel Cake
- Step 1: Prepare Your Oven and Pans
- Step 2: Sift Your Dry Ingredients
- Step 3: Cream Butter and Sugars to Perfection
- Step 4: Incorporate Wet Ingredients and Eggs
- Step 5: Gently Combine Wet and Dry Ingredients
- Step 6: Bake Until Golden and Risen
- Step 7: Crafting the Caramel Buttercream
- Step 8: Expert Cake Assembly
- Step 9: Decorate and Present
- Pro Tips for a Flawless Salted Caramel Cake
- Serving Suggestions for Your Caramel Cake
- Properly Storing Leftover Salted Caramel Cake
- More Irresistible Cake Recipes
- Salted Caramel Cake Recipe Card
Mastering the Salted Caramel Cake: Your Guide to a Delicious Dessert
The allure of caramel is truly universal, and for many, it signals the cozy comforts of autumn and winter. As the leaves begin to turn and the air grows crisp, my kitchen fills with the intoxicating scent of caramel. From tart apple slices coated in buttery caramel sauce to individual caramel apple hand pies and warm caramel-infused coffee, it’s a flavor I adore. This Salted Caramel Cake is the latest addition to my repertoire of beloved caramel treats, bringing a sophisticated yet comforting sweetness that’s hard to resist.
Imagine layers of incredibly moist, caramel-infused sponge cake, generously slathered with a light and fluffy salted caramel buttercream frosting. It’s a symphony of textures and flavors that dance on your palate. This cake isn’t just a dessert; it’s an experience. It serves as the quintessential fall indulgence, a thoughtful homemade gift for loved ones, or the ultimate centerpiece for any birthday celebration. Its remarkable balance of sweet and salty notes, combined with its tender crumb and airy frosting, ensures it pairs perfectly with a steaming cup of tea or a robust coffee.
Why This Salted Caramel Cake Recipe?
This recipe stands out for its deep, authentic caramel flavor that’s woven throughout every element of the cake, not just an afterthought. We’ve perfected the balance to ensure the salt enhances, rather than overwhelms, the sweetness of the caramel, creating a truly addictive taste. The sponge cake itself is incredibly soft and moist, a testament to carefully chosen ingredients and precise baking techniques. Furthermore, the buttercream is light and airy, avoiding the overly heavy or greasy texture often found in less refined recipes. It’s a cake designed for success, even for those new to baking, promising professional-looking results with homemade charm.
Key Ingredients for Salted Caramel Cake
Calling all caramel enthusiasts! Here’s a breakdown of the essential ingredients you’ll need to create this magnificent salted caramel cake, along with insights into their crucial roles in achieving perfect results.
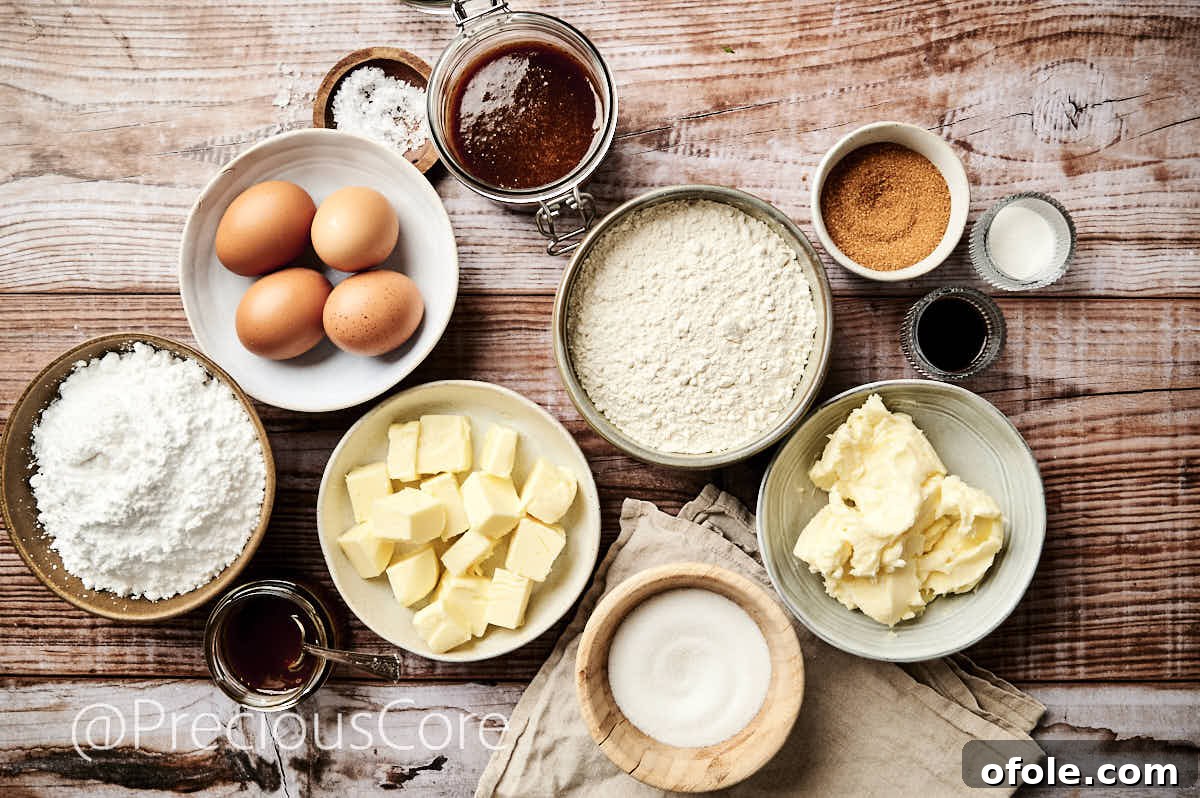
- Self-Rising Flour: This pre-mixed flour is a baker’s best friend, ensuring your cake rises beautifully and consistently. Its integrated leavening agents — typically baking powder and salt — contribute to an incredibly light, airy, and fluffy texture, which is paramount for a delicate sponge cake.
- Salted Butter: A key player in balancing the cake’s sweetness, salted butter adds a subtle depth of flavor to both the cake batter and the buttercream, creating that signature sweet-and-salty profile without needing extra salt additions. Ensure it’s softened to room temperature for optimal creaming.
- Eggs: Eggs act as a crucial binder, providing structure and richness to the cake. For the best emulsion and a smooth, velvety batter, it’s vital that your eggs are at room temperature. Take them out of the fridge 1-2 hours before you plan to start baking.
- Brown Sugar: This ingredient is indispensable for its ability to add a rich, deep, molasses-like sweetness and moisture to the cake layers, complementing the caramel perfectly. Both light brown and dark brown sugar can be used, with dark brown sugar offering a more intense caramel note. You will also need regular granulated sugar (refer to the full recipe card for precise measurements).
- Caramel Sauce: The heart and soul of this cake, caramel sauce infuses the sponge and buttercream with its signature flavor. Whether you opt for your favorite high-quality store-bought brand (Trader Joe’s Salted Caramel Sauce is a popular choice) or prefer the rich depth of a homemade caramel, ensure it’s thick enough to hold its own but still pourable.
- Vanilla Extract: A touch of vanilla enhances and deepens the overall flavor profile, providing a warm, aromatic backdrop to the caramel.
- Whole Milk: Adds essential moisture and richness, contributing to the cake’s tender crumb. Room temperature milk incorporates better into the batter.
- Icing Sugar (Powdered Sugar): Essential for creating a smooth, stable, and perfectly sweet buttercream frosting. Sifting it prevents lumps.
- Sea Salt Flakes: Used for garnishing, these coarse flakes provide a delightful textural contrast and a burst of salty flavor that cuts through the sweetness, truly elevating the “salted” caramel experience.
For a comprehensive list of all ingredients with precise measurements, please refer to the detailed recipe card at the end of this post.
Salted Caramel Cake Flavor Variations
While the classic Salted Caramel Cake is undeniably delicious, don’t hesitate to get creative and explore these delightful variations to customize your baking experience:
- Salted Caramel Chocolate Cake: For the ultimate indulgence, introduce a layer of rich, decadent chocolate ganache between your caramel cake layers. The deep bitterness of chocolate beautifully complements the sweet and salty caramel, creating an unforgettable dessert.
- Coffee Salted Caramel Cake: Infuse your cake with a sophisticated coffee note. Add a shot of freshly brewed espresso (or a teaspoon of espresso powder) to either your caramel sauce, the cake batter, or even both, for a wonderful blend of robust coffee and sweet caramel flavors. This creates a more complex and adult-friendly profile.
- Pecan Salted Caramel Cake: If you desire a delightful nutty crunch that pairs exceptionally well with caramel, consider folding some finely chopped toasted pecans into your cake batter. Alternatively, use candied pecans as an elegant and textural garnish for the finished cake, adding both flavor and visual appeal.
Ingredient Substitutions for Caramel Cake
Don’t fret if you find yourself missing an ingredient or two! Many common baking components can be successfully substituted without compromising the delicious outcome of your salted caramel cake:
- Flour Alternatives – This recipe specifically calls for self-rising flour, celebrated for its consistent leavening. However, if self-rising flour isn’t available, you can easily create your own substitute: for every cup of all-purpose flour, simply whisk in 1½ teaspoons of baking powder and a generous pinch of salt.
- Butter Replacements – For a dairy-free alternative that still delivers on moisture and flavor, you can swap out an equal amount of butter for margarine or a solid fat like coconut oil. Keep in mind that these substitutions might slightly alter the flavor profile and texture of the buttercream.
- Egg Substitutions – To make this recipe egg-free, you can substitute each egg with a flax egg. Prepare a flax egg by thoroughly mixing 1 tablespoon of ground flaxseed with 3 tablespoons of water, then allowing it to sit for about 5-10 minutes until it thickens to a gelatinous consistency.
For another versatile sponge cake base that can be adapted for various flavors, explore my VANILLA SPONGE CAKE recipe.
How to Bake the Perfect Salted Caramel Cake: A Step-by-Step Guide
Follow these detailed steps carefully to ensure a beautifully baked and expertly decorated salted caramel cake that tastes as incredible as it looks.
Step 1: Prepare Your Oven and Pans
Begin by preheating your oven to 350°F (180°C). This ensures a consistent baking temperature from the moment your cake enters the oven. Next, thoroughly grease two 8-inch round cake pans. For an extra layer of protection against sticking and to ensure easy removal, line the bases of the greased pans with parchment paper. This preparation is key to achieving perfectly shaped cake layers.
Pro Tip for Baking Pans: For optimal results and a beautifully soft cake, always opt for aluminum baking pans. Light-colored aluminum conducts heat less intensely than dark-colored pans, promoting a gentler, more even bake. Darker pans tend to absorb significantly more heat, which can lead to over-browning of the crust and a drier cake. A thin, delicate crust is ideal for a moist, tender sponge.
Step 2: Sift Your Dry Ingredients
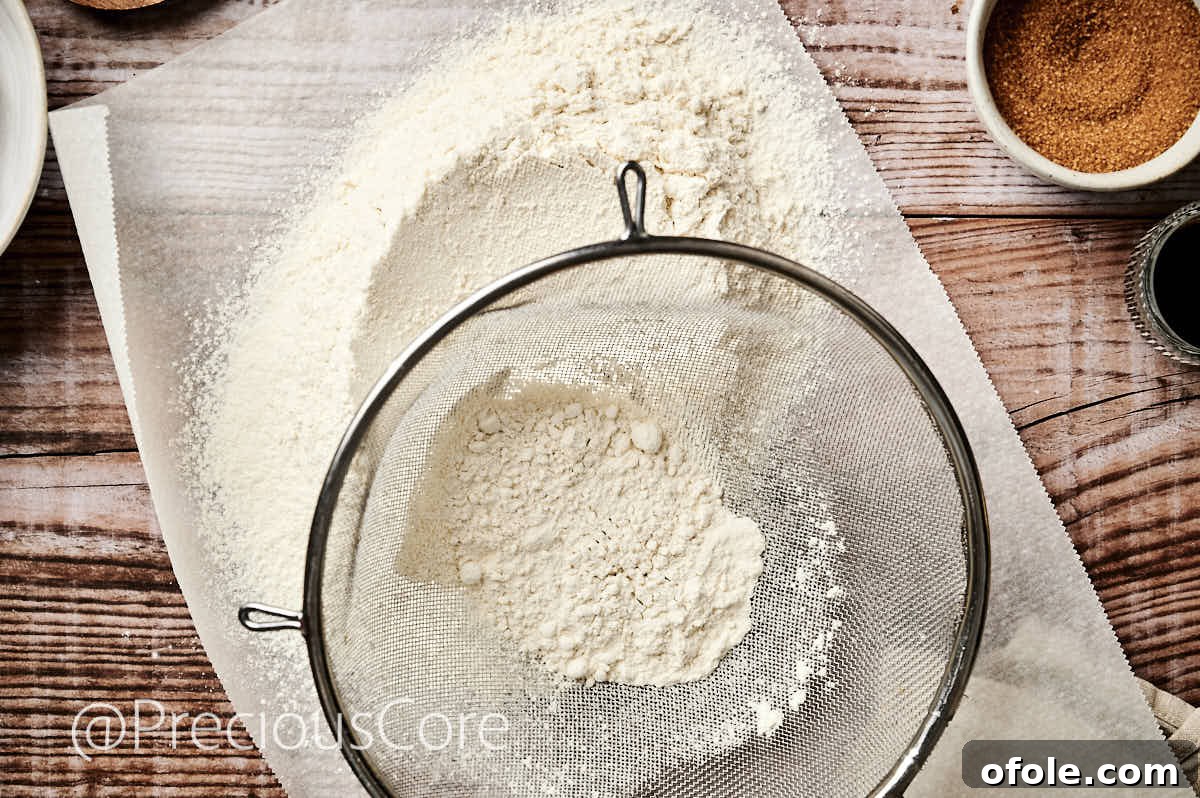
Into a large mixing bowl, use a fine mesh sieve to thoroughly sift together the self-rising flour and salt. Sifting is a crucial step that aerates the flour, removes any lumps, and ensures that the leavening agents are evenly distributed. This process contributes to a lighter, more uniform cake crumb.
Step 3: Cream Butter and Sugars to Perfection
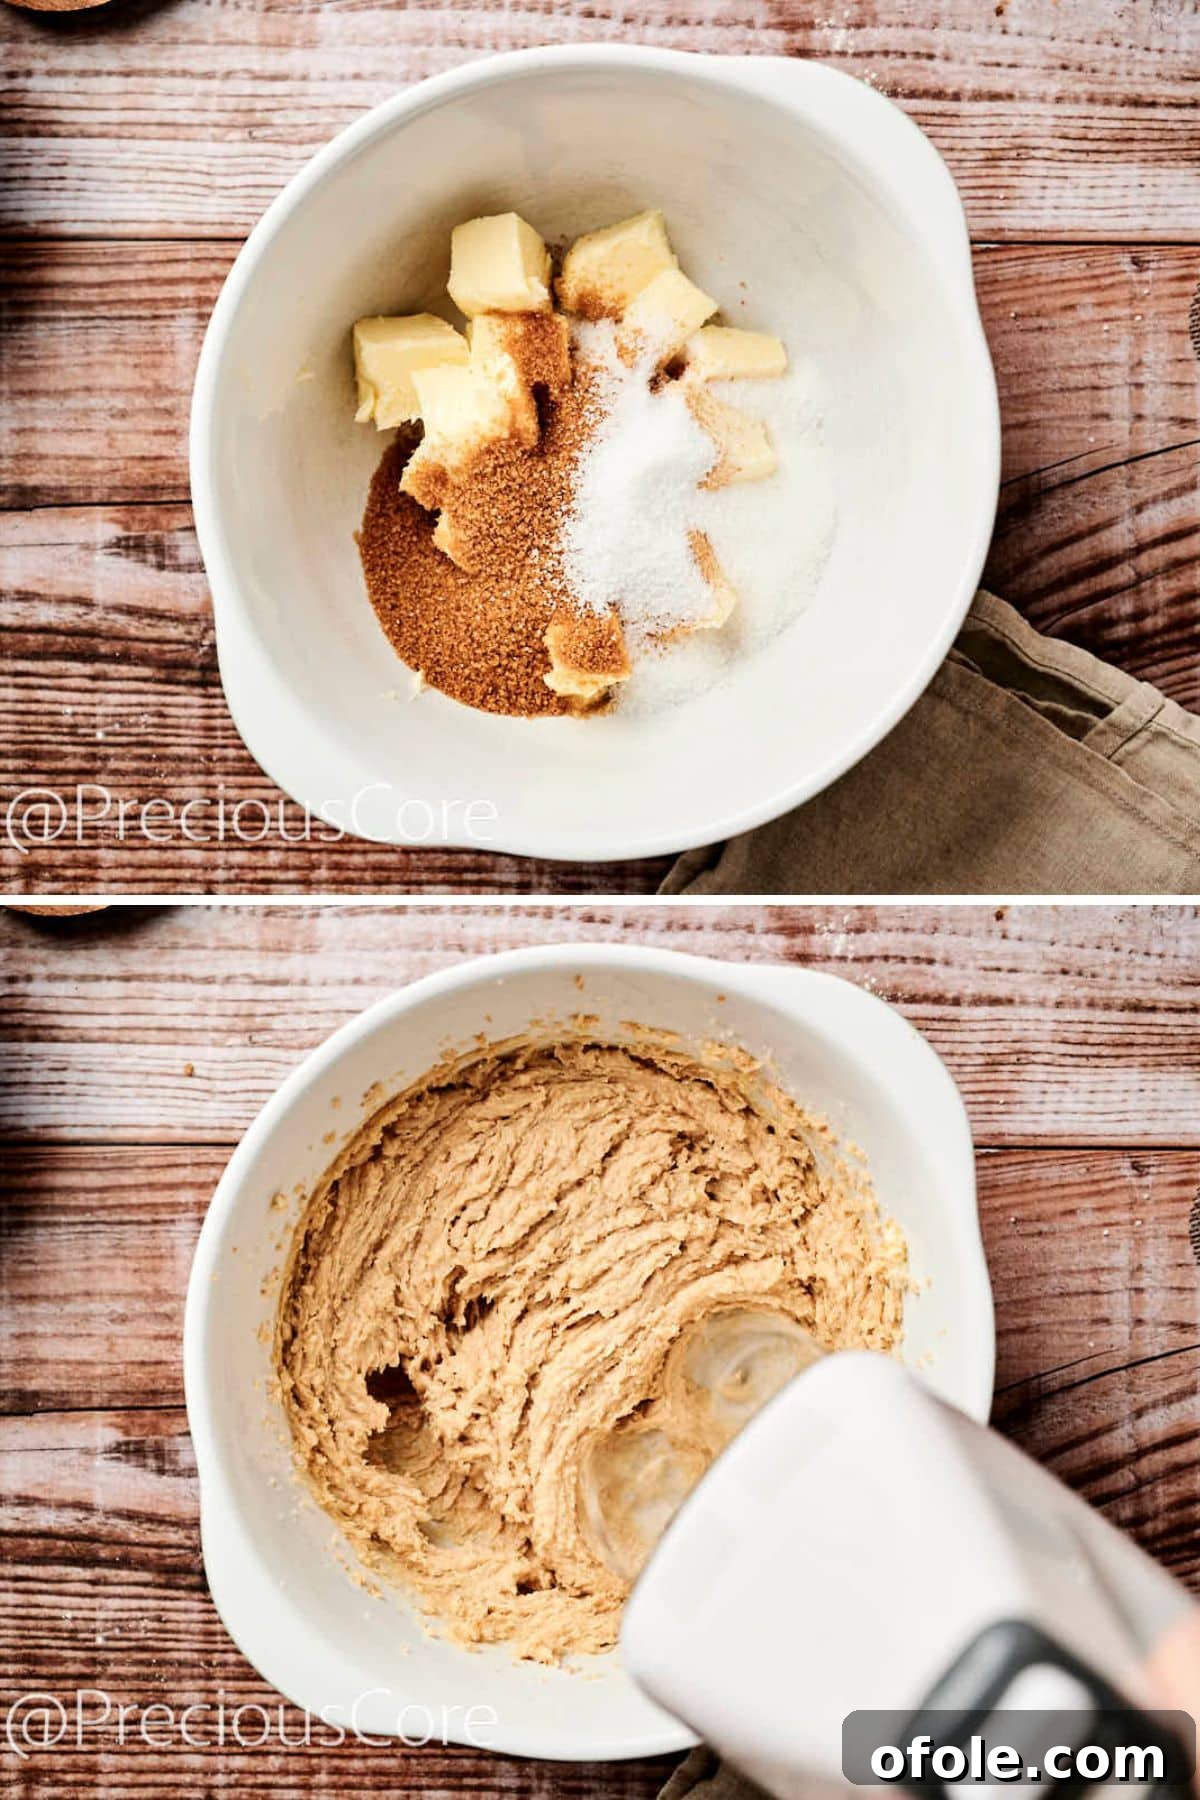
In a separate large bowl, or the bowl of your stand mixer fitted with the paddle attachment, combine the softened salted butter, granulated sugar, light brown sugar, and the 50g of caramel sauce. Beat this mixture on medium-high speed using a hand mixer or stand mixer for 2-3 minutes. Continue mixing until the mixture transforms into a light, pale, and fluffy consistency. This creaming process incorporates air, which is essential for a tender cake.
Step 4: Incorporate Wet Ingredients and Eggs
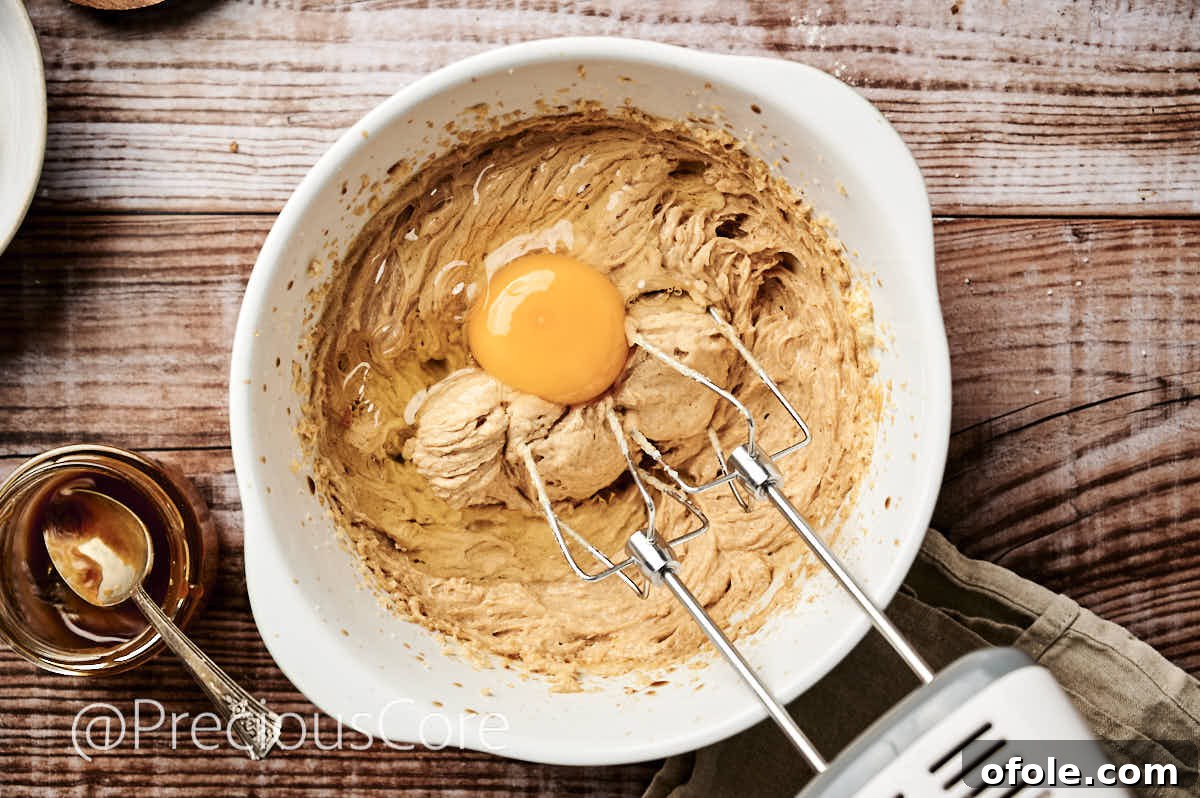
With the mixer still running on low speed, add the room temperature eggs one at a time, allowing each egg to fully incorporate into the mixture before adding the next. This prevents the batter from curdling. After all eggs are added, use a spatula to scrape down the sides of the bowl, ensuring everything is well combined. Finally, mix in the vanilla extract and whole milk until just combined. (For an even richer cake, you can substitute a small amount of heavy cream for the whole milk).
Step 5: Gently Combine Wet and Dry Ingredients
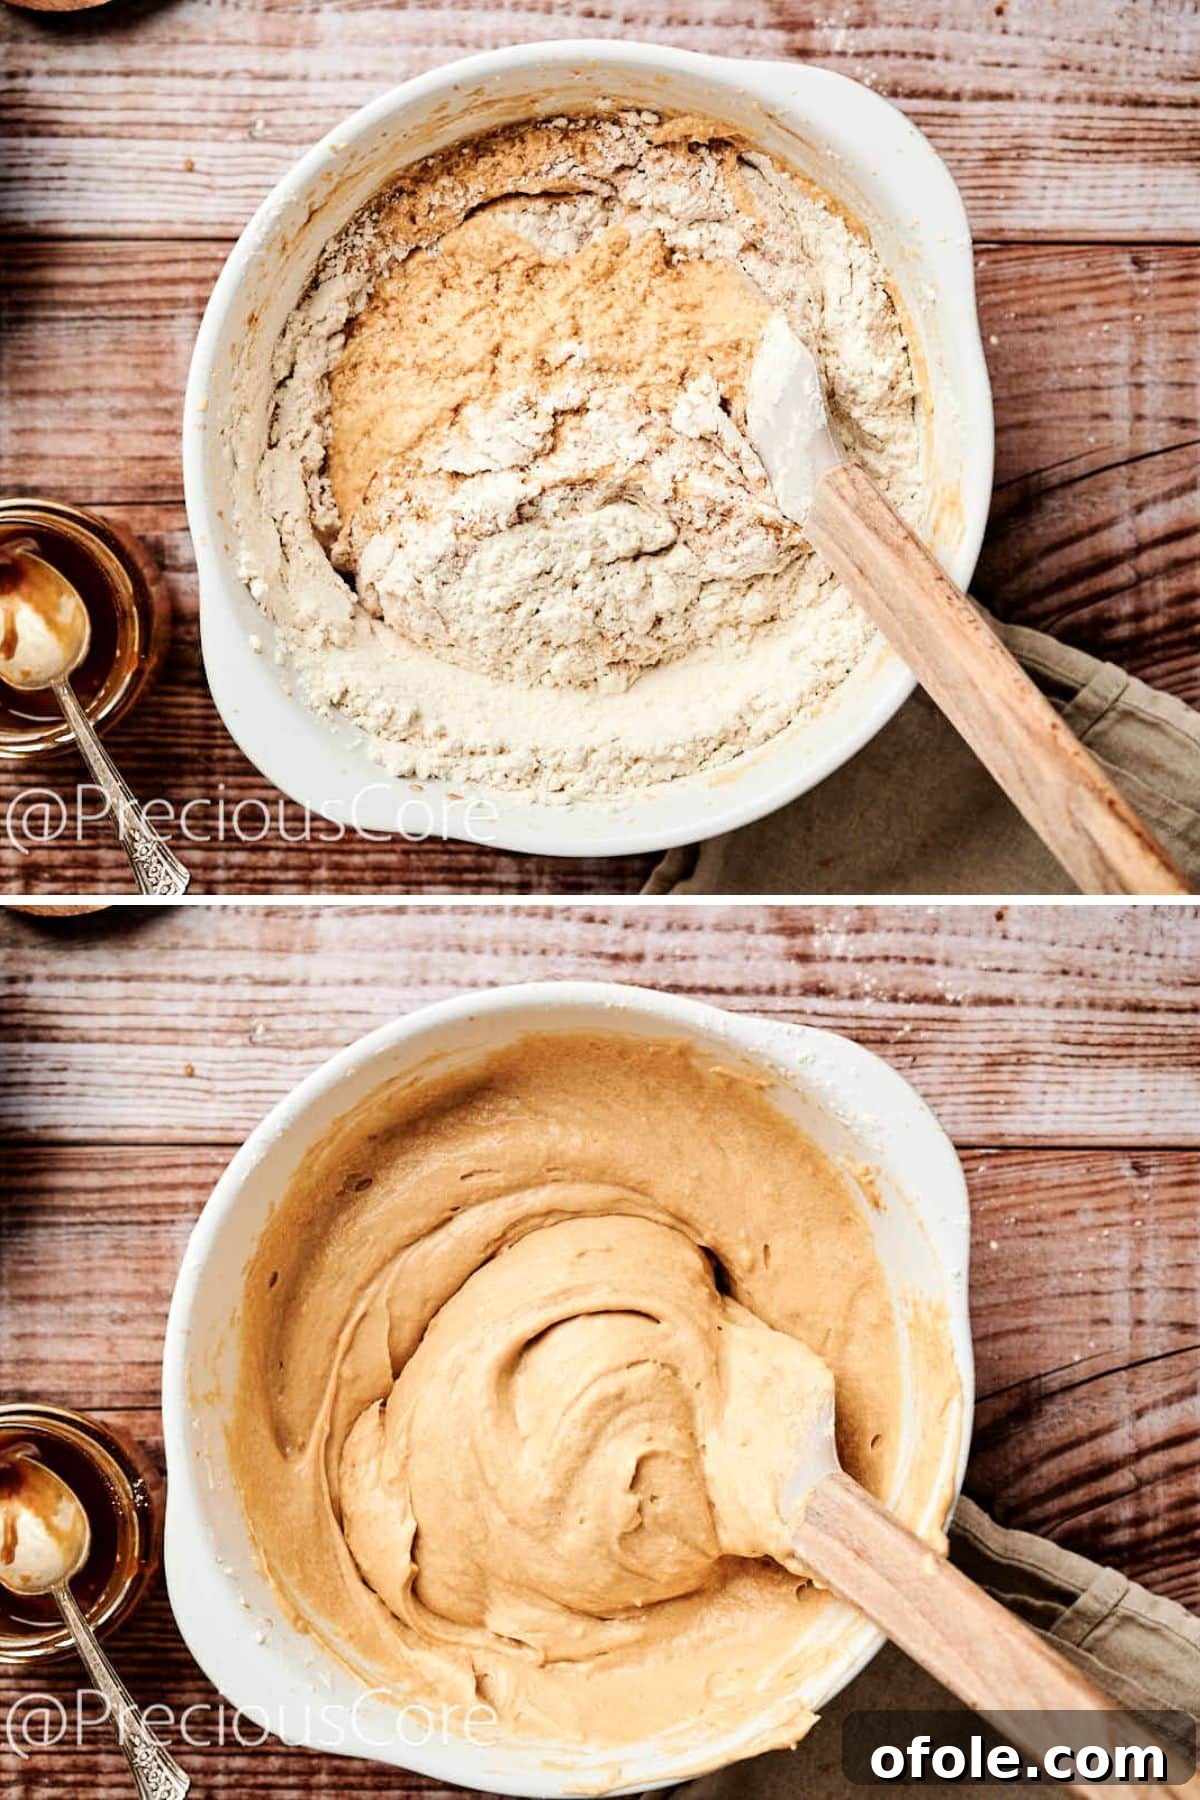
Gradually add the sifted flour mixture to the wet ingredients in two or three additions. Using a spatula, gently fold the dry ingredients into the wet until just combined. It is crucial to avoid overmixing at this stage, as over-developing the gluten can lead to a dense, tough cake. Mix only until no streaks of dry flour remain.
Baking Measurement Precision: For the most accurate and consistent baking results, I strongly recommend measuring your ingredients by weight using a kitchen scale, especially for flour and sugar. Grams offer far greater precision than volume measurements, leading to a consistently perfect cake every time!
Step 6: Bake Until Golden and Risen
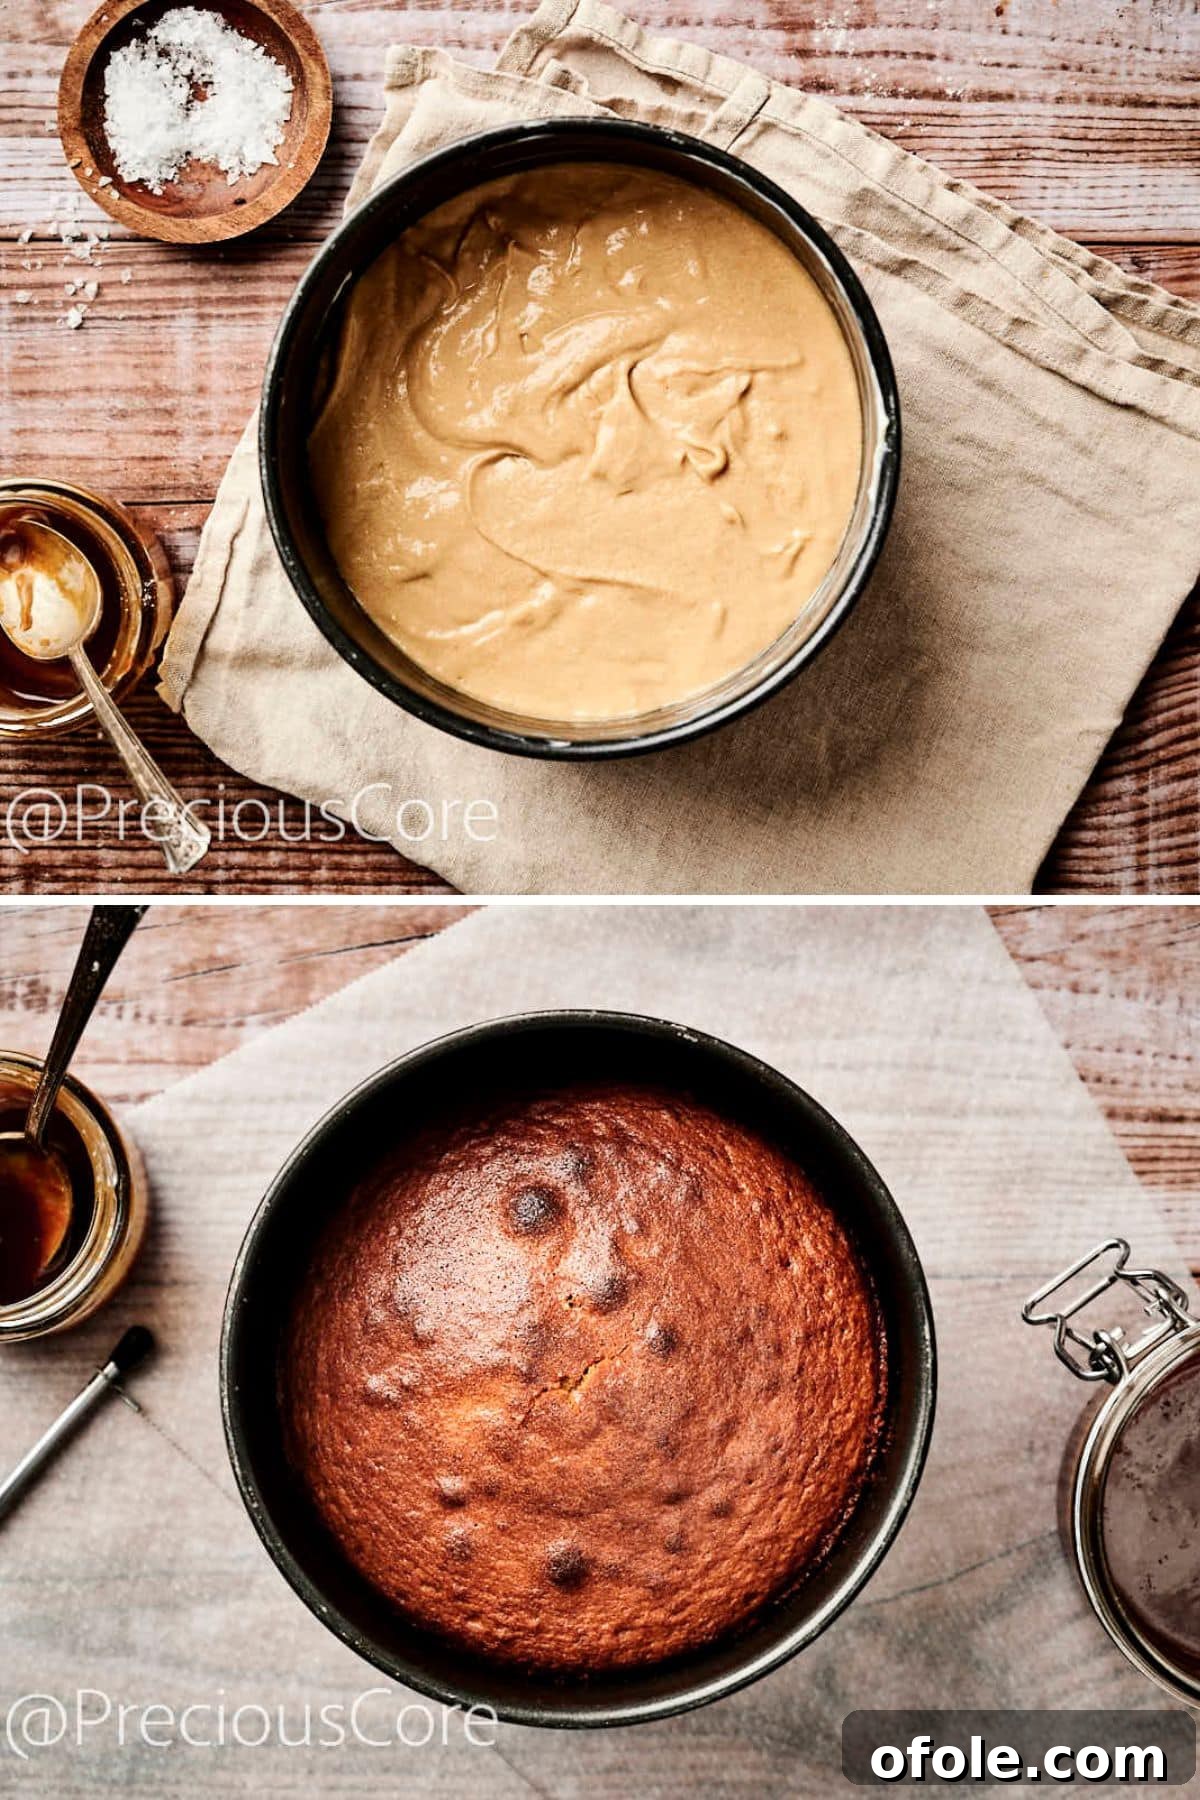
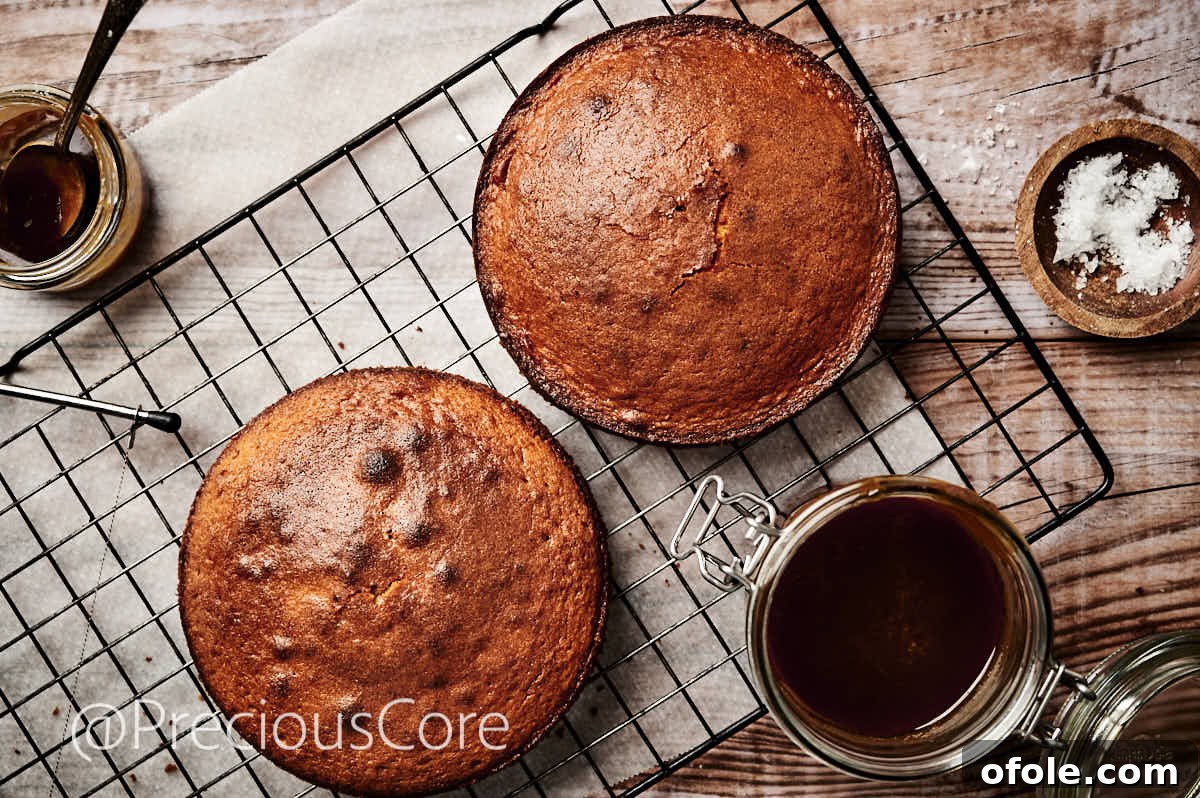
Divide the cake batter evenly between the two prepared 8-inch cake pans. Place the pans into the preheated oven and bake for 20 to 25 minutes. The cakes are ready when they are beautifully golden brown, have risen significantly, and a wooden skewer or toothpick inserted into the center comes out clean or with just a few moist crumbs. Once baked, remove the pans from the oven and let the cakes cool in the pans for about 10 minutes. This allows them to firm up slightly before you attempt to move them. Then, carefully invert them onto a wire rack to cool completely. Ensuring the cakes are entirely cool before frosting is vital to prevent the buttercream from melting.
Step 7: Crafting the Caramel Buttercream
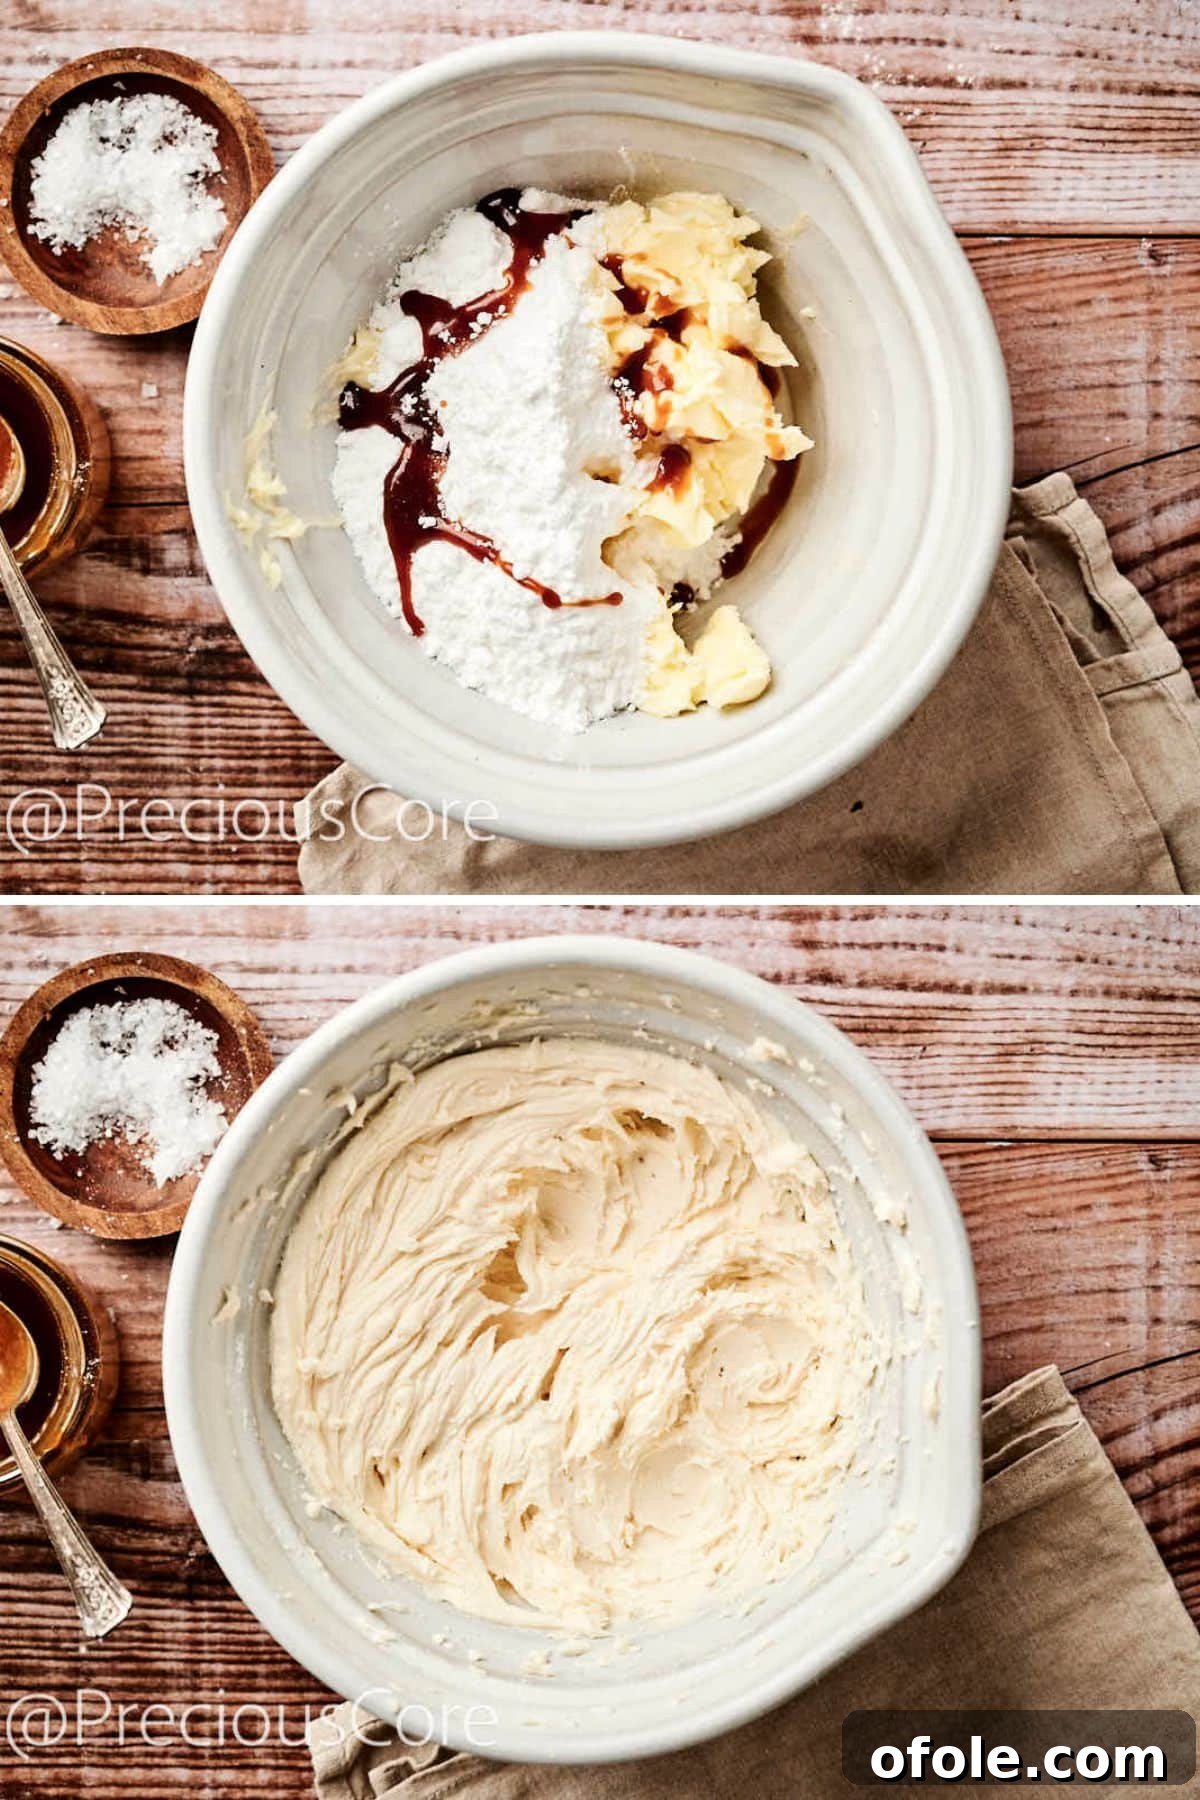
While your cake layers are cooling, prepare the luxurious salted caramel buttercream. In a large mixing bowl, add the softened unsalted butter. Beat it with a hand mixer on medium speed until it is incredibly light and fluffy, almost white in color. Gradually add the icing sugar, about one-third at a time, whisking well after each addition to fully incorporate it and prevent a sugar cloud. Continue beating until the mixture is beautifully light, airy, and smooth. Finally, mix in the remaining ¼ cup of caramel sauce and a small pinch of sea salt, beating until these are fully combined and the buttercream has a consistent caramel flavor and color.
Step 8: Expert Cake Assembly
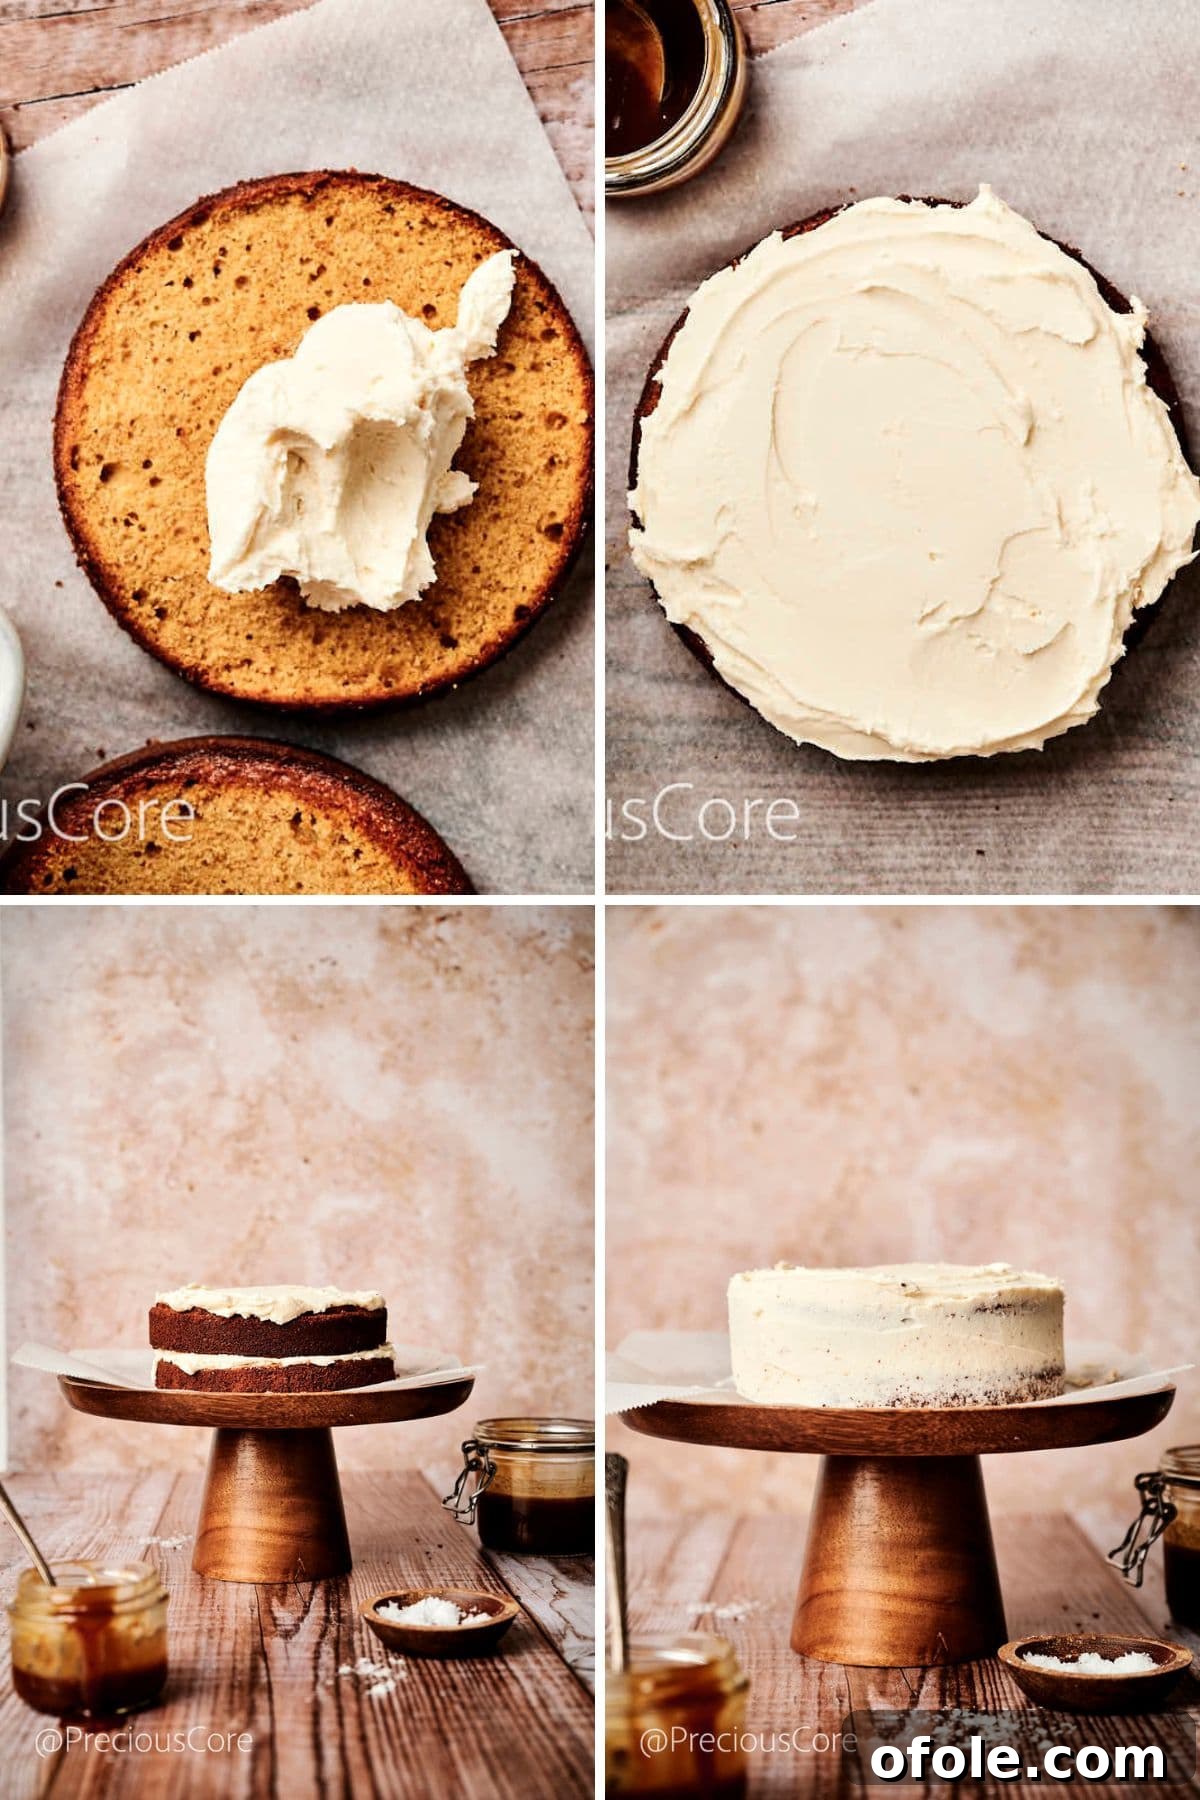
Once your cake layers are completely cool, it’s time to assemble your masterpiece. Place one cake layer onto your chosen cake stand or serving plate. Spread approximately one-third of the prepared salted caramel buttercream evenly over the top, using an offset spatula to create a smooth, level surface. Carefully place the second cake layer on top. Now, spread another third of the remaining buttercream over this second layer. If you desire a “naked” cake look, you can stop here, or for a fully frosted cake, spread the remaining buttercream around the sides of the cake. Use a bench scraper or a long offset spatula to smooth out the sides and top for a professional finish. If you have any buttercream left, you can pipe decorative borders or swirls on the top of the cake.
Step 9: Decorate and Present
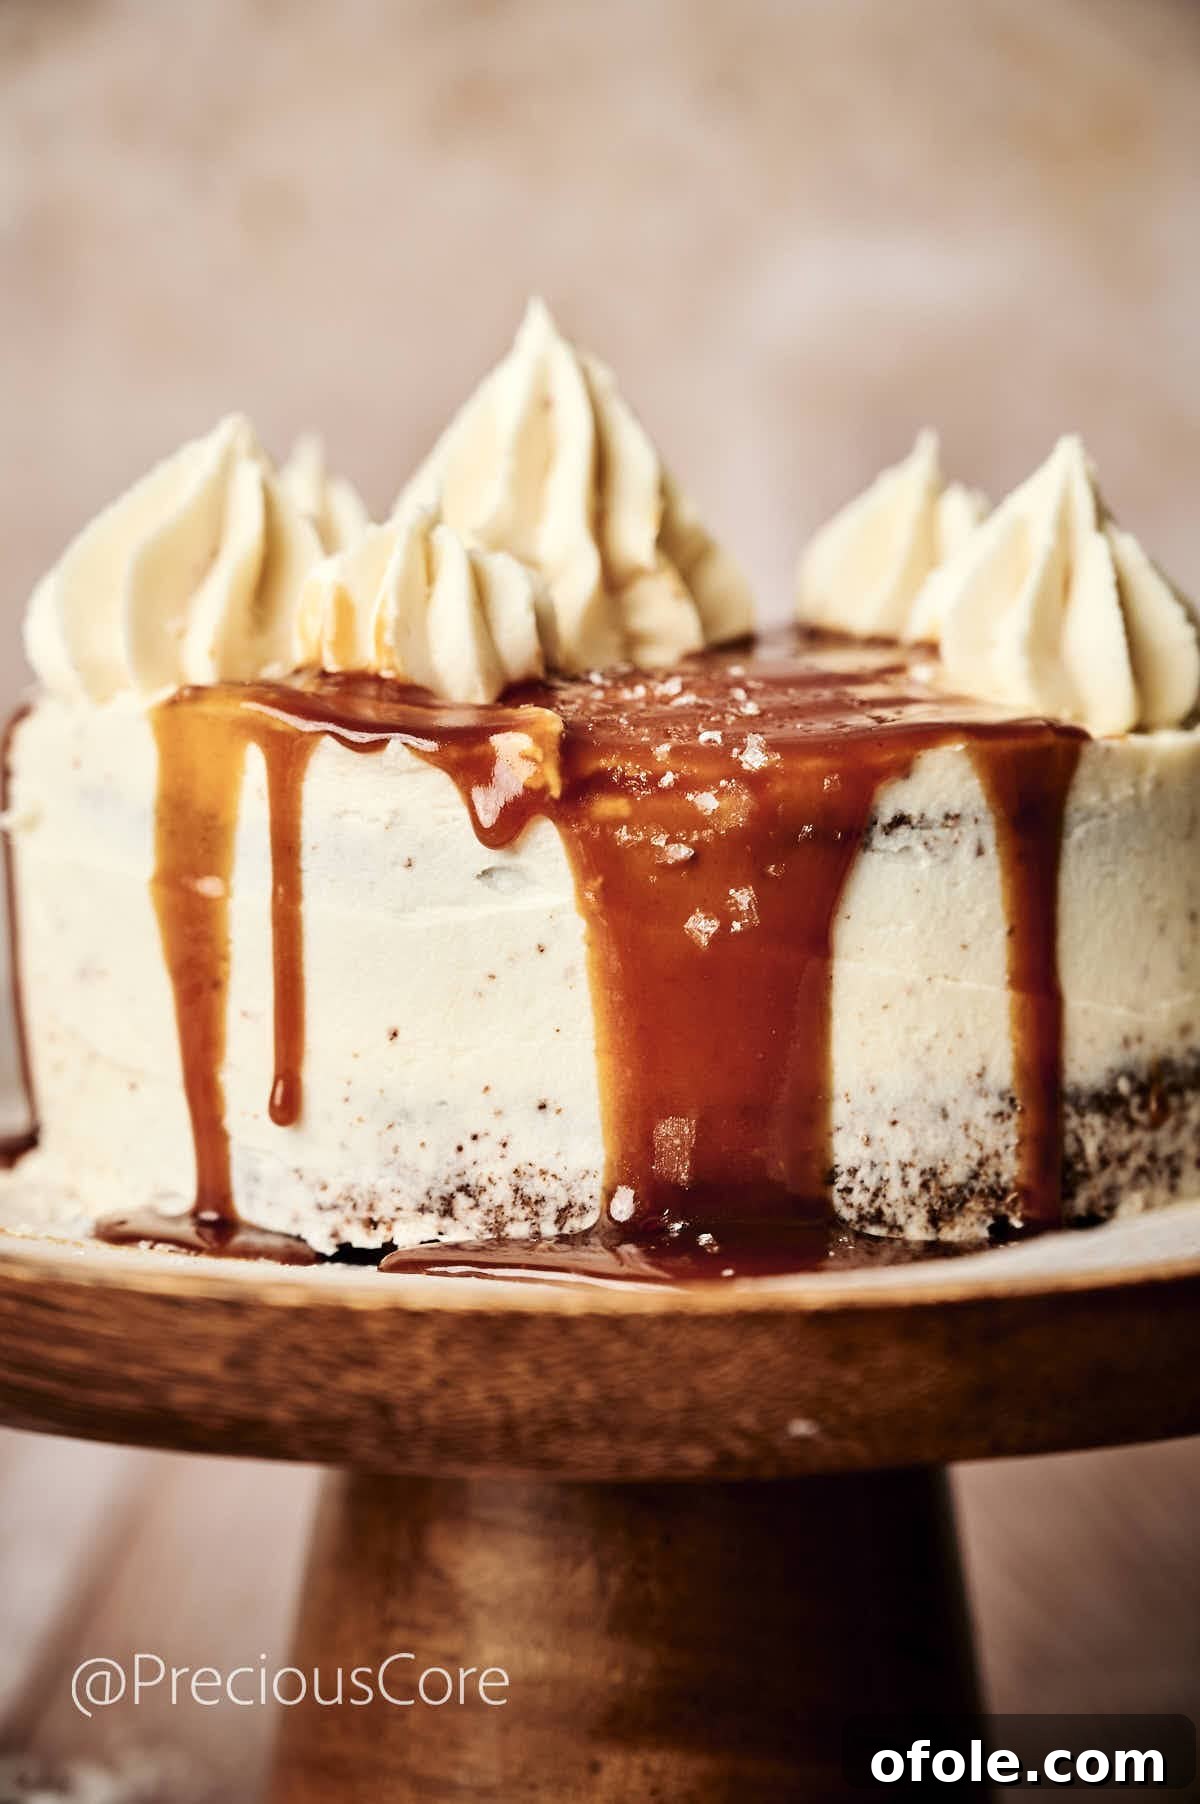
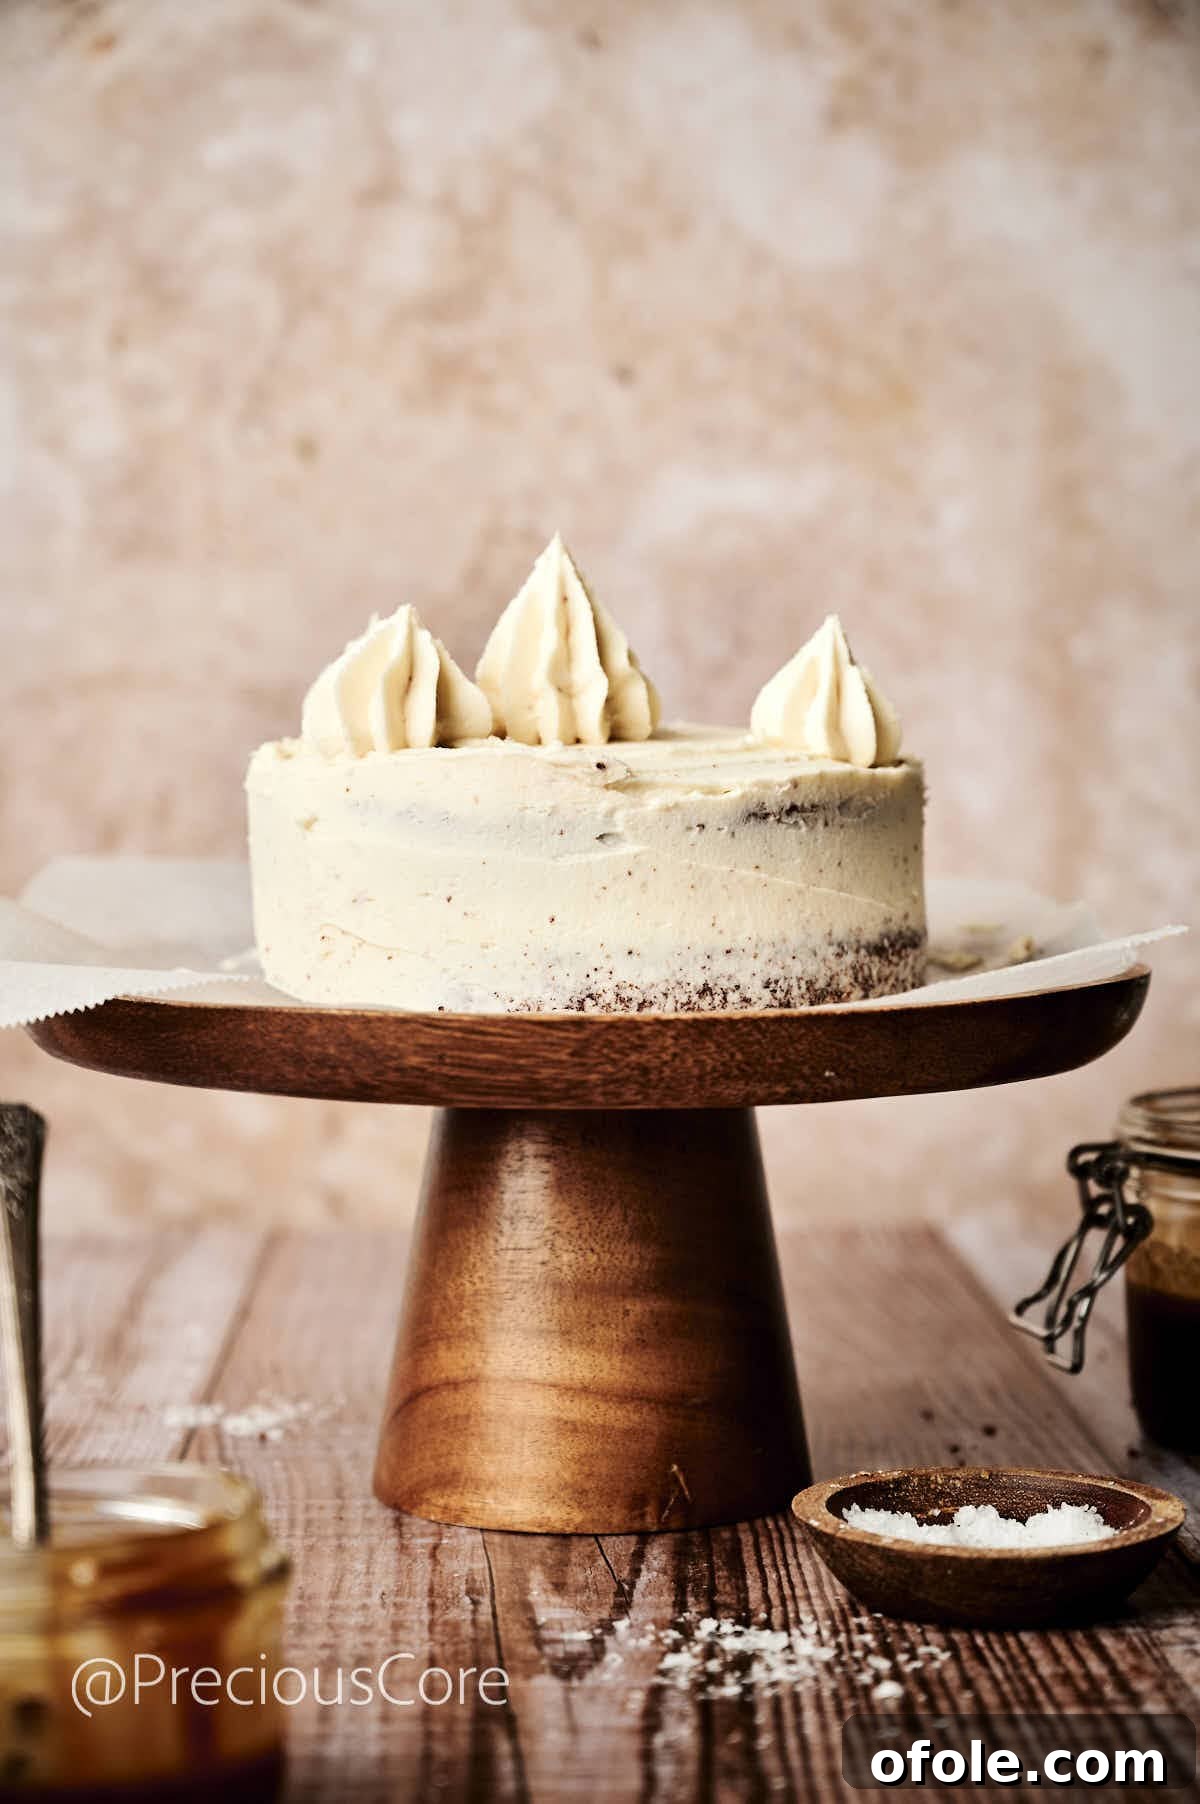
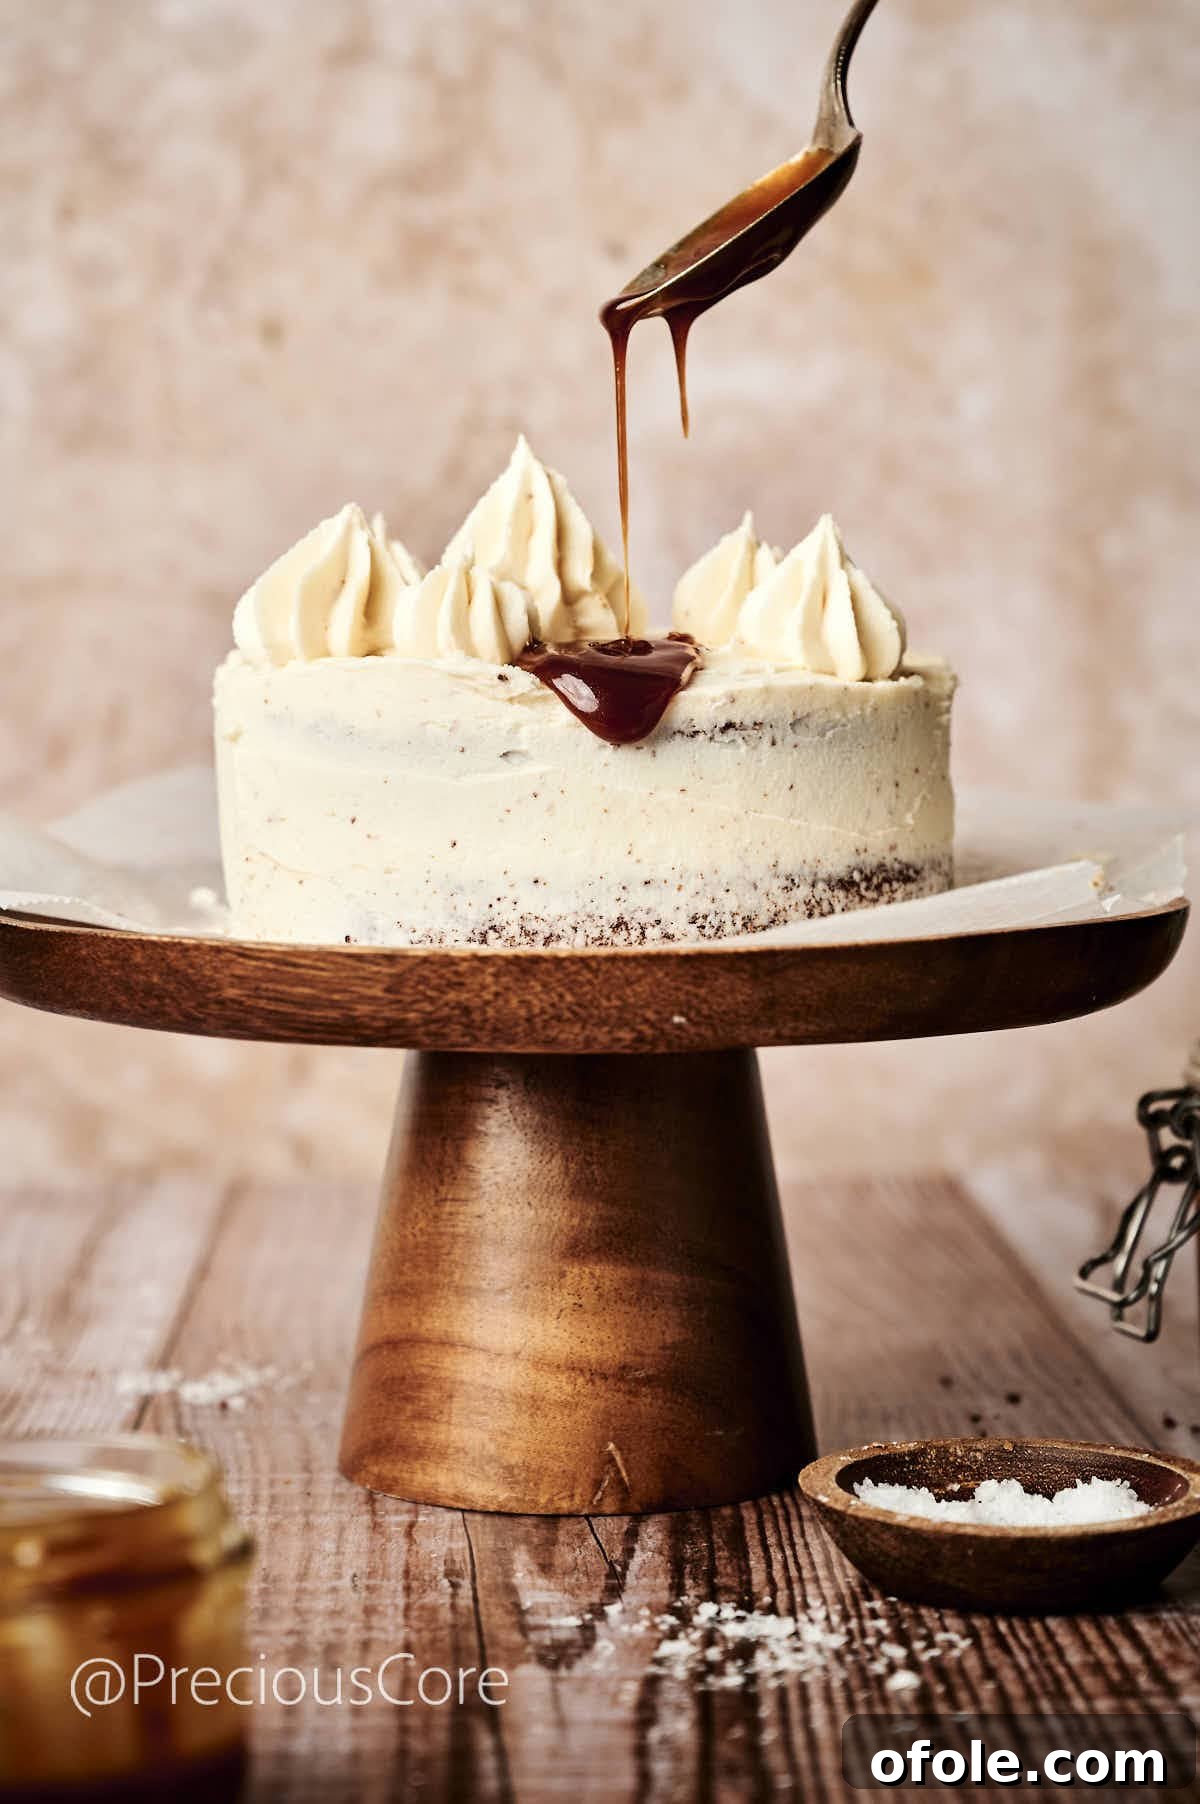
The final touch! For that irresistible salted caramel appeal, generously drizzle additional caramel sauce over the top of the cake, allowing some to drip artfully down the sides. Finish with a delicate sprinkle of sea salt flakes. These not only enhance the visual appeal but also provide a delightful textural crunch and a perfect counterpoint to the sweetness. Your magnificent Salted Caramel Cake is now ready to be proudly presented and savored!
If you adore baking and exploring new cake flavors, you’ll also love my Old Fashioned Carrot Cake, Classic Chocolate Cake, and Pear Almond Cake. Each recipe offers a unique and delightful baking experience!
Pro Tips for a Flawless Salted Caramel Cake
Achieving bakery-quality results at home is entirely possible with a few expert insights:
- Buttercream Consistency Adjustment: If your buttercream appears too thick or stiff, simply add a tablespoon of milk (or cream) at a time, mixing thoroughly, until you achieve your desired smooth, spreadable consistency. Conversely, if it becomes too soft, place the bowl in the refrigerator for 5-10 minutes to allow it to firm up slightly before continuing to beat it or spread it.
- Level Cake Layers for Stability: For a polished, professional appearance and a stable stacked cake, use a long serrated knife to carefully level off any slight domes that may have formed on your cake layers after baking. This creates flat surfaces that stack neatly.
- Elegant Caramel Drizzles: To achieve beautiful, controlled caramel drizzles, use a piping bag with a small round tip, or simply a spoon, to artfully drizzle warm (but not hot) caramel sauce over the frosted cake. Swirling a little extra caramel directly into the buttercream itself also adds an extra layer of flavor and a lovely marbled texture.
- Peak Freshness for Serving: This cake is truly at its most delicious and texturally perfect when enjoyed on the day it’s baked or within 24 hours. For optimal flavor and moisture retention, store any prepared cake in an airtight container if you plan to make it ahead of time.
- Cool Cakes are Crucial: Patience is a virtue in baking, especially when it comes to frosting. Ensure your cake layers are completely and utterly cool before attempting to apply any buttercream. Applying frosting to warm cakes will cause the buttercream to melt and slide, compromising both the structure and presentation of your beautiful creation.
- Avoid Overmixing the Batter: When combining your wet and dry ingredients, mix only until just combined. Overmixing develops the gluten in the flour too much, which can result in a tough, dense cake rather than the desired light and fluffy sponge.
- Room Temperature Ingredients: Always ensure your butter, eggs, and milk are at room temperature. This allows them to emulsify properly, creating a smooth batter that traps air efficiently, leading to a lighter, more even texture in your final cake.
- Test for Doneness: To confirm your cakes are perfectly baked, insert a toothpick or thin wooden skewer into the very center of a cake. If it comes out clean or with just a few moist crumbs attached, your cake is done. If it comes out wet with batter, bake for a few more minutes. Avoid overbaking, as this is the quickest way to a dry cake.
Serving Suggestions for Your Caramel Cake
This exquisite Salted Caramel Cake is a star on its own, but it also pairs beautifully with a variety of beverages and accompaniments to enhance the dessert experience:
- Iced Coffee: The cool, slightly bitter notes of iced coffee offer a refreshing contrast to the cake’s richness.
- Vanilla Ice Cream: A scoop of classic vanilla ice cream, slowly melting alongside a warm slice of cake, creates a truly indulgent combination.
- Pineapple Lemonade: For a lighter, zesty pairing, the tropical tang of pineapple lemonade can cut through the sweetness.
- Coconut Hot Chocolate: In colder weather, a mug of creamy coconut hot chocolate provides a warm, comforting complement.
- Aromatic Tea: A simple cup of black tea or a spiced chai can beautifully balance the cake’s sweetness.
- Espresso Shot: For coffee lovers, a strong espresso shot can be a delightful accompaniment, allowing the coffee’s intensity to play off the caramel.
Properly Storing Leftover Salted Caramel Cake
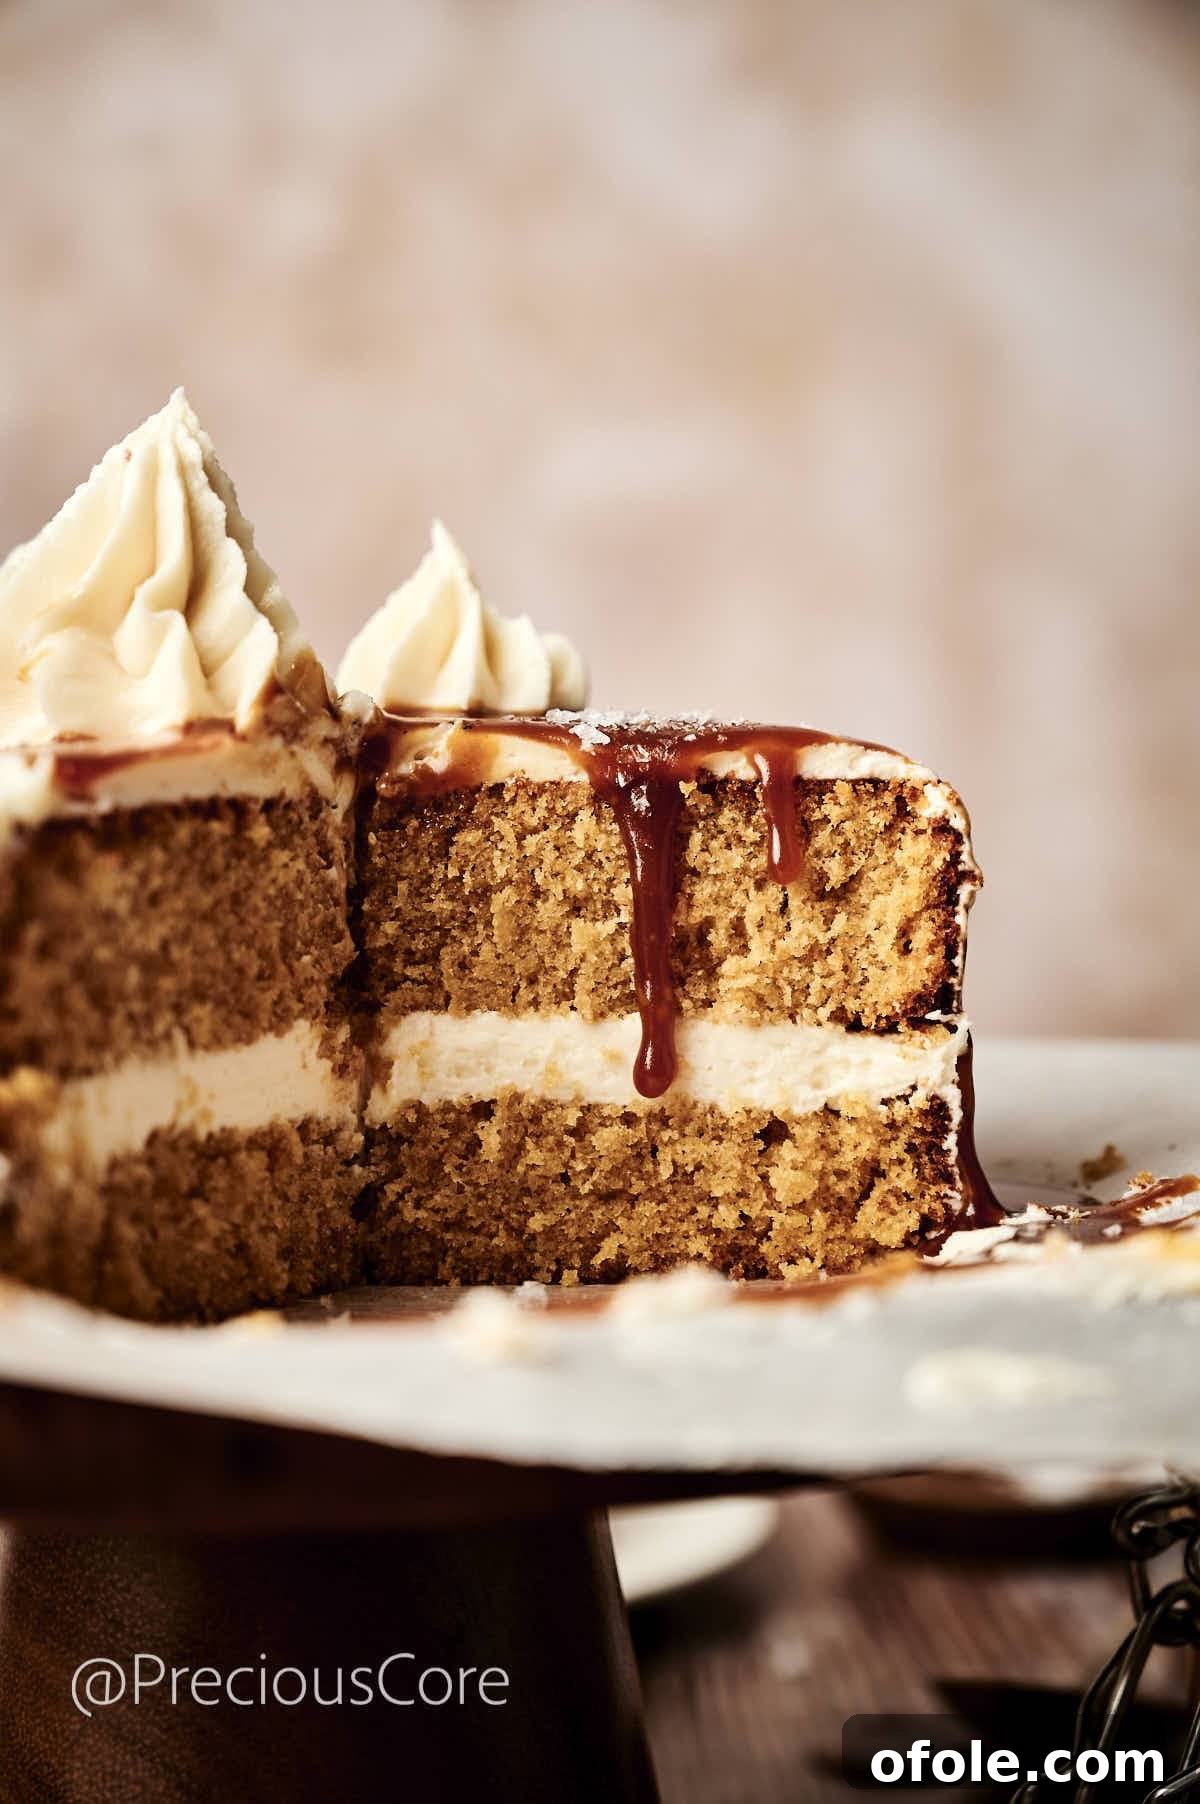
To ensure your delicious Salted Caramel Cake remains fresh and moist, proper storage is key. If you have any leftovers, place them in an airtight container. This prevents the cake from drying out and helps the frosting retain its texture. Store the container in the refrigerator. When you’re ready to enjoy another slice, take it out of the refrigerator and allow it to come to room temperature for about 30 minutes to an hour. This will soften the buttercream and enhance the cake’s texture and flavor. For the best taste and quality, consume the cake within 2 to 3 days.
More Irresistible Cake Recipes to Explore
If your passion for baking delicious cakes knows no bounds, you’ll be thrilled to discover some of our other highly-rated and popular cake recipes below. Each one is a guaranteed crowd-pleaser!
Pumpkin Roll Cake
Plain Cake Recipe
Classic Chocolate Cake
MANGO UPSIDE DOWN CAKE
Southern Lemon Pound Cake Recipe
Plantain Cake
If you make this irresistible Salted Caramel Cake recipe, please remember to leave a star rating below. Your feedback and rating not only help others discover and enjoy this wonderful dessert, but I also genuinely love hearing from you! Thank you!
Salted Caramel Cake Recipe
20
30
30
1 20
10
Rate
Print Recipe
Ingredients
- 200 g self-rising flour
- 1 tsp salt
- 200 g salted butter softened plus extra for the cake pans
- 75 g granulated sugar
- 75 g light brown sugar
- 50 g salted caramel sauce store-bought or homemade
- 4 eggs at room temperature
- ¾ tsp vanilla extract
- 1 tbsp whole milk
Buttercream:
- 200 g unsalted butter cut into cubes and softened
- 300 g icing sugar
- ¼ cup caramel sauce
- Sea salt flakes and more caramel for sprinkling and decorating
Instructions
-
Preheat the oven to 350℉ (180°C). Grease two 8-inch cake pans and line the bases with parchment paper.
-
Use a fine mesh to sieve the flour and salt together.200 g self-rising flour, 1 tsp salt
-
In a large bowl, combine the softened butter, granulated sugar, light brown sugar, and 50g of caramel sauce. Beat the mixture using an electric whisk for 2-3 minutes until light and fluffy.200 g salted butter softened, 75 g granulated sugar, 75 g light brown sugar, 50 g salted caramel sauce
-
Add the eggs one at a time, mixing well after each addition. Scrape down the sides of the bowl as needed, then mix in the vanilla extract and whole milk until just combined.4 eggs at room temperature, ¾ tsp vanilla extract, 1 tbsp whole milk
-
Gently fold in the flour mixture using a spatula – ensure everything is thoroughly combined, but avoid overmixing.
-
Evenly distribute the batter between the 2 prepared cake pans. Bake for 20 to 25 minutes, or until the cakes are golden, risen, and a skewer placed in the center comes out clean. Let the cakes cool in the pans for 10 minutes, then transfer to wire racks to allow them to cool entirely.
-
For the buttercream, add the softened butter to a large mixing bowl and beat using a hand mixer until very soft and pale. Slowly add the icing sugar, one-third at a time, whisking well after each addition until the mixture is light and fluffy. Mix in the remaining ¼ cup of caramel sauce and a pinch of sea salt, and beat until fully combined and smooth.200 g unsalted butter, 300 g icing sugar, ¼ cup caramel sauce
-
To assemble the cake, place one cooled sponge on a cake stand and spread one-third of the buttercream on top, leveling with an offset spatula. Place the second sponge on top, then spread another third of the remaining buttercream over it. Spread any desired buttercream on the sides, then use a bench scraper to smooth it out. Pipe any remaining buttercream on the top of the cake as decoration.
-
Decorate with a bit more caramel drizzle and a sprinkle of sea salt flakes just before serving.Sea salt flakes and more caramel for sprinkling and decorating
Notes
- If you do not have self-rising flour, use the same amount of all-purpose flour and add 2 teaspoons of baking powder and ½ teaspoon of salt.
- Make sure your butter, eggs, and milk are all at room temperature for the best results. This creates a more velvety batter and enhances the cake’s overall texture.
- When incorporating the dry ingredients into the wet mixture, be careful not to overmix, as this can lead to a dense cake that loses its delightful light and fluffy texture.
- After everything has come together, grab a spatula and give it a final gentle fold to ensure all the ingredients are perfectly combined, especially scraping the bottom of the mixing bowl.
- Insert a toothpick or skewer into the center of the cakes to see if they are fully baked. If it emerges clean or with just a few crumbs, your cakes are perfectly done. Steer clear of overbaking to ensure your cakes remain moist.
- At some point during whipping, the buttercream might give off a curdled appearance. Don’t worry! Continue to whip until the mixture reaches a perfectly smooth consistency.
- Sprinkle some high-quality sea salt flakes on top of the cake to take the flavor contrast between sweet and salty to the next level. Do not go overboard—a small pinch will elevate the sweetness of the caramel without overpowering it.
Nutrition Information (per serving)
Additional Info
Tried this recipe?
Mention @preciouscore or tag #PreciousCore!